


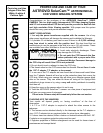
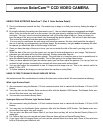

ASTROVID SolarCam™ CCD VIDEO CAMERA
DC IN Plug: This is the 12 pin hi-rose connector on the upper right of the camera. This is where the DC
power plug goes into the camera.
Mini Dip Switch Panel: Center left of camera. Rectangular box containing six dip switches. All six dip
switches should be in the up position for proper operation of the camera. You do not need to change the
position of these dip switches.
GAIN Dial: Dial next to mini dip panel labeled GAIN A, F, M. This three position dial allows you to
change the gain settings. Gains relates to the strength of the video signal. An increase in gain also
increases the noise in the background of the image. The goal of the gain control is to manually adjust it to
keep it as low as possible. The adjustment of the gain in done in conjunction with the adjustment of the
shutter speeds. It is preferred to use as high a shutter speed as possible so as to overcome some of the
atmospheric seeing or turbulence of the atmosphere.
The three gain settings are A – Auto Gain varies from 0 dB to 20 dB depending on the light conditions.
F—Fixed Gain—with the gain set at 13 dB
M—Manual Gain The gain is manually adjusted from 0-20 db. You do this by placing the dial in the M
position with the mini screwdriver. Once this is done you will use the yellow pot labeled M.GAIN (manual
gain) in the lower right corner of the camera to manually adjust the gain. Rotating clockwise will increase
the gain. Rotating counterclockwise will decrease the gain.
75 OHM On/OFF Switch: Vertical Switch on bottom left hand side of camera labeled 75 ohm ON/OFF.
Should be left in the OFF position for most imaging. You may turn
it on if you are passing through a monitor and going to a recording
device or if you are running very long distances of video cable. You
can experiment turning the switch on and off once you have your
image on the screen.
Trigger Switch: This is the vertical switch at the bottom labeled
TRIG + - Used for external triggering of the camera. Not generally used for Solar Imaging. Leave in the -
position.
VIDEO BNC Connector: Round Female Video BNC Connector labeled VIDEO. This is the EIA
monochrome video output for the camera. It goes to any TV, Monitor, VCR, Recorder, Frame Grabber etc.
Manual Gain: Yellow Dial labeled M.GAIN. Used when making manual gain adjustments. Use after
setting the gain dial to M for manual. See above please.
USING YOUR ASTROVID SolarCam™ ( Part 1) :
Because solar imaging is a little more involved than other planetary and lunar imaging. It is
recommend that once you achieve your best images, you make note of your setup. i.e. camera
settings , gain, shutter, gamma, filters used etc.
1. Make all of your camera connections and plug in the power.
2. Mae sure you have you telescope setup with proper solar protection for both your eyes an the
SolarCam™.
3. Attach the camera to the telescope via the 1.25 inch adapter.
4. Adjust the shutter speed to the position labeled 0. This is the 1/60 second shutter speed.
5. Put the Gain A,F,M button to the manual position. Rotate the M. Gain button clockwise to the full 20dB
position
VIEW AND RECORD YOUR
IMAGES AT THE SAME TIME!
SHOW THE WONDERS OF
THE SUN TO LARGE GROUPS
AT ONE TIME!
©AVA ASTRO CORP 2001