


12
English
13
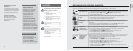
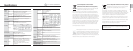
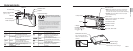
Icons Set options
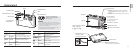
The icons displayed may change according to the selected mode or options you set. You can set options by pressing [E], [MENU/OK], or [Fn] and using the navigation buttons ([e], [t], [w], [r]).
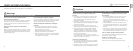
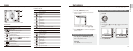
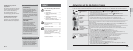
B. Icons on the left
Icon Description
Face detection
Photo style
Colour
Flash
Timer
Auto focus
Contrast
Sharpness
Voice Mute
Saturation
Optical Image Stabilisation (OIS)
C. Icons on the right
Icon Description
Photo resolution
Video resolution
Photo quality
Frame rate
Metering option
Burst type
ISO speed
White balance
Exposure
Long time shutter
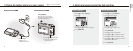
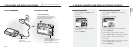
A. Information
Icon Description
Selected shooting mode
Zoom ratio
Available number of photos
Available recording time
Internal memory
Memory card inserted
: Fully charged : Partially charged
: Charging needed
Voice memo
Auto focus frame
Camera shake
Current date and time
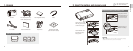
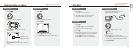
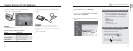
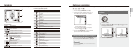
1
Press [E], [MENU/OK], or [Fn].
2
Use the navigation buttons to scroll to an
option or menu.
To move left or right, press [e] or [t].
To move up or down, press [w] or [r].
▪
▪
SIZE
3
Press [MENU/OK] to confirm the highlighted
option or menu.
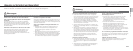
1
Select 1.
2
Press [Fn].
3
Press [w] or [r] and then [e] or [t] to set the white
balance.
WHITE BALANCE
Daylight
4
Press [MENU/OK].
E.g. Select a white balance option in the P mode
A
C
B
Press [E], [Fn], or [MENU/OK] again to go
back to the previous menu.
Note
Press [Shutter] to return to Shooting mode.
Going back to the previous menu