


31_English Spanish_31
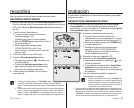
Date/Time Set
Move
OK
Set
120
MIN
2007 01 01
12 : 00 AM
Settings
MENU
Exit
OK
Settings
Move
OK
Select
MENU
Exit
120
MIN
Video
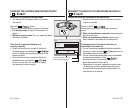
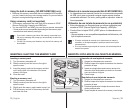
Ajuste de la fecha y hora
Fije la fecha y hora actuales de forma que al realizar la grabación la
fecha y hora aparezcan correctamente. El siguiente procedimiento
también puede utilizarse para corregir la fecha y hora ya defi nidos.
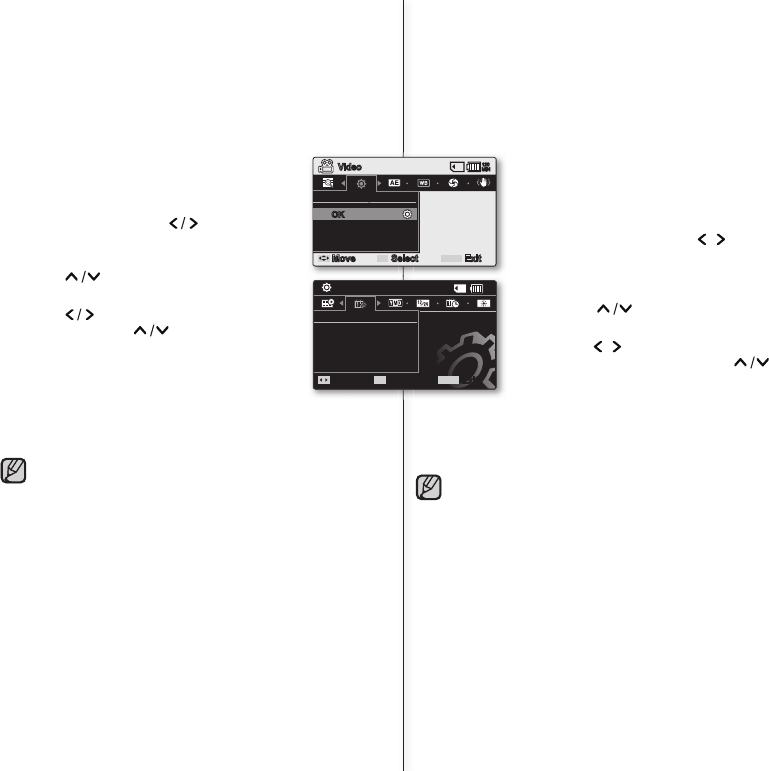
1.
Defi na el modo “Settings”.
Aparece la pantalla del menú de ajustes.
Consulte “Cómo fi jar el modo de ajustes”.
➥
página 30.
2.
Presione el botón de Control ( / ) para
seleccionar “Date/Time Set” y, a continuación,
presione el botón OK.
3.
Establezca el valor que desee moviendo el botón
de Control ( ).
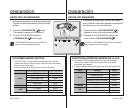
4.
Desplácese a la opción siguiente moviendo el botón
de Control
( / )
y, a continuación, ajuste los
valores moviendo el botón de Control
( )
.
Los elementos aparecen en el orden del formato
de fecha.
Por defecto, aparece en el orden de año, mes,
día, hora, minuto y AM/PM
5.
Después de ajustar la última opción, presione el botón OK
para fi nalizar el ajuste.
Presione el botón MENU para salir del menú.
•
•
•
•
•
Puede fi jar el año hasta 2037.
La fecha y la hora se graban automáticamente en una zona espe-
cial del soporte de almacenamiento.
La pila de botón mantiene la función de reloj y el contenido
predefi nido de la memoria: incluso aunque se quite la batería
o el adaptador de alimentación de CA. La pila de botón de la
videocámara con memoria dura aproximadamente seis meses en
condiciones normales de funcionamiento.
Cuando se debilite o se agote la pila de botón, el indicador de
fecha y hora mostrará “2007/01/01 12:00AM “ cuando tenga
activada la visualización de fecha y hora.
➥
página 20.
•
•
•
Activación y desactivación de la visualización de la fecha y hora
Para mostrar o no la fecha y hora, acceda al menú y cambie el
modo de fecha y hora.
➥
página 64
•
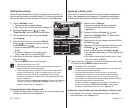
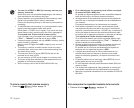
Setting date and time
Set the current date and time so that the date and time at which you
make a recording can be recorded correctly. The following procedure
can also be used to correct the date and time you have already set.
1. Set the "Settings" mode.
The settings menu screen appears.
See "How to set the Settings mode".
➥
page 30
2. Press the Control button ( ) to select
"Date/Time Set" and then press the OK button.
3. Set the desired value by moving the Control
button ( ).
4. Move to the next item by moving the Control
button ( ) , and then set values by moving
the Control button ( ).
Items are displayed in the order of the date
format.
By default, it appears in the order of year,
month, date, hour, minute and AM/PM.
5. After setting the last item, press the OK button to
fi nish the setting.
Press the MENU button to exit the menu.
•
•
•
•
•
You can set the year up to 2037.
After setting, the date and time are automatically recorded on a
special data area of the storage media.
The button type battery maintains the clock function and preset
contents of the memory : even if the battery pack or AC power
adapter is removed. The button type battery for the memory
camcorder lasts about 6 months under normal operation from the
time of installation.
When the button type battery becomes weak or dead, the date/time
indicator will display "2007/01/01 12:00AM " when you turn the
date and time display on.
➥
page 20
•
•
•
Turning the date and time display on/off
To switch the date and time display on or off, access the menu and
change the date/time mode.
➥
page 64
•