


05
ENG
installation
In this chapter, we will provide you with general
instructions for product installation and preferred places
as well as considerations before installation. Now, let’s
install the camera and connect necessary cables.)
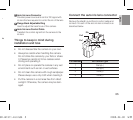
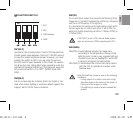
Package
You must check that all the components and accessories
listed below are included in the product package.
Camera
Camera Holder
(Mount Adaptor) screw x2
User’s guide Auto Iris Lens Connector
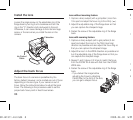
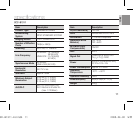
Parts & Description
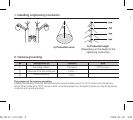
1
Mount Adaptor Holes
Used to fix the mount adaptor with a screw if you
want to mount the camera on the bracket.
2
Auto Iris Lens (Optional)
A lens to be installed on the camera
- If the camera gets dirty on the surface of the lens,
apply ethanol to the provided tissue or a dry cloth
and wipe it out.
2
Auto Iris
Lens
3
Auto Iris Lens Connector
Provides power source and control/ DC signal with
iris lens that are required to control the iris of the lens
4
Flange Back Adjustable Ring
Used to adjust the back focus of the camera.
5
Auto Iris Lens Control Cable
Transfers the control signal from the camera to the
iris lens.
Things to keep in mind during
installation and Use
Do not disassemble the camera on your own.
Always be careful when handling the camera.
Do not strike the camera by your fists or shake
it. Please be careful not to be careless when
storing and operating it.
Do not place or operate the camera in any wet
environment such as rain or wet surfaces.
Do not clean the camera with rough sandpaper.
Please always use a dry cloth when cleaning it.
Put the camera in a cool area free from direct
sunlight. Otherwise, the camera may be dam-
aged.
•
•
•
•
•
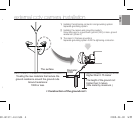
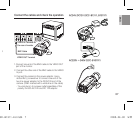
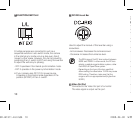
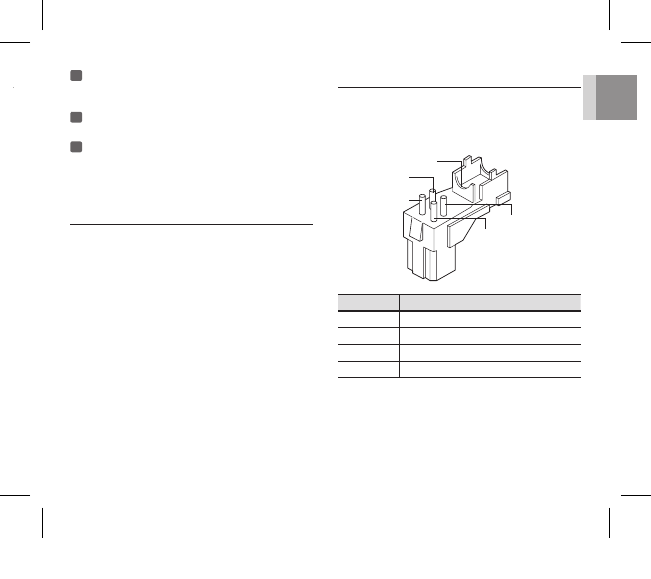
Connect the auto iris lens connector
Remove the sheath round the iris control cable and
connect it to each of the auto iris lens connector as
described below.
Pin Number DC Control Type
1 Damp(–)
2 Damp(+)
3 Drive(+)
4 Drive(–)
Rib
Pin3
Pin1
Pin2
Pin4
00753D-B1311-EU.indb 5 2008-04-30 오후 6:10:22