NOTE: Step 1 is necessary only if the EFAV-II assembly has been previously completed.
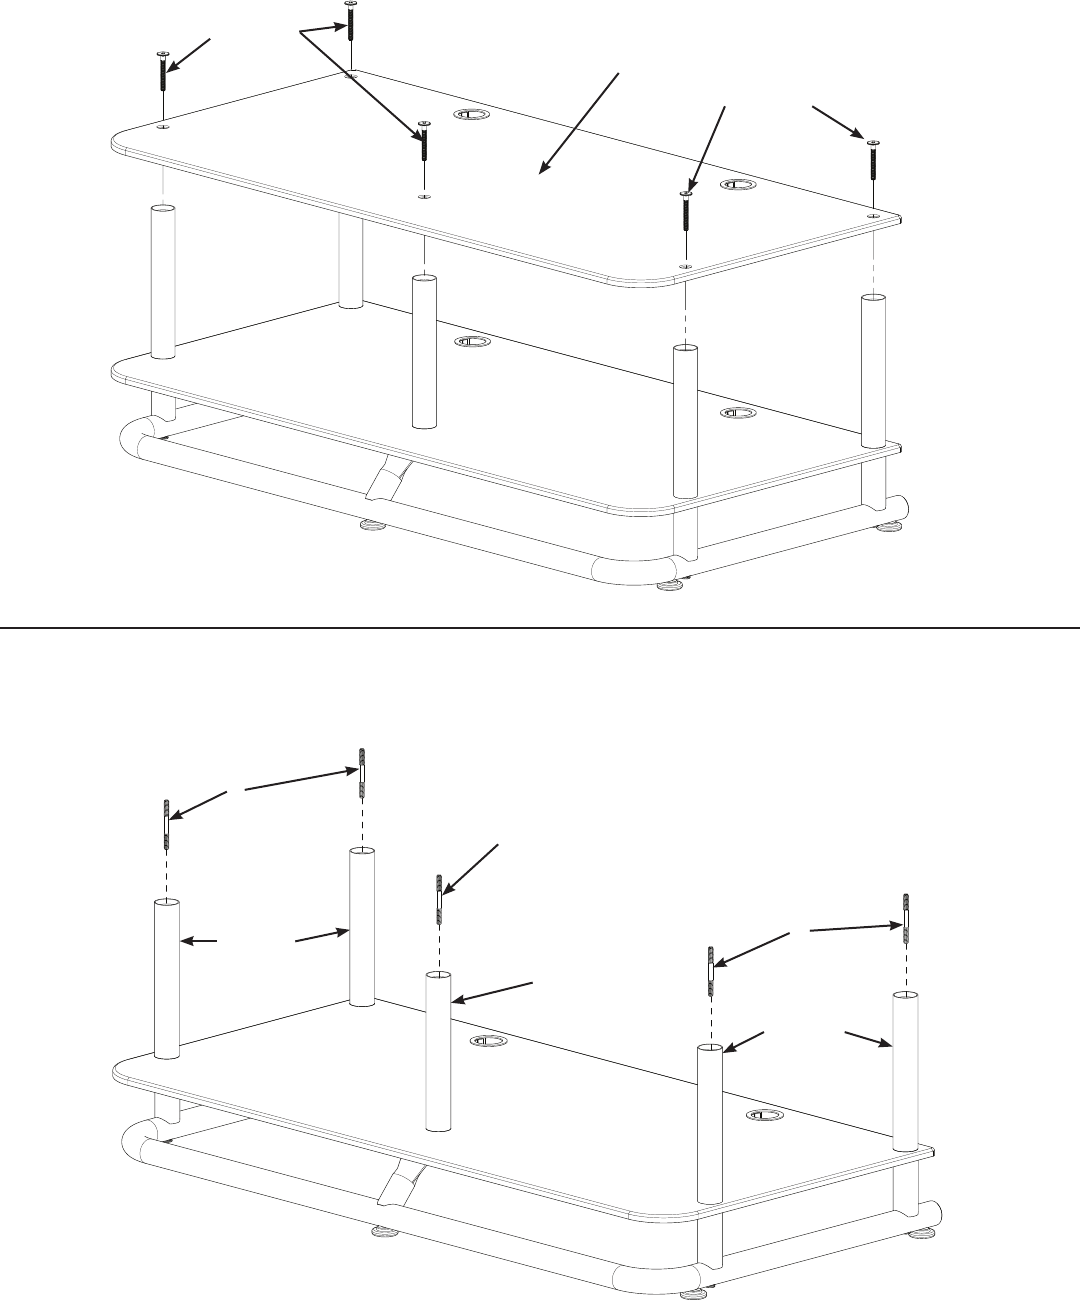
Step 1 - Remove existing Top Video Shelf
Remove the ve Top Bolts and Top Video Shelf. Place the Video Shelf on a smooth soft surface, such a carpeted oor.
Diagram 1
C
Top Bolt
Step 2 - Install Shelf Connectors
Thread a Shelf Connector (C) securely into the ve 8˝ Pillars.
Diagram 2
Top Bolt
8˝ Pillar
Top Video Shelf
C
C
8˝ Pillar
8˝ Pillar


