SETTINGS
White balance adjustment
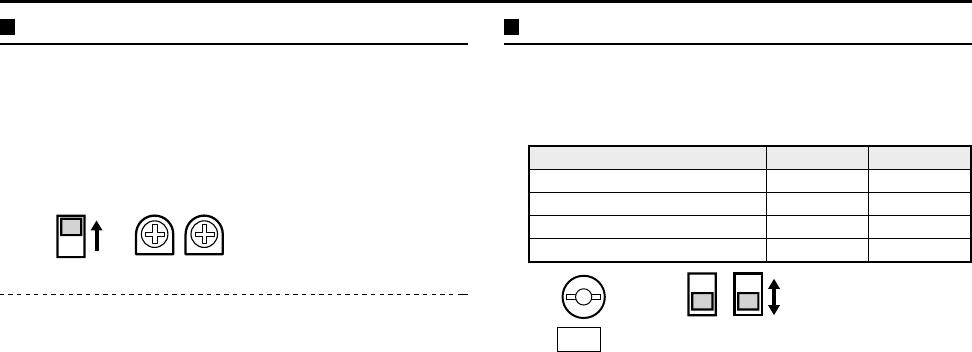
Normally the switch 8 (WB) is set to the down (ATW: auto white
balance) position and the white balance is adjusted automatically. If a
manual white balance adjustment is necessary, follow the steps below.
Set the switch 8 (WB) to the up (M: manual) position, then adjust the
colour.
• Turn RED (VR302) to set the red ratio and/or BLUE (VR303) to set
the blue ratio.
Synchronization settings
The default setting is internal synchronization (INT). You can
change the power supply synchronization by moving switch 9
to the up (LL) position. Refer to “Line phase adjustment”
for details.
External sync adjustment (VBS) (VCC-6592P only)
1 Connect the VBS signal output for the other camera to the VBS
IN connector at the rear of this camera.
2 If the signals are not synchronized, change the sub-carrier (SC-P1)
switches as follows.
Setting 9-pin 10-pin
Default OFF (down) OFF
Set to 90˚ counterclockwise OFF ON (up)
Set to 180˚ counterclockwise ON OFF
Set to 270˚ counterclockwise ON ON
Note:
• The sub-carrier switches let you make broad adjustments to the
sub-carrier phase. If finer adjustments are required, contact the
place of purchase.
• The type and length of the cable which is connected to the VBS
connector may cause the horizontal synchronization being out of
phase. If this happens, adjust VR304 (H-P: horizontal sync).
8
VR303
BR
VR302
109
VR304
H-P
L53H2, H4/XE GB 2001, 9, 18
16 English


