


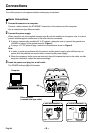

Network Camera Settings
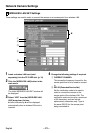
Accessing Without Setting a
Password
Normally you need to type in a password at the
password entry screen in order to display the
live image screen. However, if you make the
settings described below, you can view the live
image screen without having to type in a
password. In this case, you will be logged in at
user level “ID1”.
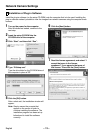
1
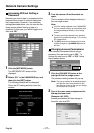
Click the [NETWORK] button.
The NETWORK SET screen will be
displayed.
2
Delete “ID1” in the PASSWORD box, and
then click the [SET] button.
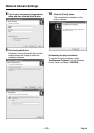
The following window will be displayed.
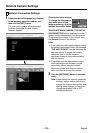
Check the ID1 setting and then close the
window.
3
Turn the camera off and then back on
again.
The live images will be displayed directly in
the live image screen.
Note:
•
If the ID1 setting is deleted in the PASSWORD
box, the camera will start up automatically with
live images displayed directly in a live image
screen.
•
To return to normal password entry operation,
type the ID1 password (example: 1111) into the
ID1 password box.
•
The [SET] button that is displayed in live view
screens changes to a [CHANGE ID] button at
this time.
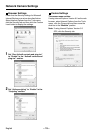
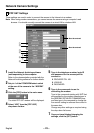
Changing Access Permissions
If the camera is accessed without using a
password, the user level is set to “ID1”. To
change the user level to “ID2” or “ID3”, follow
the procedure below.
1
Click the [CHANGE ID] button at the
top-right of the live image screen.
The password setting screen will pop up.
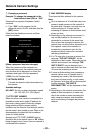
Note:
The pop-up window will be displayed when
you click the menu select buttons for ID2
and ID3 user levels, so that you can change
the access level if required.
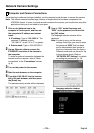
2
Type in the user name and password for
the required user level.
(Example: id3, 3333)
Access permissions will then change to
those for user level ID3.
English
– 17 –