


ENFORCER Vandal Ball-Mount Dome Cameras
SECO-LARM U.S.A., Inc. 3 SECO-LARM U.S.A., Inc. 33 3
1. Please read this manual carefully and keep it for
future reference.
2. Use the camera within the given temperature and
electricity limits.
3. Do not point the camera at the sun. Heat could
damage the camera, even when not in use.
4. Do not drop the camera or subject it to
strong vibrations.
5. Do not mount the camera in areas exposed to
radiation, strong magnetic fields, or strong
electrical signals.
Before Starting:
1. Run a 12VDC power supply wire and a video cable
with a male BNC connector through the wall to where
the camera is to be mounted.
2. Loosen the set screws with the included hex wrench
and remove the case from the base.
NOTE: The camera ball is NOT attached to the case
or the base. It sits loose inside the case. Therefore,
be very careful when removing the case from the
base. Do not drop the camera ball.
3. Mount the base to the wall using the four included
mounting screws. If the wall is made of dry wall, brick,
or similar material, it may be necessary to use the
included plastic screw anchors.
4. Run the camera’s BNC and power connectors through
the camera base, and connect to the video and power
wires that were run through the wall.
Installation:
5. Put the case over the cameral ball onto the base. Be
careful to not drop the camera ball.
6. Holding the case loosely on the base, turn the camera
ball to the desired direction.
NOTE: Before securing installation, make sure to check
both the day and night images. Adjust the camera ball
in a way so that there are no objects blocking or
obscuring the camera’s view.
7. 3X Models Only: Use the OSD controller joystick to
adjust camera settings (see the separate OSD manual).
8. Once the ball is pointing in the desired direction,
tighten the outer case ring to secure the camera in
its position.
9. Do a final test of the video camera and monitor.
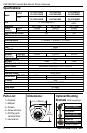
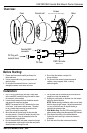
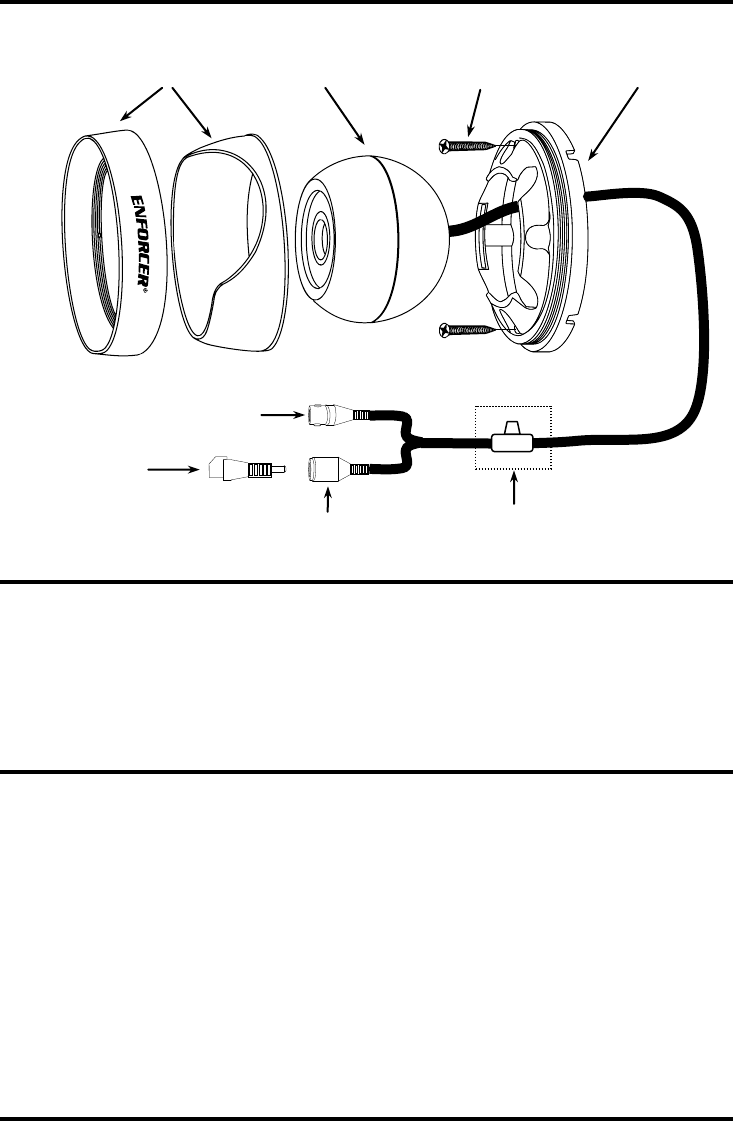
Overview:
Camera ball
Case
Base
Screws
(Only 2 shown. Use all 4 when installing.)
Female BNC
connector
DC Plug with
terminal block
DC Jack
OSD Controller
(3X Models only)