


22
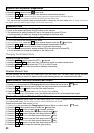
If the flash ratio is indicated as or , press the
+
or
-
button until 1:1 is displayed.
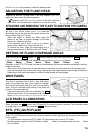
4. Place the Slave Unit at the desired position.
5. Make sure that the Master Unit and Slave Unit have both been charged.
Master Unit’s Ready Light is lit and Slave Unit’s AF Auxiliary Light is blinking.
6. Focus on the subject and take the picture.
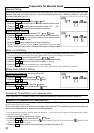
Slave ID, Wireless ETTL Autoflash With Flash Ratio (Two Slave Units)
The Wireless ETTL autoflash system, described as an example, consists of a master unit on the camera,
which will not fire, and two slave units. When you set the flash ratio, the ETTL autoflash system then
controls the total flash amount according to the flash ratio, to obtain a correct exposure.
Only EOS-1V, EOS-3 cameras can use this function.
The flash ratio can be set between 8 : 1 1 : 1 1 : 8.
Please set the Slave ID to 1 and 2 for each Slave unit.
Set the Master unit as follow.
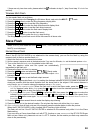
1. Please set the Master Flash unit firing mode to OFF (see Mater Flash ON / OFF setting).
2. Press the MODE button to Select the ETTL
mark.
3. Press the SEL button several times to make the flash ratio indicator blink.
4. Press the
+
or
-
button and select . (Blinking)
5. Press the SEL button to make flash ratio value blink.
6. Press the
+
or
-
button to set the flash ratio.
7. Press the SEL button to make the Flash Ratio indicator stop blinking.
8. Place the Slave Unit at the desired position.
9. Confirm that both the master and slave units are charged.
10. Focus on the subject and take the picture.
If you want to change the settings, you can start from step 3.
If you want to cancel the setting, please set the flash ratio 1:1. (refer to step 4)
Slave ID, Wireless ETTL Autoflash With Flash Ratio (Three Slave Units)
The following wireless ETTL autoflash procedure is for a master unit with three (3) slave units. This
procedure sets the flash ratio for two Slave Units and the flash exposure compensation amount for other
slave unit.
Only EOS-1V and EOS-3 camera can use this function.
Please set the Slave ID 1, 2 and 3 for each Slave unit (See Slave ID Setting).
Set the Master unit as follow.
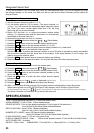
1. Please set the Master Flash unit firing mode to OFF (See Master Flash ON / OFF Settings).
2. Press the MODE button to Select the ETTL
mark.
3. Press the SEL button several times to make the flash ratio indicator display blink.
4. Press the
+
or
-
button to select the 1 2 3. (Blinking)
5. Press the SEL button to make the flash ratio value blink.
6. Press the
+
or
-
button to set the flash ratio.
7. Press the SEL button to make the flash exposure compensation display blink.
8. Press the
+
or
-
button and set the flash exposure compensation amount.
9. Press the SEL button to make the indicator stop blinking.
10. Place the Slave Units at the desired position.
11. Confirm that both the master and slave units are charged.
12. Focus on the subject and take the picture.
If you want to change the settings or cancel the flash ratio settings, you can start from step 3.
Wireless High-Speed Sync (FP Flash)
1. Please set the master flash to Wireless Flash mode. (Refer to Page 21)
2. Press the
+
or
-
button to set to (Master Flash unit firing ON) or (Master Flash
unit firing OFF).
3.
The remainder of the procedure for setting wireless high-speed sync, is the same as for normal high-speed sync.
It is not necessary to make any additional settings on the Slave units.