


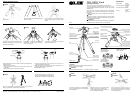
Attach the two Pan Handles to the Pan Head,
by inserting the shorter handle to the left, and
the longer horizontal tilt handle to the right.
Do not reverse.
Install the handles
Remove Quick Shoe by opening the Locking
Lever and then pressing the Release Button.
Screw Quick Shoe on to camera, and insert
back into the Camera Platform.
Please DO Not over tight your Quick Shoe.
Correctly installed you will hear a "click", and
the Quick Shoe will rotate 360°.
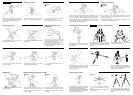
Using the Quick Shoe Adjusting the firmness of the
Locking Lever
Fix the Quick Shoe at a desired position by closing
the Locking Lever.
After long use, you may need to re-tighten the
Lever Lock mechanism through the window
located underneath the Pan Head.
First, you will need to loosen the locking pin
with an ordinary allen wrench(1.5 mm).
We advise you not to tamper with this part until
it becomes necessary.
Two bubble levels are built-in for vertical and
horizontal positioning.
Bubble levels Safeguards during operation with a Camera
The camera may fall suddenly when the
Locking Lever is loosened, causing damages
and injuries. Always hold on to the camera dur-
ing such operation.
When loosening either the Pan & Tilt Handle, or
the Vertical Tilt Handle, take precaution by keep-
ing a firm grip on the handle until the Pan Head is
locked down.
Caution
Using the Pan Head
Loosen the Pan & Tilt Handle, and the head
will tilt back and forth.
Loosen the Panning Lock Knob, and the head will
rotate along the horizontal direction.
Loosen the Vertical Tilt Handle, and the level
can be adjusted.
Caution
Pan Head Section
tighten
loosen
Caution
Attaching the Camera
Please exchange by the following method to attach other heads or acces-
sories to this leg. Fix the Center Column of the legs firmly by both the
Center Column Locking Collar and the Center Column Stopper. Next,
tighten the Panning Lock Knob of the head firmly. The Pan & Tilt Handle
and the Vertical Tilt Handle are grasped and then, turn the head counter-
clockwise forcibly. The head loosens now.
Removing the Pan Head from the Center Column
Set the new head, or accessory on the tripod's threaded post, and turn
clockwise until it comes to a stop. Tighten the Panning Lock Knob and
turn clockwise slightly more.
Do not attach camera directly to the threaded post of the Center Column.
This can damage both camera and tripod.
When attaching the Pan Head to a tripod with a
small thread(U1/4) use the optional small
thread adapter.
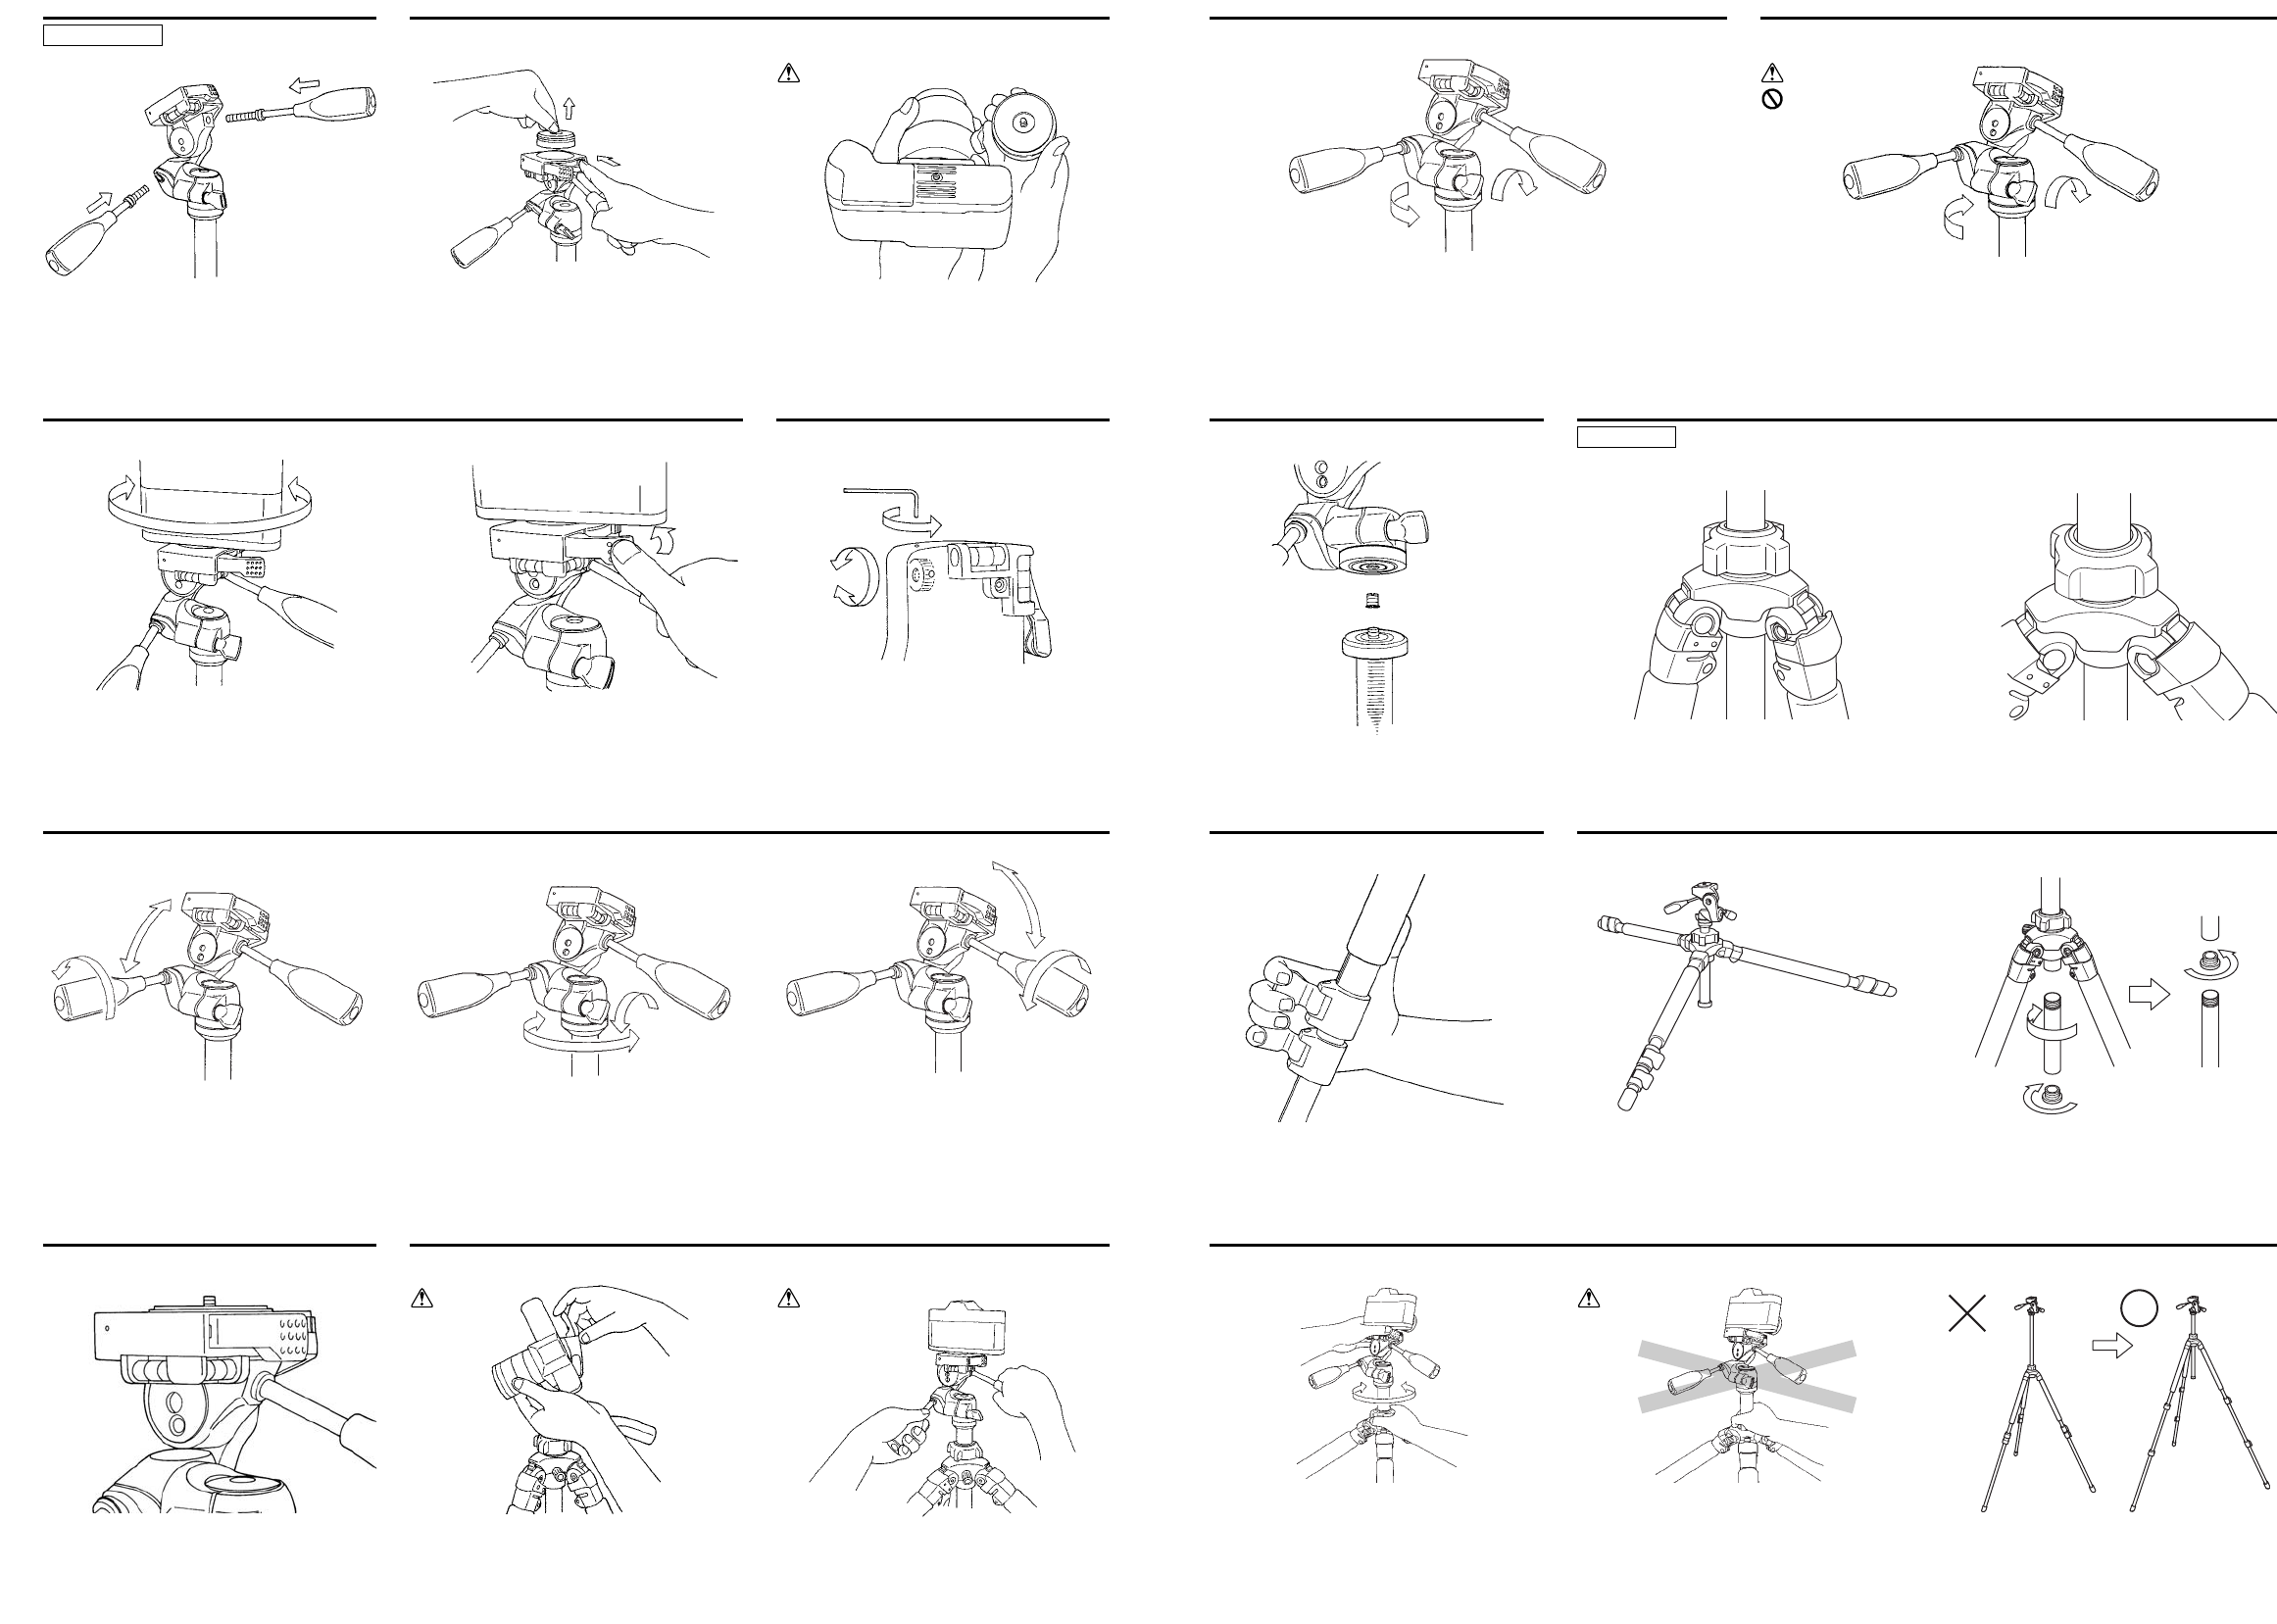
Three Position Adjustable Legs
To change the angle of each leg, close the Leg
slightly, and then pull the Leg Angle Adjustment
Lock out. There is a choice of two other angle
positions.
After choosing the desired leg angle, securely
push in the Adjustment Lock.
To avoid unnecessary camera vibrations, try to
keep the Center Column height to a minimum.
Also use the larger legs first, when extending
the legs.
Extending the Tripod Legs
Flip up the Leg Lock Lever to extend or shorten
any of the individual leg sections to the desired
length, and press the Leg Lock Lever flush
against the Leg to lock.
You can get lower height.
You may injure your hand by a sudden fall, if
you let go of Pan Head before locking the
Collar.
Turn the Locking Collar with your fingers on the
side of the Collar.
How to get low position shots
Caution
Prohibition
Caution
Tripod Section
Using the Center Column
Attaching the Pan Head (Continued)
Hold onto the Pan Head with one hand, and
loosen the Center Column Stopper and the Center
Column Locking Collar with the other hand.
Raise or lower Pan Head to desired height, and
while maintaining a hold of the Pan Head, tighten
the Locking Collar and the Stopper.
Remove the Center Column Base Stopper and
then, remove the Lower part of Center Column.
Put the Center Column Base Stopper on the
Upper part of Center Column.
Attaching the Pan Head