


126
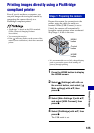
Printing images directly using a PictBridge compliant printer
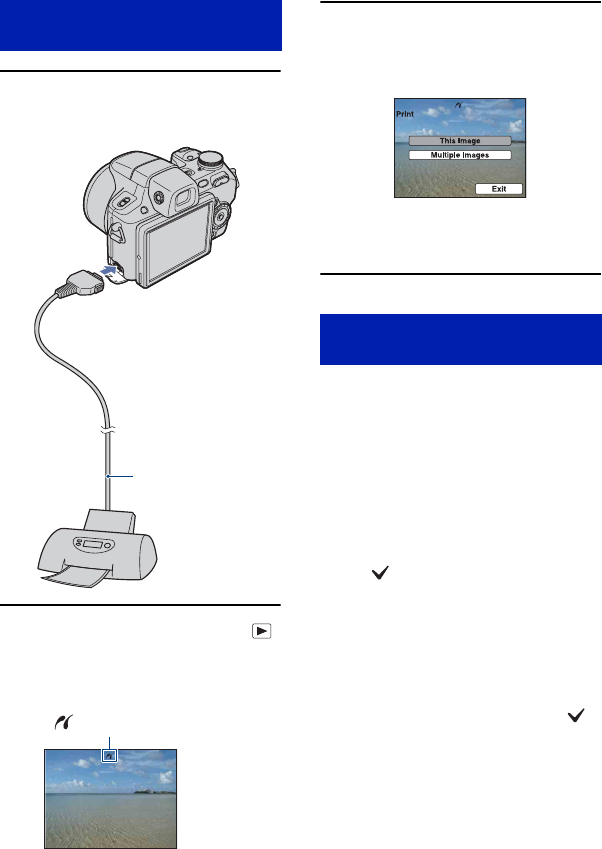
1 Connect the camera to the
printer.
2 Turn on the printer. Press the
(Playback) button and turn on the
camera.
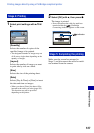
3 Press the MENU button, select
[Print] with v/V on the control
button, then press z.
The camera is set to playback mode,
then an image and the print menu appear
on the screen.
Select [This Image] or [Multiple
Images] with v/V, then press z.
When you select [This Image]
You can print the selected image. Move on
to Stage 4.
When you select [Multiple Images]
You can print multiple selected images.
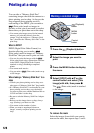
1 Select the image you want to print with v/
V/b/B, then press z.
The
mark appears in the checkbox of
the image.
2 Press the MENU button to display the
menu.
3 Select [OK] with
v, then press z.
• To print all the images of a date/folder/favorites,
select [Multiple Images] on the index screen,
select the bar with b,
then press z. The
mark appears in the checkbox of the bar.
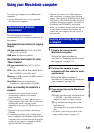
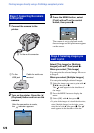
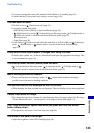
Stage 2: Connecting the camera
to the printer
1 To the
USB jack
2 To the multi connector
Cable for multi-use
terminal
After the connection is made,
the indicator appears.
Stage 3: Selecting images you
want to print