


16
— Recording – Basics —
Recording a picture
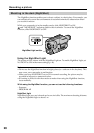
Your camcorder automatically focuses for you.
You can select English, Spanish, Portuguese or Chinese for the information indicators in
the menu settings. The default setting is English.
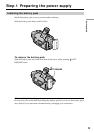
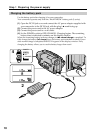
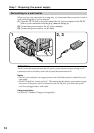
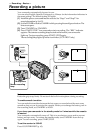
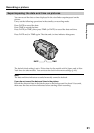
(1) Install the power source and insert a cassette. See “Step 1” and “Step 2” for
more information (p. 9 to 15).
(2) Set the POWER switch to CAMERA while pressing the small green button. The
lens cover opens.
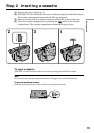
(3) Turn STANDBY to STANDBY.
(4) Press START/STOP. Your camcorder starts recording. The “REC” indicator
appears. The camera recording lamp located on the front of your camcorder
lights up. To stop recording, press START/STOP again.
The recording lamp lights up in the viewfinder. (CCD-TR317 only)
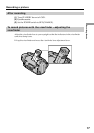
Note
Fasten the grip strap firmly. Do not touch the built-in microphone during recording.
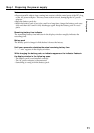
To enable smooth transition
You can make the transition between the last scene you recorded and the next scene
smooth as long as you do not eject the cassette. When you exchange the battery pack in
the recording mode, set STANDBY to LOCK.
If you leave your camcorder in the standby mode for 5 minutes while the cassette
is inserted
Your camcorder automatically turns off. This is to save battery power and to prevent
battery and tape wear. To resume the standby mode, turn STANDBY down and up
again. To start recording, press START/STOP.
To set the counter to 0:00:00
Press COUNTER RESET (p. 63).
3
4
L
O
C
K
START/STOP
S
T
A
N
D
B
Y
L
O
C
K
START/STOP
S
T
A
N
D
B
Y
40min
SP
STBY
0:00:00
40min
SP
REC
0:00:01
2
POWER
OFF
PLAYER
CAMERA
(CHARGE)
Camera recording
lamp
Microphone