


Editing
83
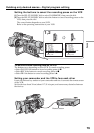
Dubbing only desired scenes – Digital program editing
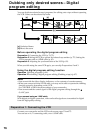
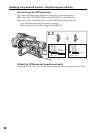
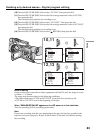
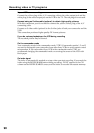
(10)Turn the SEL/PUSH EXEC dial to select “CUT-IN,” then press the dial.
(11)Turn the SEL/PUSH EXEC dial to select the average numerical value of CUT-IN,
then press the dial.
The calculated start position for recording is set.
(12)Turn the SEL/PUSH EXEC dial to select “CUT-OUT,” then press the dial.
(13)Turn the SEL/PUSH EXEC dial to select the average numerical value of CUT-OUT,
then press the dial.
The calculated stop position for recording is set.
(14)Turn the SEL/PUSH EXEC dial to select RETURN, then press the dial.
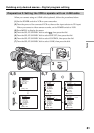
Errors in editing
If you connect your camcorder to Sony equipment with the DV jack, the range of errors
is within +/– 5 frames.
The range may become wider in the following conditions:
•The interval between CUT-IN and CUT-OUT is less than five seconds (p. 84).
•CUT-IN or CUT-OUT is set at the beginning of the tape.
When “ENGAGE REC PAUSE” appears on the LCD screen or in the viewfinder
Turn the recording VCR to recording pause mode.
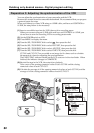
Note
If you start recording from the very beginning of the tape, the first few seconds of the
tape may not record properly. Be sure to allow about 10 seconds’ lead before starting
the recording.
10,11
12,13
ED I T SET
CONTROL
ADJ TEST
“CUT–I N”
“CUT–OUT”
I R SETUP
PAUSE
M
ODE
I R TEST
RETURN
[
MENU
]
:
END
0
OTHERS
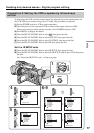
ED I T SET
CONTROL
ADJ TEST
“CUT–I N”
“CUT–OUT”
I R SETUP
PAUSE
M
ODE
I R TEST
RETURN
[
MENU
]
:
END
0
OTHERS
ED I T SET
CONTROL
ADJ TEST
“CUT–I N”
“CUT–OUT”
I R SETUP
PAUSE
M
ODE
I R TEST
RETURN
[
MENU
]
:
END
0
OTHERS
ED I T SET
CONTROL
ADJ TEST
“CUT–I N”
“CUT–OUT”
I R SETUP
PAUSE
M
ODE
I R TEST
RETURN
[
MENU
]
:
END
0
OTHERS