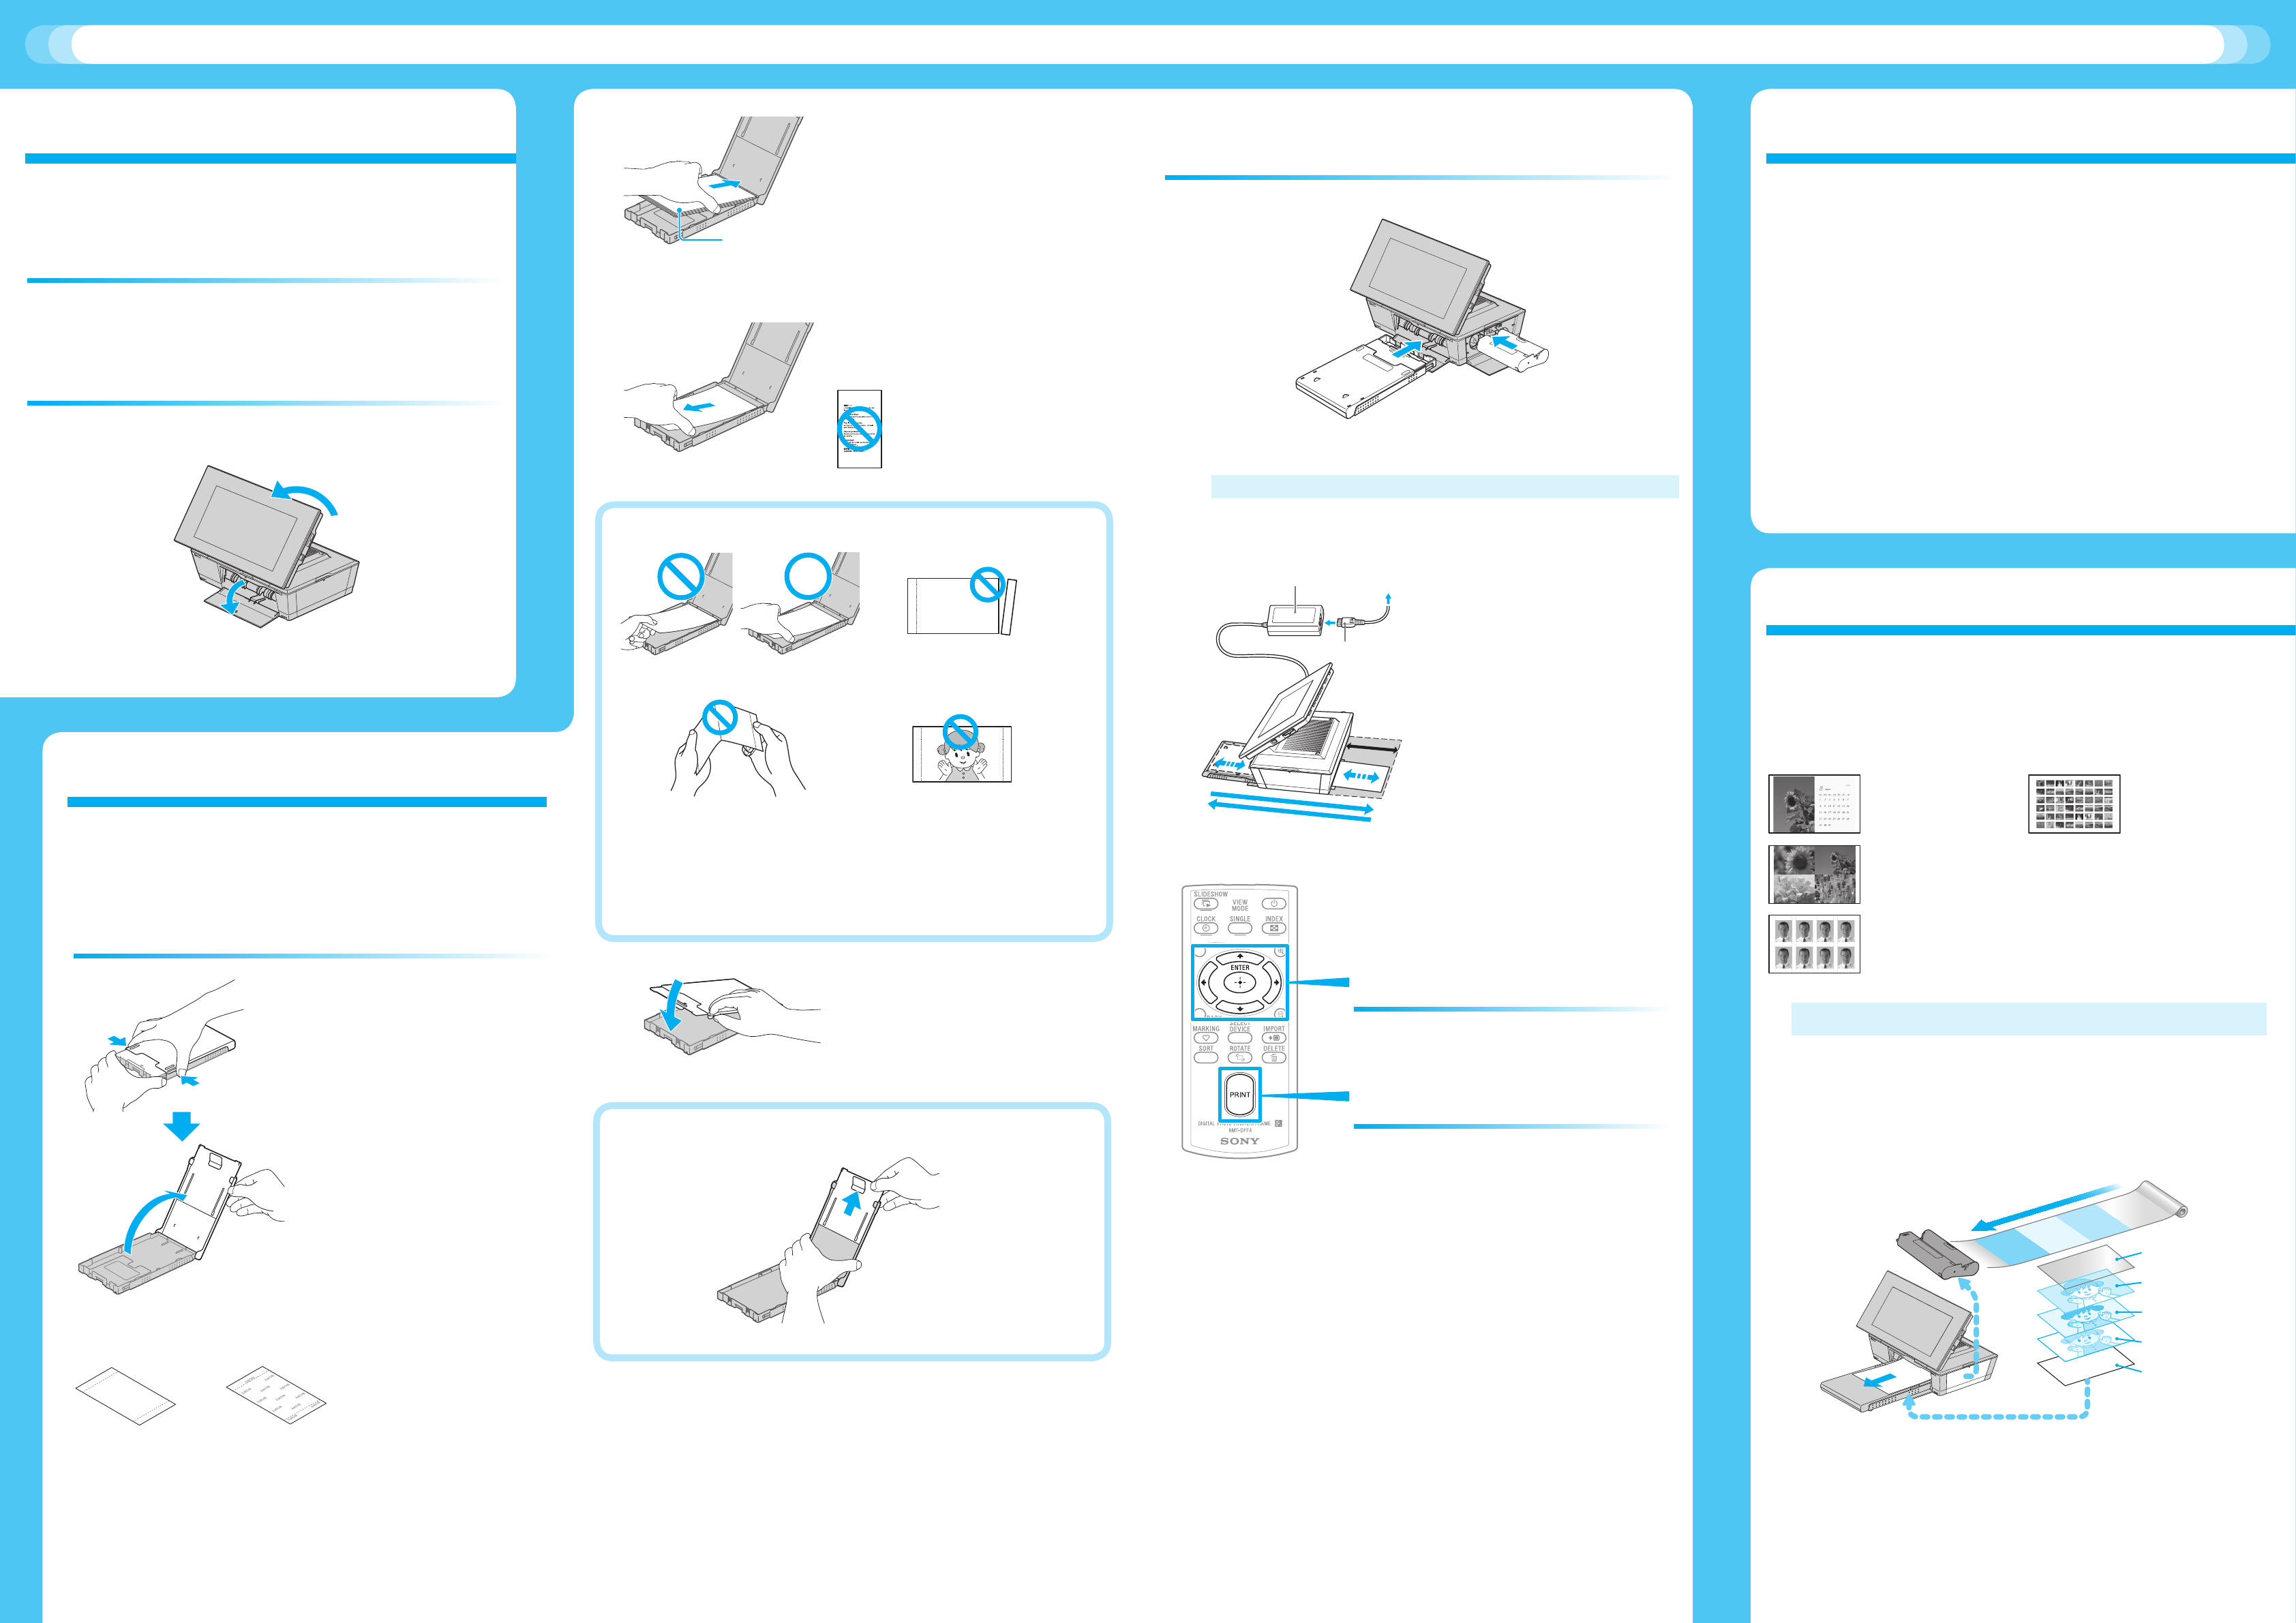
1
Lay this unit flat (print position) and open
the paper tray compartment door.
2
Tilt the screen up.
2
1
Enjoy your printing in a variety of ways
Index Print
Print All
DPOF Print
ID Photo
Calendar
Layout print
Creative Print
CPages 55 to 59 in the Operating Instructions
Batch Print
CPage 60 in the Operating Instructions
The printing process
The printer employs a dye sublimation printing system.
In this printing system, a thermal print head heats up as it passes over
the yellow, magenta and cyan layer of the ink ribbon, causing the dyes
to vaporize and permeate the surface of the print paper. A nal cycle lays
down a laminate layer to protect the printed surface.
Print Paper
The direction that the ink lm
moves inside the ink ribbon
Laminate lm
Cyan
Magenta
Yellow
Notes
The ink ribbon cannot be reused. You cannot reuse it by rewinding. ˎ
The number on the ink ribbon cartridge is the maximum number of sheets ˎ
that can be printed with that cartridge.
(e.g. SVM-F40P means you can print up to 40 sheets.)
Print paper emerges from the back and front paper outlets each time a ˎ
color is printed. Wait until printing is completed and the print paper is
automatically ejected onto the paper tray.
Before printing
What you can print with this unit
Cleaning
Printing
1
Inserting the print paper into the
paper tray.
1
1
Open the paper tray
cover.
Hold both sides of the
paper tray cover (as
shown with arrows) and
open it.
Rear surface
Front surface
(Printing surface)
2
2
Make sure the print paper
is not upside down.
Let’s print
Protective sheet (If there is no protective sheet, insert
the print paper into the paper tray with the printing
surface (plain white side) facing up.)
3
3
Insert the print paper into
the paper tray with the
protective sheet facing
up.
4
4
Remove the protective
sheet from the tray.
You cannot print on a protective
sheet. (Doing so may cause a
malfunction.)
Do not touch the printing
surface!
Do not cut off from
perforated portions!
Do not bend! Do not use used print paper!
You can use Sony optional color print packs designed for this unit, ˎ
only. You cannot use the other print packs. For color print packs you
can use, refer to the “About the Print Packs” also supplied.
You can set up to 20 sheets of print paper. ˎ
Make sure the print paper is not upside down before printing. ˎ
Notes
5
5 Close the paper tray cover.
If you cannot close the tray cover
Stretch out the slide cover, and then close the tray cover.
2
Insert the paper tray and ink ribbon
until each clicks into place.
Installation place for printing
10cm
AC adaptor
To the
wall
outlet
Power cord
Movement of print paper
Install this unit with at least 10 cm
(3 13/32 inches) of space at the rear.
3
Select an image
for printing.
4
Press PRINT.
Press the / button repeatedly until
the image that you want to print appears.
If white lines or period-like dots are printed on the pictures, clean
the inside of this unit.
For details, refer to page 97 in the Operating Instructions.
1 Remove any memory cards, USB cables, the ink ribbon, the
paper tray, and print paper from this unit.
2 Place the cleaning sheet into the paper tray with the no-
imprint side facing up.
3 Set the supplied cleaning cartridge and the paper tray into this
unit and press PRINT.


