


24
DSC-H50
3-295-472-11(1)
H:\JOB\CX60470\3295472111\3295472111DSCH50\040PRE.fm
master:Left
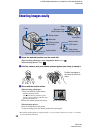
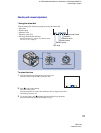
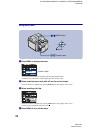
[ To view an index screen
Press (Index) to display the index screen while a still image is displayed.
Then, select an image with v/V/b/B.
To return to the single image screen, press z.
• In the default setting, images are displayed in Date View (when using the “Memory Stick Duo”) or in
Folder View (when using the internal memory).
When using a “Memory Stick Duo”, you can change the View Mode by selecting (View Images) on
the HOME screen (page 27).
• Each time you press (Index), the number of images on the index screen increases.
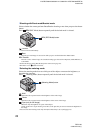
[ To delete images in index mode
1 Press MENU while the index screen is displayed.
2 Select [Delete] with v/V and select [Multiple Images] with b/B, then press z.
3 Select the image you want to delete with v/V/b/B, then press z.
The mark is checked in the checkbox of the image.
To cancel a selection, select an image you have selected for deletion, then press z again.
4 Press MENU and select [OK] with v, then press z.
• To delete all the images of a date/folder, select [All Images in Date Range]/[All In This Folder] in step 2,
then press z.
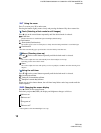
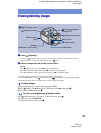
[ To play back a series of images with effects and music (Slideshow)
1 Press (Slideshow) button.
The setup screen appears.
2 Press (Slideshow) button again.
• This is the same as pressing the (Slideshow) button on the Remote Control.
The music will change together with the [Effects]. You can also transfer and change the music
to your desired music.
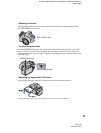
To transfer and change the music, take the following steps.
1 Press the HOME button. Then select [ Music Tool] t [Download Music] in (Slideshow)
(pages 26, 27).
2 Install the software included in the CD-ROM (supplied) to your computer.
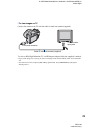
3 Connect the camera and a computer with USB cable.
4 Start up “Music Transfer” installed to your computer and change the music.
For details on changing the music, refer to Help in “Music Transfer”.