19
US
Getting started
4
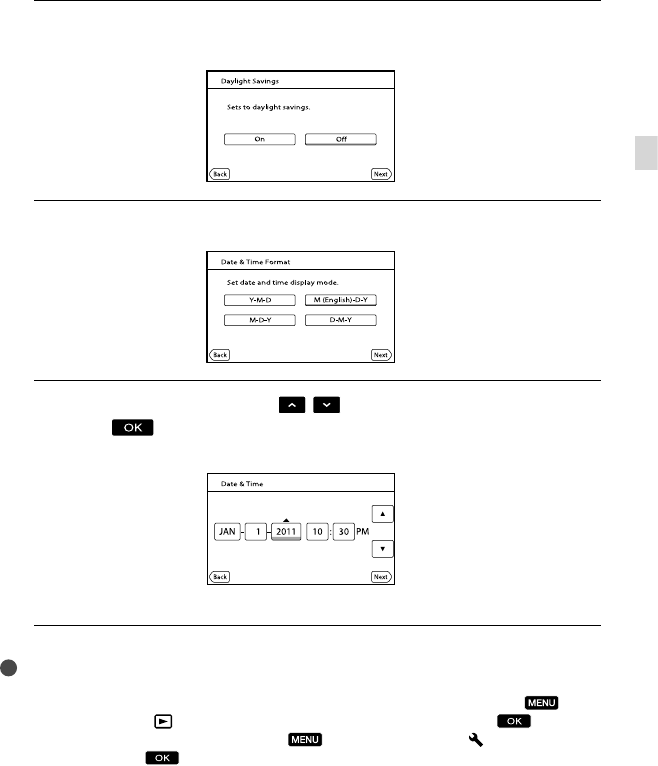
Set [Daylight Savings] or [Summer Time], then touch [Next].
If you set [Daylight Savings] or [Summer Time] to [On], the clock advances 1 hour.
5
Select the date format, then touch [Next].
6
Select the date and time, touch
/ to set the value, then touch
[Next]
*.
* The confirmation screen appears only when you set the clock for the first time.
The clock starts.
Notes
The date and time does not appear during recording, but they are automatically recorded on the
recording media, and can be displayed during playback. To display the date and time, touch
(MENU) [Setup] [
(Playback Settings)] [Data Code] [Date/Time] .
You can turn off the operation beeps by touching
(MENU) [Setup] [ (General Settings)]
[Beep] [Off]
.
If the button you touch does not react correctly, calibrate the touch panel.
Once the clock is set, the clock time is automatically adjusted with [Auto Clock ADJ ] and [Auto Area
ADJ] set to [On]. The clock may not be adjusted to the correct time automatically, depending on the
country/region selected for your camcorder. In this case, set [Auto Clock ADJ ] and [Auto Area ADJ] to
[Off] (HDR-CX560V/CX700V).


