112
Viewing images using your computer
Viewing images
For Windows 98 users
(1) Turn on the power of your computer and allow Windows 98 to load.
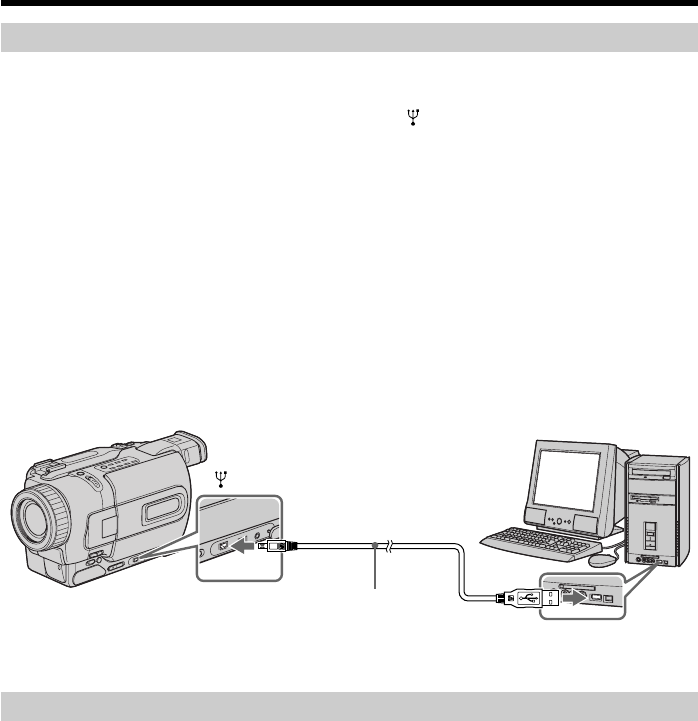
(2) Connect one end of the USB cable to the
(USB) jack on the camcorder and the
other end to the USB connector on your computer.
(3) Insert a “Memory Stick” into your camcorder, and connect the AC power
adaptor to your camcorder and then to a wall outlet.
(4) Set the POWER switch to MEMORY.
“PC MODE” appears on the screen of your camcorder.
(5) Open “My Computer” on Windows 98 and double click the newly recognized
drive. (Example: “Removable Disk (D:)”)
The folders inside the “Memory Stick” are displayed.
(6) Select and double-click the desired image file from the folder. Double-click the
folder or the file in the following order.
“Dcim” folder t “100msdcf” folder t Image file
For the detailed folder and file name, see ”Image file storage destinations and
image files” (p. 113).
Unplug the USB cable/Eject the “Memory Stick”
To unplug the USB cable or eject the “Memory Stick”, follow the procedure below.
For Windows 2000 users
(1) Move the cursor to the “Unplug or Eject Hardware” icon on the TaskTray and
click to cancel the applicable drive.
(2) A message to remove the device from the system appears, then unplug the
USB cable or eject the “Memory Stick.”
For Macintosh users
(1) Quit application programs opened.
Make sure that the access lamp of the hard disk does not lit.
(2) Drag and drop the “Memory Stick” icon to the Trash or select Eject under the
Special menu.
(3) Eject the “Memory Stick.”
USB connector
(USB) jack
USB cable
Push in until
the connector
clicks into place
