


32
33
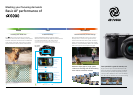
Easy setting guide
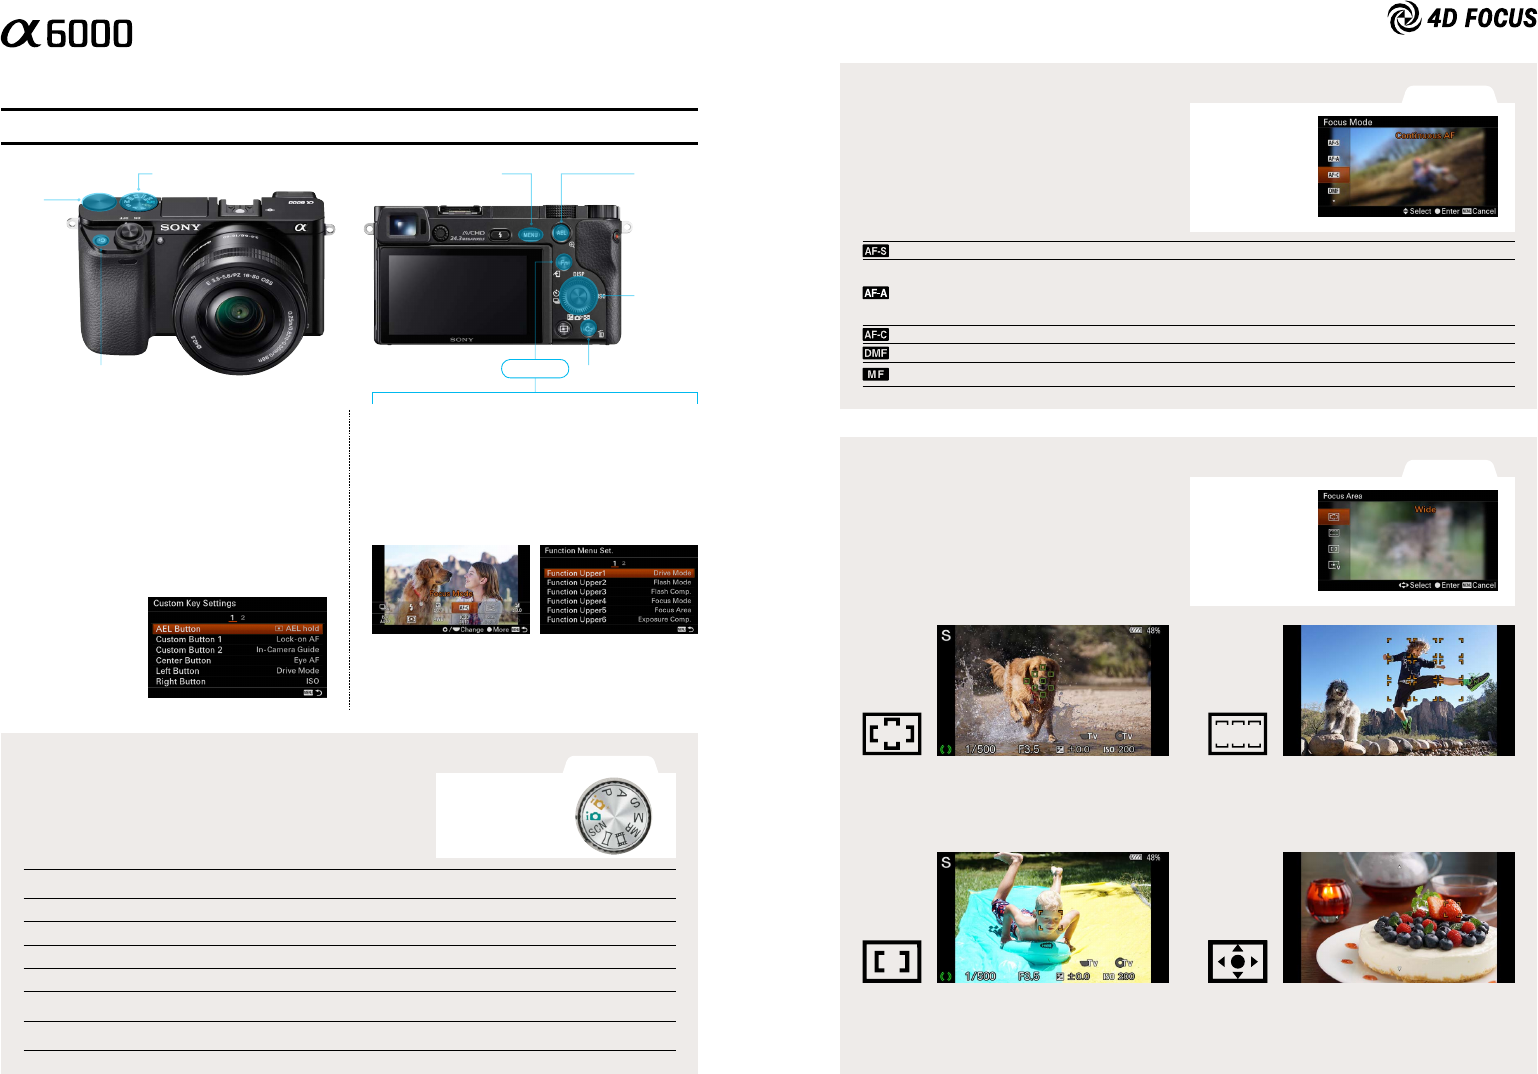
Wide
Center
Zone
Flexible Spot (S/M/L)
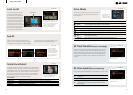
Shooting Mode
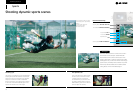
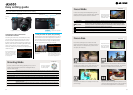
Command the camera with button
customization function
Handy Fn button for quick, easy resetting
Setting steps
Dials and buttons frequently used for AF shooting
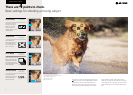
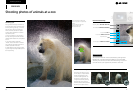
Single-shot AF Locks the focus when focus adjustment is achieved. Use Single-shot AF when the subject is stationary.
Automatic AF
Switches between Single-shot AF and Continuous AF according to the movement of the subject. When
the shutter button is pressed halfway down, the camera locks focus when it determines that the subject
is stationary, or continues to focus while the subject is in motion.During continuous shooting, the camera
automatically shoots with Continuous AF starting from the second shot.
Continuous AF Continues to focus while the shutter button is held halfway down. Use this when the subject is in motion.
DMF
Allows you to use a combination of manual focus and autofocus.
Manual Focus Allows focus to be adjusted manually.
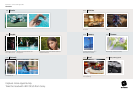
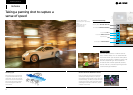
P (Program Auto)
Allows you to shoot with the exposure adjusted automatically (both the shutter speed and the aperture value (F
value)). Also, you can select various settings using the menu and adjust them as desired.
A (Aperture Priority) Allows you to adjust the aperture and shoot when you want to blur the background, etc.
S (Shutter Priority) Allows you to shoot fast-moving subjects etc. by manually adjusting the shutter speed.
M (Manual Exposure) Allows you to shoot still images with a desired exposure by adjusting the shutter speed and the aperture value.
Intelligent Auto Allows you to shoot still images with the settings adjusted automatically.
Superior Auto
Allows you to shoot still images of higher quality with the settings adjusted automatically than you could with
Intelligent Auto mode.
MR (Memory recall)
Allows you to shoot an image after recalling often-used modes or numeric settings that have been registered in
advance.
Fn button
Control
dial
Press the MENU button
and select Custom Key
Settings. Then choose
a button and a function
for assignment.
Up to 12 functions can be
registered.
Press the MENU button and
select Function Menu Set.
Then, choose an area and a
function for assignment.
Mode dial MENU button AEL button
Control
wheel
C1 (Custom 1) button C2 (Custom 2) button
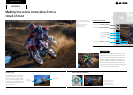
According to preferences and conditions of use,
you can freely assign a function of your choice
to each of seven customizable buttons: the C1
(Custom 1) button and C2 (Custom 2) button, AEL
button, center button, and left/right/down sides
of the control wheel. There are 48 assignable
functions, and you can instantly call up frequently
used functions.
Pressing the Fn (Function) button displays a set of
12 functions that you have assigned, any of which
you can quickly access and set. It is not necessary
to call up the function through the MENU button,
so changing settings is very user-friendly.
To freely control the AF setting, shooting in P, A, S or M
mode is recommended, rather than Intelligent Auto or
Superior Auto mode.
Turn the mode dial
to select a desired
shooting mode.
Focus Mode
Focus Area
Choose a focusing method depending on the
subject movement. The methods mainly used as
examples in this booklet are AF-C and AF-S.
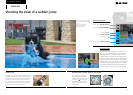
Focuses automatically on a subject within all
ranges of the image. One or more green frames
are displayed around the area that is in focus.
Focus Area settings let you choose the area
within the frame to focus on. The basic choice is
Wide, but you can choose Zone, Center or Flex-
ible Spot, as necessary.
Focuses automatically on a subject in the center
of the image.
Select a zone on the monitor on which to focus.
You can choose among nine zones. The camera
focuses on a subject in the chosen zone.
Lets you move an AF range frame (select S, M, or
L size) to a desired point on the screen and focus
on a very small subject within a narrow area.
Setting steps
Setting steps
Press the Fn button
and choose Focus
Mode, then choose
a desired mode.
Press the Fn button
and choose Focus
Area, then choose
a desired setting.