www.svat.com
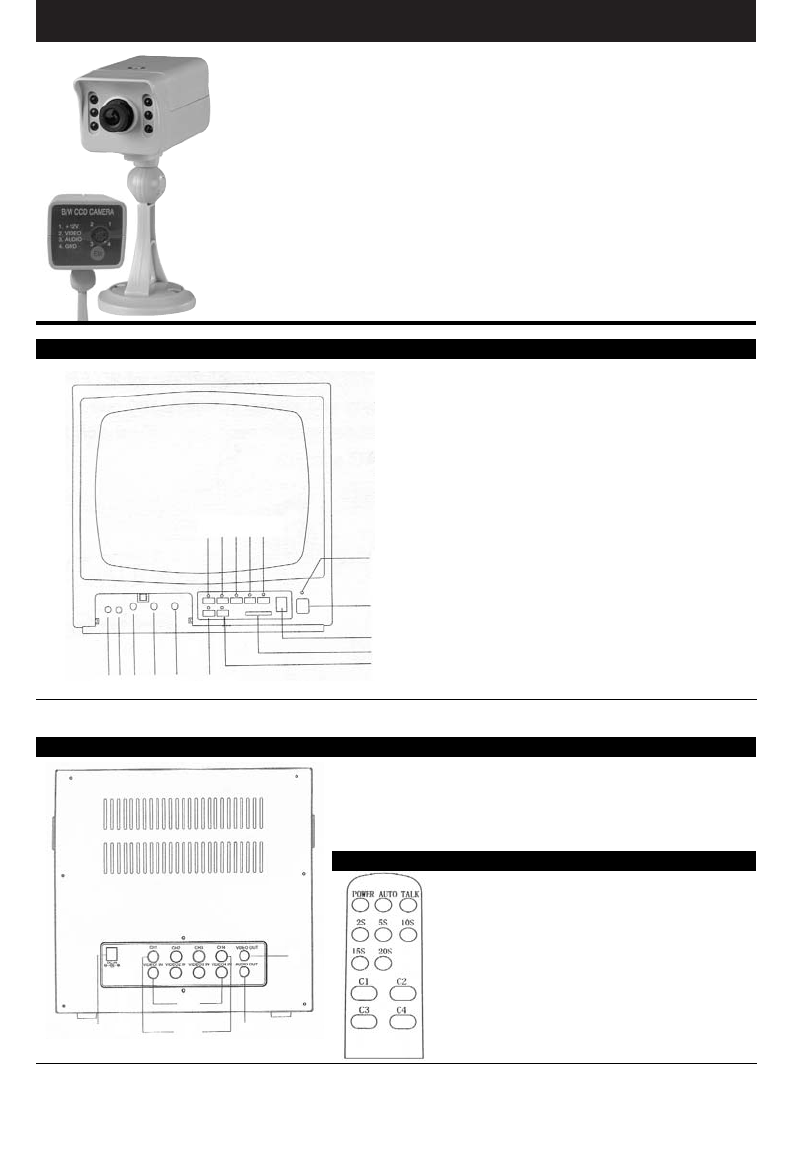
Product Features (see diagrams below)
The camera uses a 4 pin DIN connection in the back. This con-
nection, using one plug, contains the power, audio and video
for the camera. The power for the camera is being received
from the monitor.
Camera is equipped with 6 infrared LEDS which let you view
the action in near total darkness. The camera can be mounted
in virually any position using the supplied bracket, even on ceil-
ings (simply unscrew the bracket from the bottom of the cam-
era and screw it in to the top)
1. Headhone jack
2. 50/60 Hz system switch
3. V-Hold adjustment knob
4. Brightness control knob
5. Contrast adjustment knob
6. AUTO switch
7. TIME switch
8. VOLUME adjustment switch
9. C1 button + Auto Timer Light 2 sec
10. C2 button + Auto Timer Light 5 sec
11. C3 button + Auto Timer Light 10 sec
12. C4 button + Auto Timer Light 15 sec
13. TALK button +Auto Timer Light 20 sec
14. REC (Remote Control Sensor)
15. POWER button
16. Power Button Light
1
23 4 5 6
7
8
9
10 11 1213
14
15
16
MONITOR FRONT VIEW
MONITOR BACK VIEW
17. 18V DC 2400mA Power Input Jack
18. CH1-4 (Video/Audio Input DIN Connector)
19. VIDEO1-4 (Video Input RCA or BNC Connector)
20. VIDEO OUT (BNC Connector)
21. AUDIO OUT (BNC Connector)
POWER: Turns monitor on/off
AUTO: switches system to auto mode
TALK: dissabled
2S: Auto Switching Timer - 2 sec
5S: Auto Switching Timer - 5 sec
10S: Auto Switching Timer - 10 sec
15S: Auto Switching Timer - 15 sec
20S: Auto Switching Timer - 20 sec
C1 - C4: Switches between Cameras
19
20
2117 18
REMOTE CONTROL
4
(FIG-1)
(FIG-2)


