


Instructions on how to attach a fixed camera and wall mounting bracket.
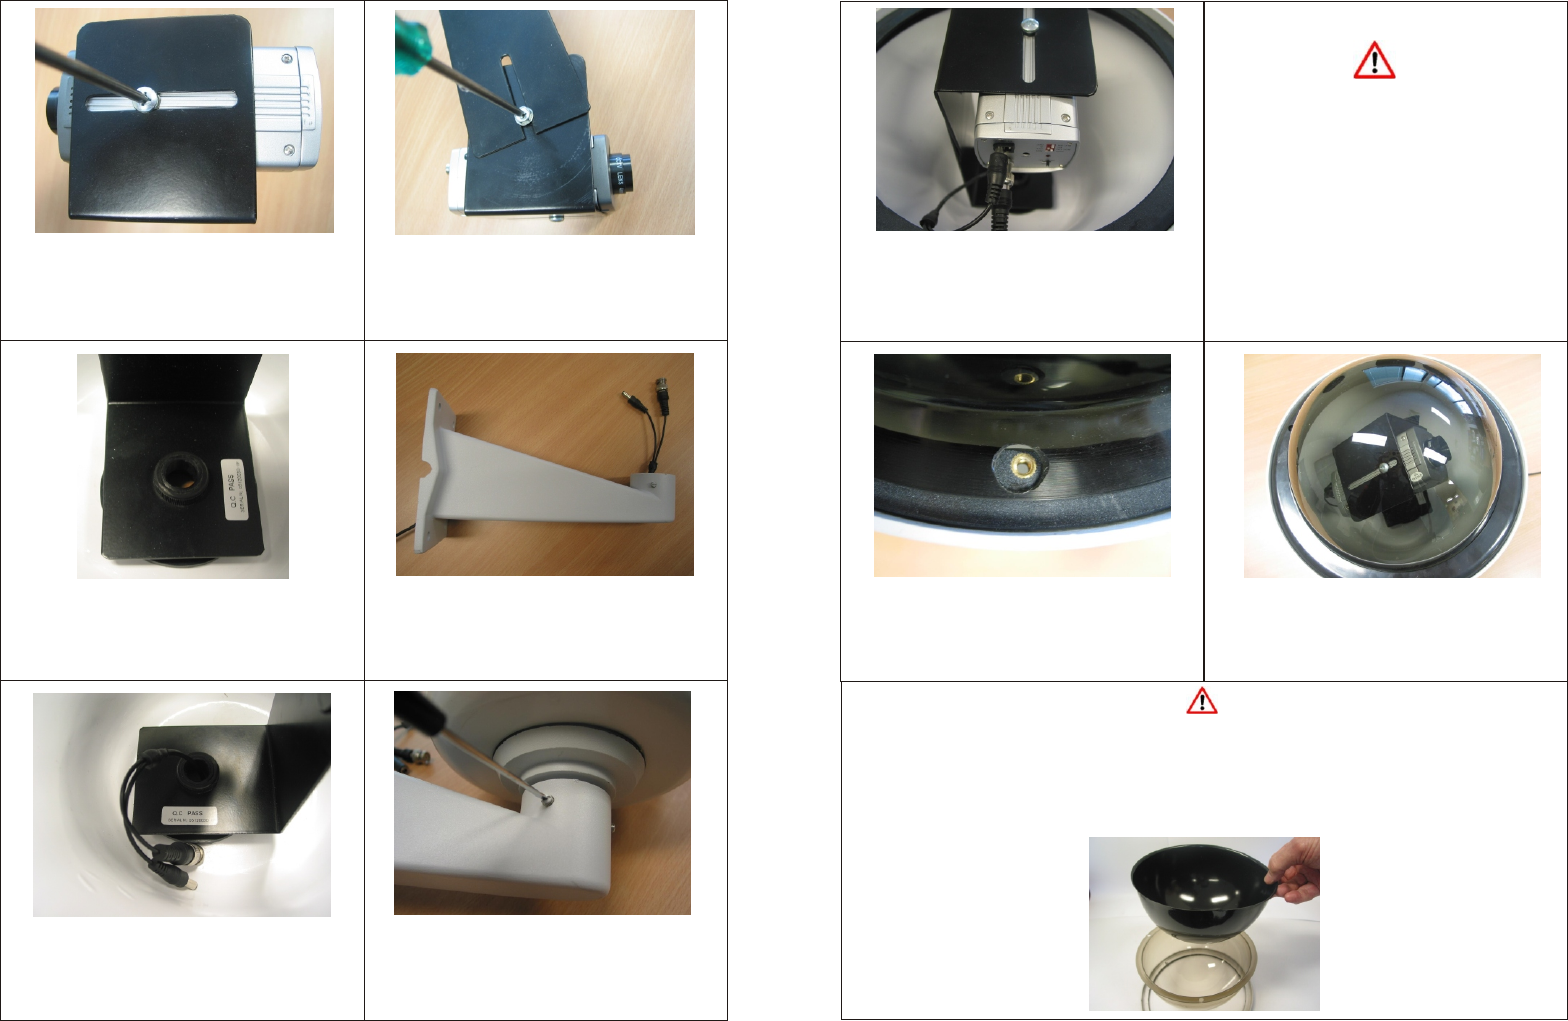
1. Firstly attach the camera onto the camera
bracket. Keep the orientation of the dome in
mind when mounting the camera.
3. Screw the camera bracket onto the bottom of
the dome using the bracket retainer.
4. Thread the AV cable through the wall
mounting bracket. Make sure the male DC plug
is passed through the bracket so it can be
connected to the camera. (See above image)
6. Fix the wall mounting bracket onto the dome
by screwing in the 3 holding screws in a
clockwise direction using a flat head screw
driver.
2. Adjust the camera bracket to suit your viewing
direction. Then secure the bracket into place by
screwing the locking screw in a clockwise
direction.
9. Align the dome cover and dome ring over the
holes. (See image above)
7. Connect the AV and DC cable onto the back
of the camera. This illustration shows how to
connect the cables into the back of a Swann
C500, but actual connections will vary
depending on your camera.
5. Now thread the cable into the bottom of the
dome.
8. We highly recommend you test the camera
now. Connect the other end of the AV cable into
you TV/monitor and power up the camera to see
if you get a picture. Make sure the camera is in
focus and all the appropriate settings are made.
If possible, temporarily mount the dome to the
desired location and check if the image is
viewable.
To mount the dome onto your wall, please visit your local hardware store for wall mounting bolts.
We recommend you get advice from your hardware store staff on the appropriate tools to use and
wall mounting bolts for your wall. Please keep in mind the dome and wall mounting bracket weighs
approximately 5.5 lb / 2.5 kg
Please make sure you remove the dark insert film if you wish to use this dome deterrent as a real
dome camera. (See image below)
10. Secure the dome cover to the dome body
using 3 screws supplied.