


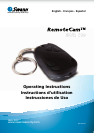


888
To turn the RemoteCam ON:
Press and hold the Power Button for approximately one second. •
The LED will turn on, indicating that the • RemoteCam is now turned on.
To turn the RemoteCam OFF:
Press the Power button for approximately two seconds. •
Do NOT turn the • RemoteCam off whilst recording video, or immediately
after recording video.
The • RemoteCam needs several seconds after stopping a recording to write the
video the microSD card – turning the RemoteCam off during the writing to
card process will corrupt the data, and render the video file unusable.
Automatic Shutdown:
To conserve battery power, the RemoteCam will automatically shut itself down
after 35 seconds of inactivity. If you want to continue using the RemoteCam after
this time, simply turn it on again as detailed above.
Important Notes:
When you stop a recording, it takes several seconds for the • RemoteCam to
write video data to the microSD card. If the Record/Stop button is pressed
again or the power is turned off whilst the RemoteCam is writing data to the
microSD card then the video data may be corrupted, resulting in either an
corrupt file or corrupted file structure on the microSD card. If this happens, the
video quality will be greatly reduced, if the file works at all.
See the • Shooting Guide (page 11) for more information.
Resetting the RemoteCam:
Occasionally, particularly during long periods of constant use, the RemoteCam may
freeze and stop working correctly. If this happens, the RemoteCam needs to be
reset.
To reset the RemoteCam:
Locate the Reset button, located immediately below the microSD card slot.•
Using a thin (not sharp!) object such as an unfolded paper clip or hair pin, •
press and hold the Reset button for approximately one second.
Wait whilst the • RemoteCam resets. The procedure is the same as when it is
first turned on.
Once you’ve reset the • RemoteCam, you’ll need to set the Time & Date again.
Turning on the RemoteCam