


6
!
!
!
!
!
!
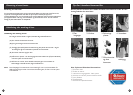
Best Results are achieved when the camera is looking down on the subject area.
The hood can be used to stop sunlight entering the lens and causing the picture to wash out
during bright daylight.
Please test all devices before final installation as it is far easier to rectify problems at this stage.
To avoid the risk of damage to your product, use only the supplied power adaptors.
Areas with a bright background may caused degradation of the image. If possible position
your camera so that it doesn’t point towards a very bright light source.
Do not cut the DC power cable of the Camera to fit with another power source.
This may result in damage to the Camera & any unauthorised modifications will void
your warranty.
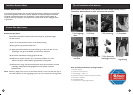
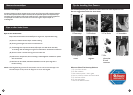
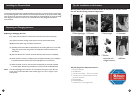
1. Deterrence is the best and most cost effective security method for:
- preventing criminal activity before it occurs is preferable to, and cheaper than,
cleaning up after it occurs
- the Swann Maxi Day/Night Camera is an example of cost effective security utilising
the 'art of deterrence' to outsmart thieves and criminals
2. Always place cameras high enough that they can't be closely inspected or easily accessed.
3. Position cameras and dummies where they can be easily seen for maximum deterrence.
4. Position a monitor where it can be seen but not touched.
5. If you have more than one camera use a monitor with channel switching function, a Quad
Processor or DVR with multiple views to show potential offenders the level of coverage you
have protecting your site.
6. Add extra Swann dummy cameras to give the impression of heightened security.
7. Purchase a Swann DVR to monitor and record activity on your cameras.
Depending on the settings used, DVRs can record for months.
8. Position a VCR with tapes or boxes close to your monitor for added effect,
implying there is a security video recorder even if there isn't one.
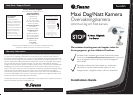
Important Information about this product
Tips for using your Swann Security camera
27
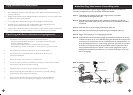
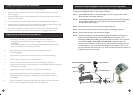
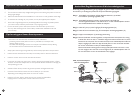
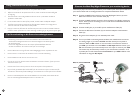
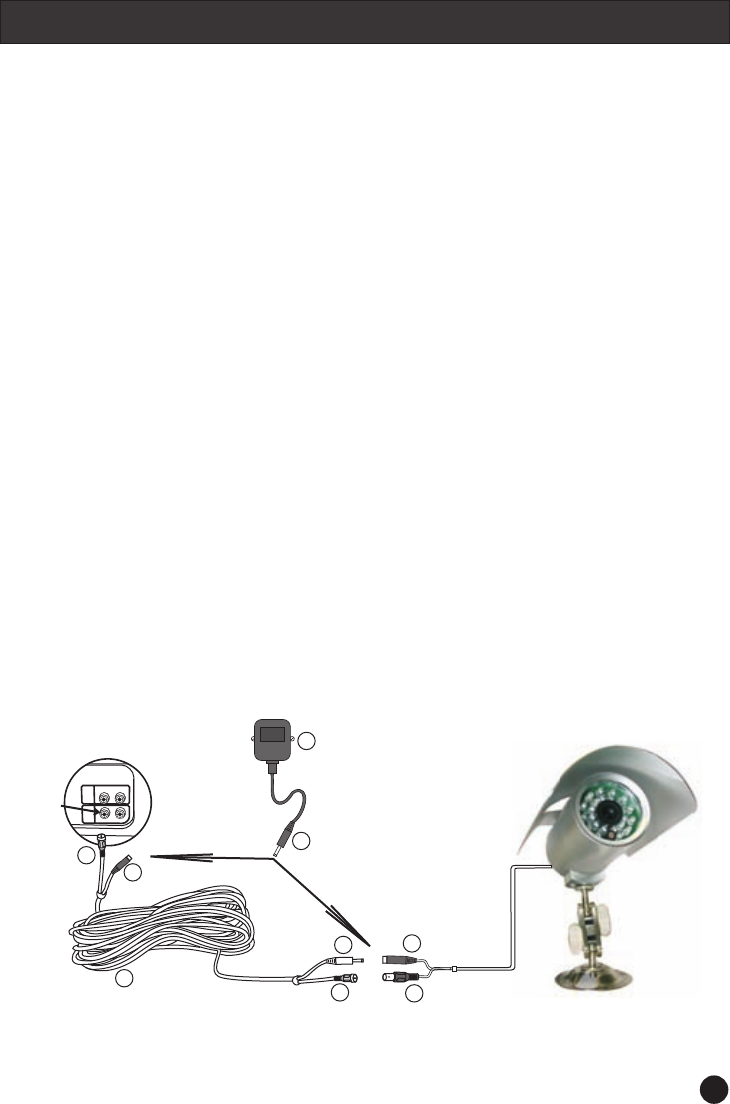
Anslut Maxi Dag/Natt kameran till din övervakningsenhet
BNC hona
DVR, TV, videobandspelare
eller övervakningsenhet
OUT
IN
VIDEO
VIDEO
AUDIO
AUDIO
Video in
DC Jack
DC plug
3c
2a
1b
DC ström kontakt
2
DC Jack
1a
Strömadapter
3
BNC hane
3b
BNC hane
3d
DC Plug
3a
Dessa steg-för-steg instruktioner ger dig möjlighet att göra en snabb och enkel installation av
din kamera. Fyll i det diagram på sidan för komponent identifieringsuppgifter.
Anslut BNC hon-kontakten på Maxi Dag/Natt Kameran (1b) till BNC
han-kontakten på förlängningskabeln (3b)
Anslut BNC förlängnings kontakt (3d) till baksidan av din DVR eller
övervakningsenhet. Notera om du ansluter till en TV eller videobandspelare använd
den inkluderade BNC honan till RCA han-adaptern.
Anslut DC Jack (1a) till DC ingången på förlängningskabeln (3a)
Anslut DC ström kontakten (2a) på strömadaptern till förlängningskabeln (3c)
Koppla in strömadaptern (2) till lämpligt strömuttag.
Starta din DVR eller övervakningsenhet och följ tillverkarens instruktioner för visning
av bilder. Om du har en A/V TV med RCA uttag kan du behöva slå över din TV till AV-
kanalen för att se kameran. För att ansluta kameran till din videobandspelare måste du
välja A/V ingången på videon och välja den kanal på din TV som du normalt använder
när du visar ett band eller en film på videobandspelaren.
Denna kanal aktiveras oftast genom en knapp på din fjärrkontroll som heter L1 eller
L2, eller möjligtvis AV1 eller AV2. Läs anvisningarna för din videobandspelare eller TV
för mer information om hur du använder deras A/V ingångar.
Steg 1:
Steg 2:
Steg 3:
Steg 4:
Steg 5:
Steg 6: