PRECAUTIONS IN SHOOTING
The optical design for Di-II takes into consideration the various features of digital
single reflex cameras. However, due to the configuration of the digital SLR cameras, even
when the Autofocus accuracy is within specifications, the focal point may be a little forward
or behind the optimum point when shooting with auto focus under some conditions.
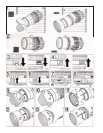
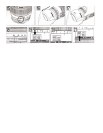
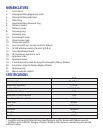
Switching to Macro Photography (Ref. Figs. 1, 18 to 21)
The model A17 allows macro photography by operating the macro selector switch.
Switching to Macro Photography
First, turn the zoom ring to align the zoom between 180-300mm. Next, slide the macro
switch (22) from the Normal to the Macro position.The lens is now switched to macro
photography mode.
The macro selector switch (22) cannot be operated unless the zooming ring (9) is between 180mm,
and 300mm. Always make sure to align the zoom ring between 180mm and 300mm before operating the
macro selector switch.
When in the macro photography mode, the zoom ring can only be rotated over the range of 180-
300mm.
When in the macro photography mode, the focusing ring rotates continuously from infinity to the
minimum focus distance of 0.95m.
The maximum magnification ratio in the macro photography mode is 1:2 (f=300mm, 0.95m)
Cancellation of Macro Photography
First, check that the focusing ring (8) is aligned to 1.5m or farther (1.5 - infinity). Next, slide
the macro selector switch (22) from the Macro position to the normal position.The macro
photography mode is now cancelled.
The macro selector switch (22) cannot be operated unless the focusing ring (8) is set to a dis-
tance between 1.5m and infinity. Always make sure to align the focus ring is set between 1.5m and infinity
before operating the macro selector switch.
The focus ring can only be turned between infinity and 1.5m when the macro selector switch is set
to the Normal position (when macro photography is cancelled.) It cannot be turned to a distance closer
than 1.5m.


