


7
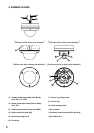
LOCK
LOCK
L-type wrench
Dome cover
Case
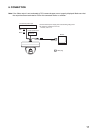
5. INSTALLATION
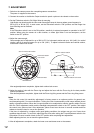
Notes
· Do not remove the protective sheet attached to the dome cover until installation work is completed. Damage
to the dome cover could result if the protective sheet is removed during installation.
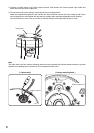
· A safety wire for connecting between the unit and ceiling is not supplied. Hook a safety wire for the unit itself
to the safety wire-fixing hole (M4, useful thread depth = 6 mm
(
0.24 inch
)
) as needed.
· Wrap self-adhesive insulation tape around coaxial cable connections and the power supply lead.
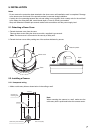
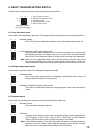
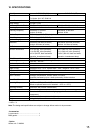
5.1. Detaching a Dome Cover
1. Detach the dome cover from the case.
Remove three screws fixing the dome cover with a supplied L-type wrench.
Note: The dome cover is connected to the case by a safety wire.
2. Detach the inner cover while pushing two of the sections indicated by arrows.
Push
Push
Detach upward.
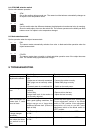
5.2. Installing a Camera
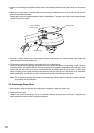
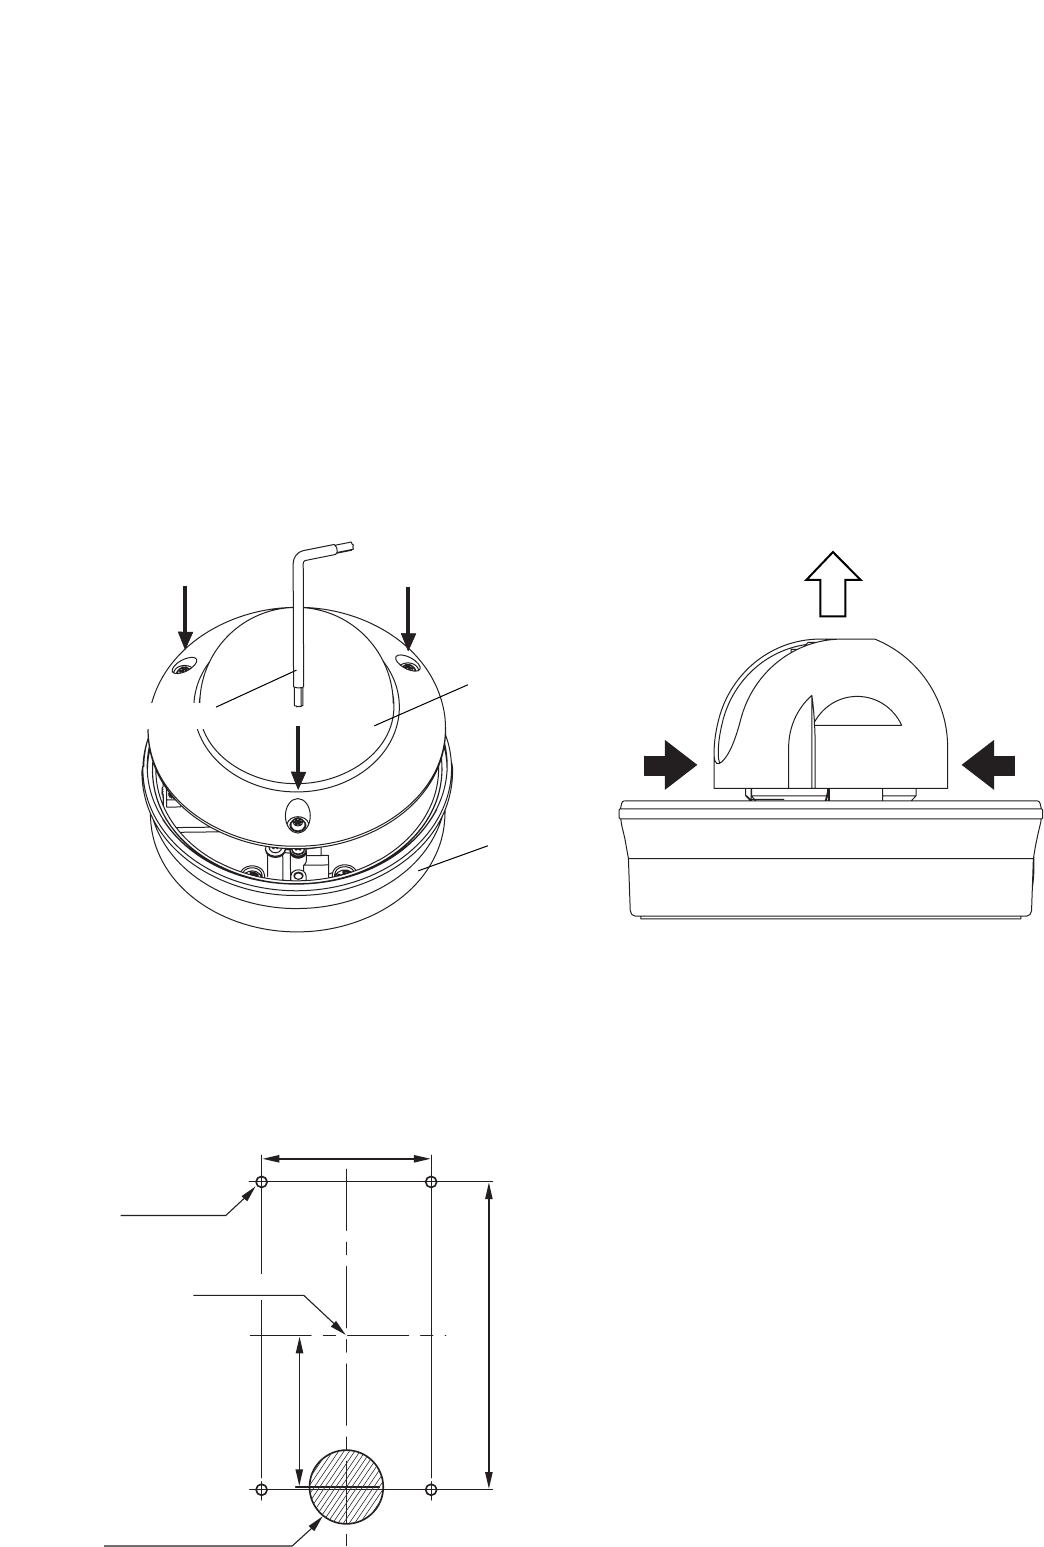
5.2.1. Unexposed wiring
1. Make a cable entry hole as shown below in the ceiling or wall.
41
(
1.6
)
83.5
(
3.3
)
46
(
1.8
)
Camera unit
mounting hole
Camera center
Cable entry hole ø20
(
0.8
)
Unit : mm
(
inch
)
Note
When mounting the camera to a wall, make sure the
cable entry hole is positioned below the camera center.