


8
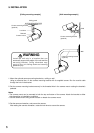
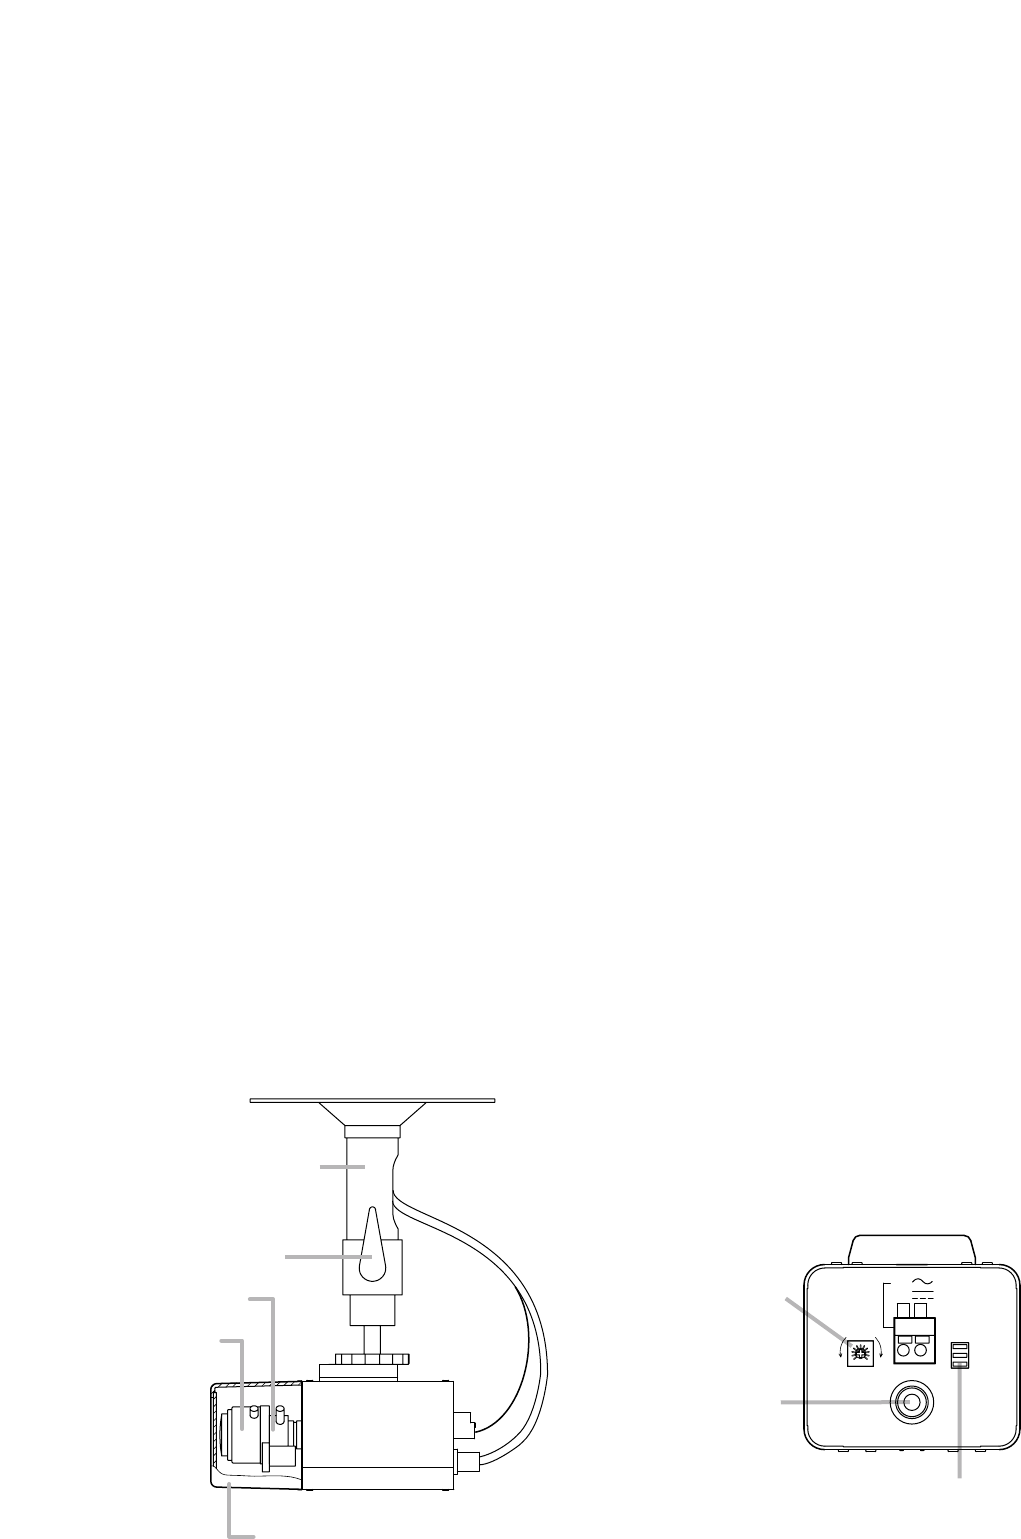
Camera mounting bracket
(optional)
Mode setting switch
Video output terminal
Iris control
Lens cover
Focus ring
Zoom ring
Lock lever
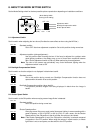
12V
24V
+
-
IRIS
L
H
OFF ON
VIDEO OUT
FOUCUS ADJ
BLC
SHUTTER
7. ADJUSTMENT
1. Switch on the camera power after completing camera connections.
Power is supplied to the camera.
2. Normally,set the Shutter Speed switch to "1/60"(NTSC) or "1/50"(PAL) position.
Flickering of the picture may interfere with the view under fluorescent lamp in the area with power frequency
of 50 Hz(NTSC) or 1/60 Hz(PAL). In such cases, set the switch to "1/100"(NTSC) or "1/120"(PAL) position,
and the image free from flickering can be obtained.
Note
If the Flicker Reduction switch of the Mode Setting switch is set to the ON position, sensitivity is reduced
compared to operation in the OFF position. When using the camera in a dark location, or where light flicker
is not an annoyance, set the switch to the OFF position.
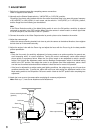
3. Connect the monitor to the Video Output terminal to permit a picture to be viewed on the monitor.
4. Adjust the camera angle.
Loosen the camera mounting bracket’s lock lever to point the camera to the desired direction, then retighten
the lock lever to fix the camera securely.
5. Adjust the angle of view with the Zoom ring and adjust the focus with the Focus ring for the best possible
picture reproduction.
Notes
• Since the Iris control (for sensitivity adjustment) is factory-preset to an optimum position for general use,
avoid tampering with it in normal conditions. Turning the control unnecessarily could cause reduced
picture quality or equipment failure. When the Iris control needs to be readjusted to match a specific
subject, first set both the Adjustment switch and the Backlight Compensation switch of the Mode setting
switch to the OFF position, then adjust the control to an optimum level. After adjustment, place a hand
over the lens for several seconds and then release to check the lens for correct iris operation.
• If the focus is adjusted for a subject under good lighting conditions, the subject may go out of focus when
conditions become dark. To avoid this, adjust the lens focus after setting the Adjustment switch of the
Mode setting switch to the ON position. Be sure to switch it back to the OFF position after completing lens
adjustment.
6. Attach the Lens cover to the camera after completing all necessary adjustments.
Note: Refer to p. 7; Lens Cover Attachment and Detachment.