


11
Windows®
2000, XP and Vista
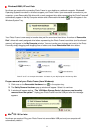
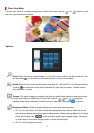
No drivers are required for connecting Photo Frame to your desktop or notebook computer. Windows®
Operating Systems have built-in drivers to support your Photo Frame. Upon successful connection to your
computer, a new Removable Disk drive with a newly assigned drive letter representing the Photo Frame will
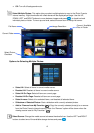
automatically appear in the My Computer window and a Removable Hardware
icon will appear in the
Windows System Tray.
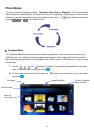
Your Photo Frame is now ready to transfer data just like an external hard drive. A number of Removable
Disk* drives with newly assigned drive letters representing the Photo Frame’s card slots (and its onboard
memory) will appear in the My Computer window. You can transfer your pictures and music to the Photo
Frame by simply dragging-and-dropping files or folders onto these Removable Disk drive letters.
*Note: E: and F: are example drive letters - the letters in your “My Computer” window may differ
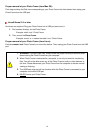
Proper removal of your Photo Frame (from Windows):
1.
Click once on the Removable Hardware icon
in the system tray.
2.
The Safely Remove Hardware pop-up window will appear. Select it to continue.
3.
A window will appear stating, “The ‘USB Mass Storage Device’ device can now be safely
removed from the system.” Unplug your Photo Frame from the USB port after this message
appears.
Mac
®
OS 10.0 or later
No drivers are required. Plug your Photo Frame into an available USB port and your computer will
automatically detect it.