8
mark
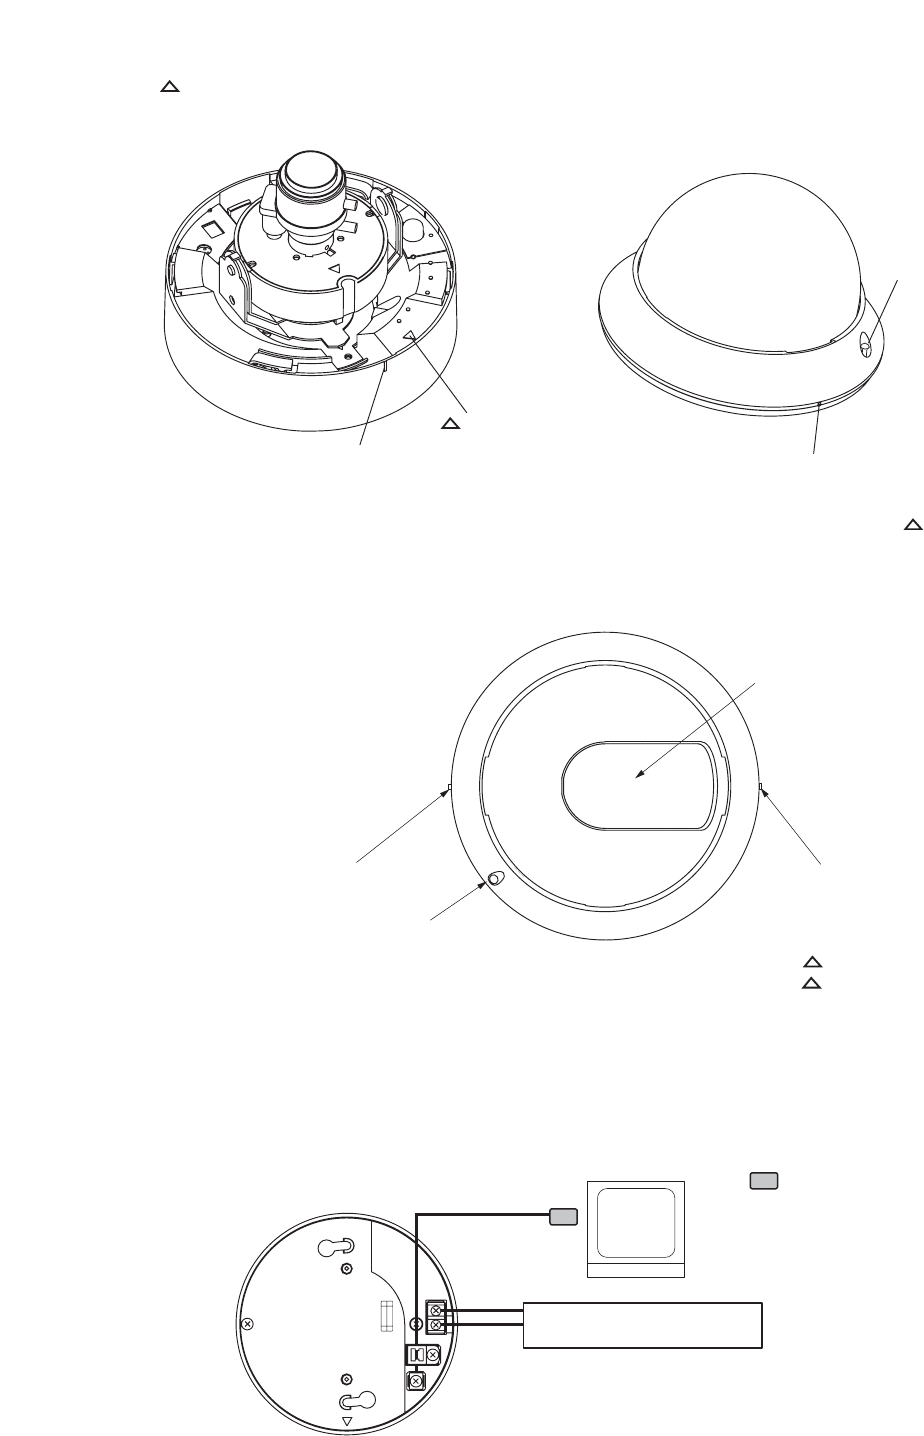
Alignment mark
Alignment mark
Dome cover
turn stop screw
• Ceiling mounting : Align the front alignment mark with the camera’s mark.
• Wall mounting : Align the rear alignment mark with the camera’s mark.
Dome cover external view (as supplied from the factory)
Camera window
Rear alignment mark
Front alignment mark
Dome cover turn stop screw
-
+
21
DC12V IN
AC24V IN
24 V AC or 12 V DC
Video output
Video input
Monitor
: BNC plug
Use the external power supply unit of the following rating when
the camera is operated on 12 V DC.
12 V DC, over 1.0 A
3-2. Attach the dome cover to the camera by aligning the dome cover’s alignment mark with the camera’s
mark and then rotating the cover clockwise.
(Be sure that the dome cover’s alignment mark is properly aligned with the camera’s alignment mark.)
About the alignment marks
The dome cover has two alignment marks. Note that the mark to be aligned with the camera’s mark differs
depending on whether the camera is being mounted on a wall or ceiling.
6. CONNECTIONS
Note: If the Video output is not terminated at 75 Ω, video pictures are not properly displayed.
Make sure that the output has been terminated at 75 Ω at the connected monitor or switcher.


