


44
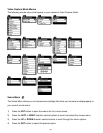
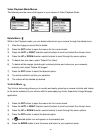
3) The “Date Setup” submenu will open
4) Scroll through the window with the right and left navigation buttons. For each field in the
menu, use the UP and DOWN navigation buttons to set the time and date.
5) Press the MODE button to exit the menu and return to your previous screen.
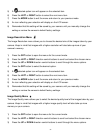
Audio Menu
The Audio menu allows you to control the camera‟s ability to record audio in the video clips
recorded with your camera in addition to the video record.
Note: The Audio menu may not be available in some versions of this camera.
1) Press the SET button to open the menus for the current mode.
2) Press the LEFT or RIGHT direction control buttons to scroll and select the chosen menu.
3) Press the UP or DOWN direction control buttons to scroll through the menu options.
4) Press the SET button to select the desired option.
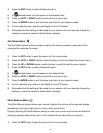
5) A selected option icon will appear on the selected item.
6) Press the LEFT or RIGHT button to select the next menu item.
7) Press the MODE button to exit the menu and return to your previous mode.
8) An icon reflecting your selection will display on the LCD screen.
9) Remember that this setting will be saved by your camera until you manually change the
setting or restore the camera‟s default factory settings.
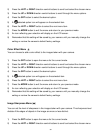
Auto Power Off Menu
You can use the Auto Power Off feature in order to conserve you camera‟s battery life. The
designated time represents when your camera will automatically power off.
When the camera sits idle for the designated period of time, the camera will shut off completely
and will need to be turned on again with the power button before the next use.
1) Press the SET button to open the menus for the current mode.
2) Press the LEFT or RIGHT direction control buttons to scroll and select the chosen menu.
3) Press the UP or DOWN direction control buttons to scroll through the menu options.
4) Press the SET (OK) button to select the desired option.