6
Tip: Liquid ingredients can be measured in the measured pour lid, using
the measurement marking. Solid ingredients can be added by simply
dropping them through the fill area into the blender jar. Replace the
measured pour lid after adding ingredients.
Note: To remove blender jar cover, lift edge of cover upward. Lifting
measured pour lid will not remove cover.
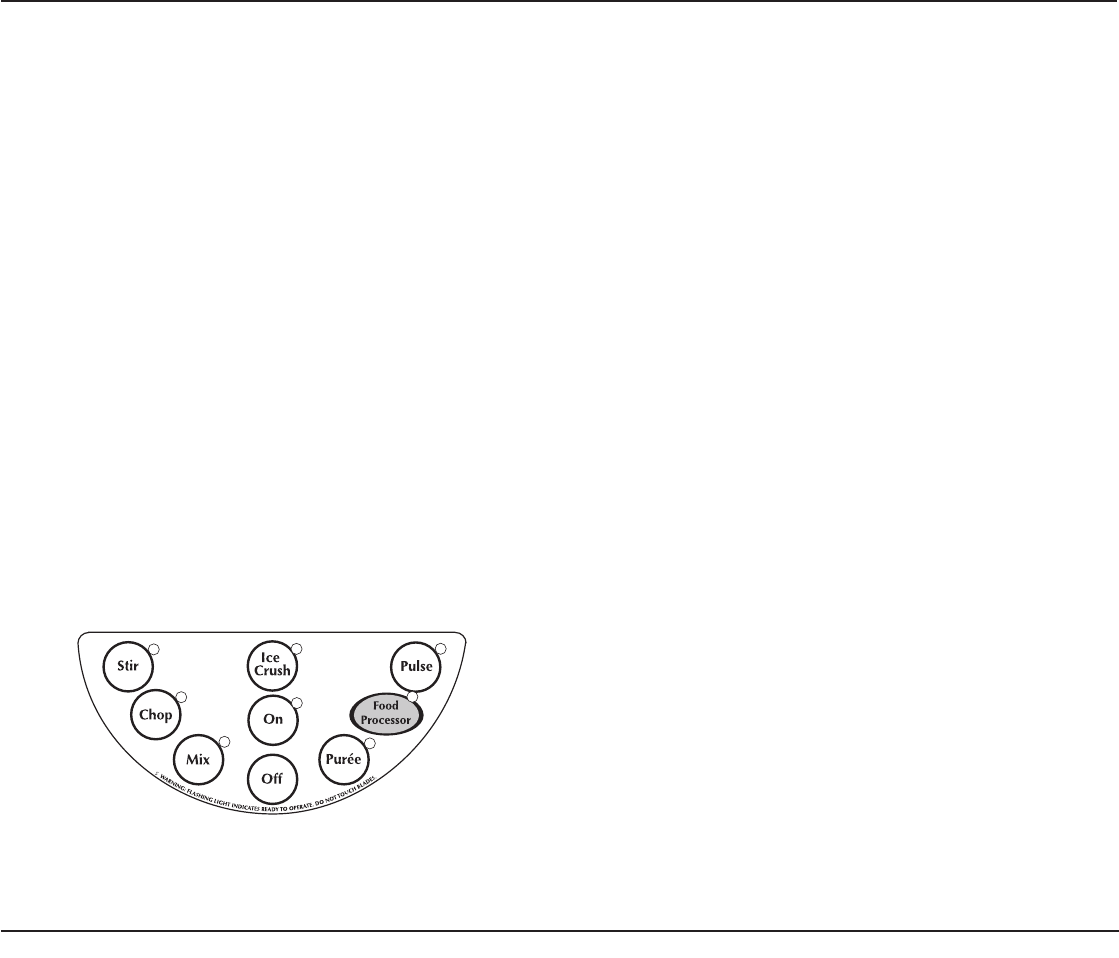
3. To start blending: press the On button. The red On LED light will
flash, indicating that the blender is turned on but no speed has been
selected.
4. Press the desired blending speed: both the On indicator light and
the activated speed indicator light will glow. The blender will now be
functioning at the desired speed. It is possible to switch speeds
without pressing the Off button, by simply pushing the next desired
speed button.
5. To reset the blender: The unit has an advanced thermal resettable
fuse feature. If the event of an overload condition the unit will shut
down to protect the motor from overheating. When this happens, to
reset the unit, unplug the blender and let it cool down for a minimum
of 15 minutes. Then look to reduce the contents and/or clear any
jams, then restart as noted in the operating directions.
6. To stop the blending process: re-press the activated speed button.
The blending process will stop. The red On indicator light will
continue to flash to let you know that the blender is still on and can
be reactivated by pushing the desired speed button. The blender
can be completely deactivated and stopped from any speed by
pushing the Off button. You will need to press the On button again
to continue blending.
7. Pulse Mode: while the blender is turned on, you can create a burst
of power for quick, efficient blending by activating this function. To
do so, first push the Pulse button, which will cause the Pulse
indicator light to flash. Next, push and release the desired speed
button. Repeat as desired. You determine the duration of each pulse.
While pulsing, all indicator lights (the On, the Pulse, and the desired
speed) will glow.
The Pulse function can be used to break apart larger pieces of food
or to control the texture of food when chopping. The Pulse function
is also effective in starting the blending process when you do not
want continuous power, or when processing items that do not
require an extended amount of blending.
8. To crush ice: Use blender jar only. The SmartPower Duet
®
Blender/
Food Processor motor is strong enough to crush ice without liquid at
any speed; however, for your convenience we have preset the best
speed for ice crushing. To give you greater control, the Ice Crush
function automatically operates as a Pulse function. To crush ice,
place ice cubes in the blender jar, and place the cover and the
measured pour lid on the blender jar. Press the On button. Press the
Ice Crush button in short pulses until ice is crushed to desired
consistency. See the Recipe Tips section on page 12 for more
details.
9. To dislodge food: use a rubber or plastic spatula to help remove
food lodged around the cutting assembly.
DO NOT USE SPATULA UNTIL YOU HAVE TURNED OFF AND
UNPLUGGED THE BLENDER. Replace the cover and measured
pour lid and continue blending if necessary. Make sure spatula is not
inside the blender jar before blending.
10. When finished blending: press the Off button, and unplug the
blender from the electrical outlet. Never remove the blender jar from
the motor base until pressing the Off button. Do not twist locking
ring from blender jar when removing jar from motor base. Simply lift
blender jar from motor base. Do not place hands into blender jar
with blender plugged in.
