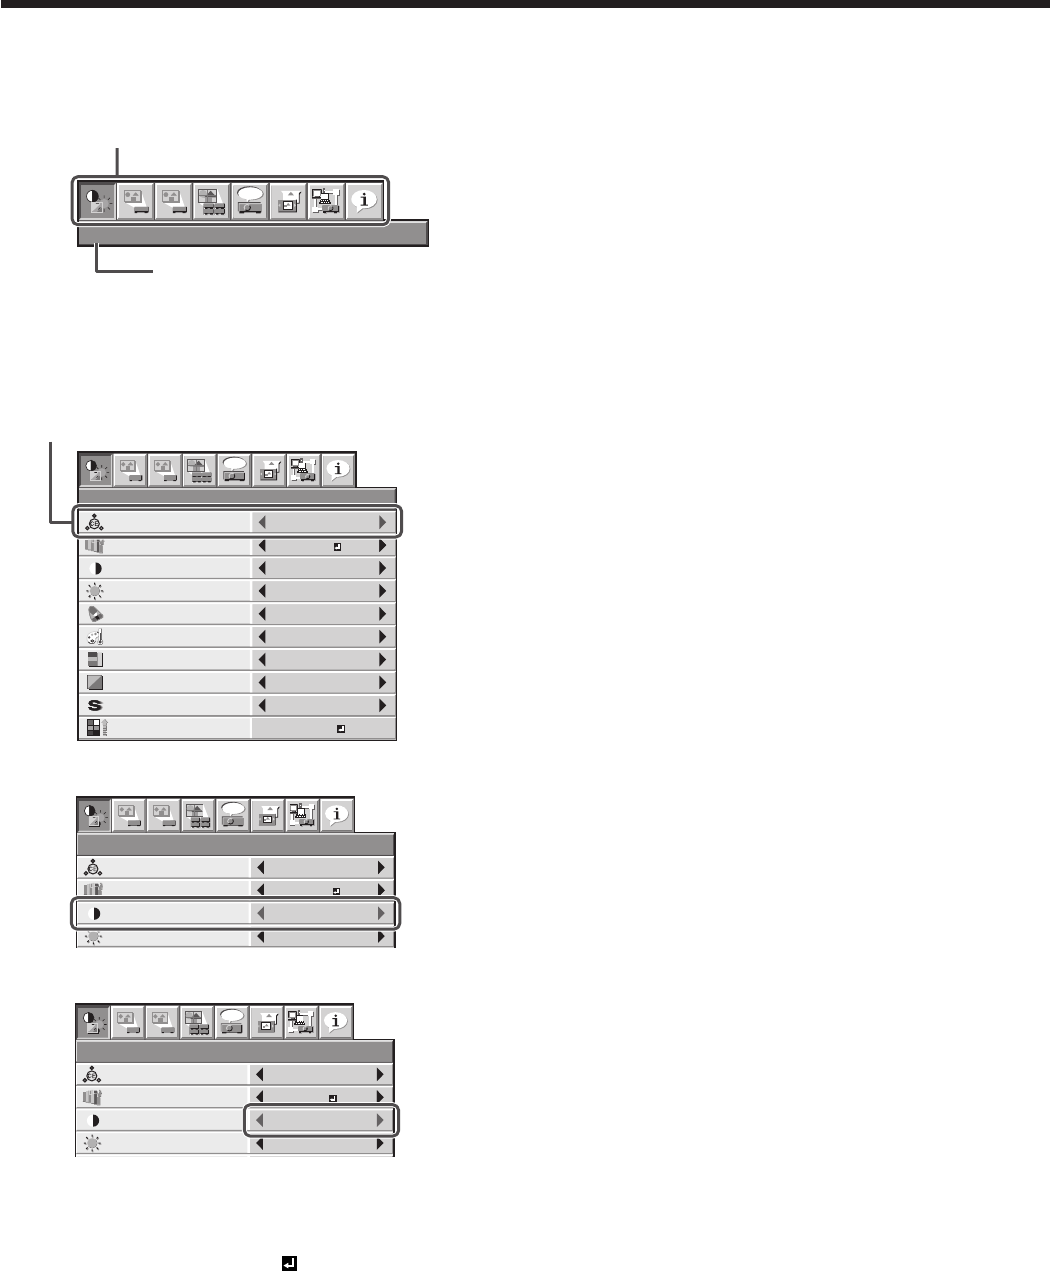
How to set the menus
1. Press the MENU button.
• Themenuselectionbarisdisplayed.
IMAGE
1
1
2
2
opt.
Selectable menus are displayed by icons. (The menu
icon being selected is displayed on a blue background.)
The name of the menu being
selected is displayed.
2. Press the or button to select a menu to use.
3. Press the ENTER button (or button).
• Theselectedmenuisdisplayed.
COMPUTER
0
COLOR
0
TINT
0SHARPNESS
ADVANCED MENU
COLOR MATRIX
SUPER RESOLUTION
IMAGE
1
1
2
2
BRIGHTNESS 0
COLOR ENHANCER
AUTO
CONTRAST
STANDARDCOLOR TEMP.
opt.
0
ENTER
ON
The item being selected is
displayed in red letters.
4. Press the or button to select an item to adjust.
COMPUTER
0
COLOR
0
TINT
0SHARPNESS
ADVANCED MENU
COLOR MATRIX
SUPER RESOLUTION
IMAGE
1
1
2
2
BRIGHTNESS 0
COLOR ENHANCER
AUTO
CONTRAST
STANDARDCOLOR TEMP.
opt.
0
ENTER
ON
5. Set the selected item by pressing the or button.
COMPUTER
0
COLOR
0
TINT
0SHARPNESS
ADVANCED MENU
COLOR MATRIX
IMAGE
1
1
2
2
BRIGHTNESS 0
COLOR ENHANCER
AUTO
CONTRAST
STANDARDCOLOR TEMP.
opt.
2
ENTER
SUPER RESOLUTION
ON
6. To cancel the menu, press the MENU button
several times.
Important:
• When an item marked with “ ” is selected,
pressing the ENTER button makes its value
effective or displays another screen for further
setting.
• When the MENU button doesn’t function, unplug
the power cord from the wall outlet. Wait about 10
minutes, plug the power cord in, and try again.
• The menus and screens shown in this manual may
be different from those of the actual projector.
Menu operation (continued)
