8
Hookups and Settings
When unpacking, check the supplied
accessories by referring to page 29.
b
• Plug cables securely to prevent unwanted noise.
• Refer to the operating instructions supplied with
the components to be connected.
• Be sure to disconnect the mains lead of each
component before connecting.
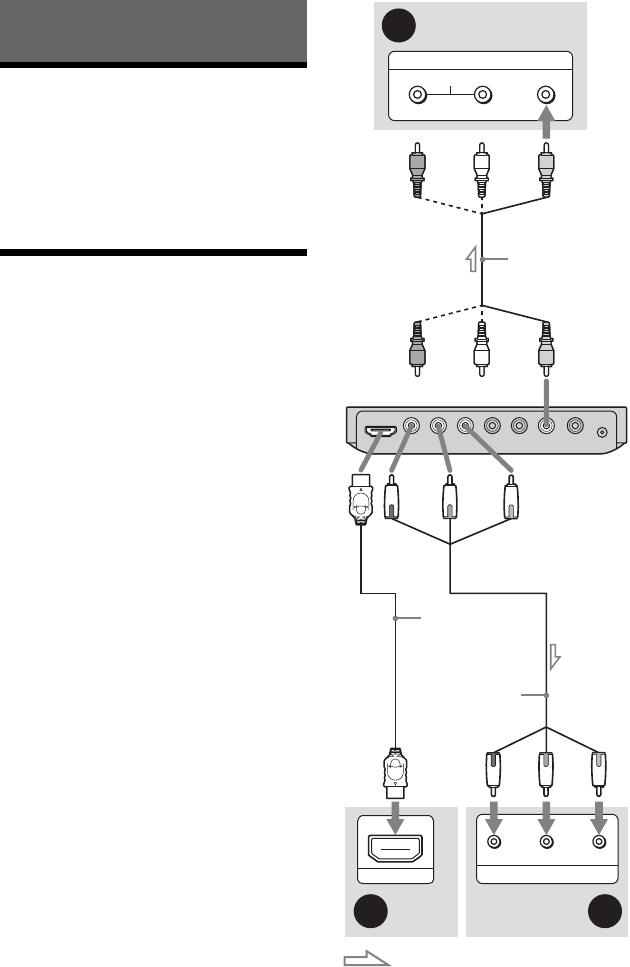
Step 1: Connecting to
Your TV
Connect this player to your TV using a video
cable. Select one of the patterns A through
C, according to the input jack on your TV.
In order to view progressive signal (525p or
625p) pictures with a compatible TV, you
must use pattern B . Select pattern C when
connecting to a TV equipped with HDMI
input. Be sure to also make an audio
connection in the case of patterns A and B
(page 10).
A Video input jack
You will enjoy standard quality images.
B Component video input jacks
(Y, P
B/CB, PR/CR)
You will enjoy accurate colour reproduction
and high quality images.
C HDMI/DVI input jack
Use a certified Sony HDMI cord (not
supplied) to enjoy high quality digital picture
and sound through the HDMI OUT jack.
R
AUDIO VIDEO
L
INPUT
PB/CB PR/CRY
COMPONENT VIDEO IN
B
A
C
HDMI IN
Audio/video cable
(supplied)
Component
video cable
(not supplied)
(red)
(green)
TV
(red)
(green)
(blue) (red)
to LINE OUT (VIDEO)
: Signal flow
USB media
player
to COMPONENT
VIDEO OUT
(blue)
(red)
(white) (yellow)
(white) (yellow)
TV
HDMI cord
(not supplied)
to HDMI
OUT
TV


