P/N 313-001, REV C © 2002 Titan Tool Inc. All rights reserved. 3
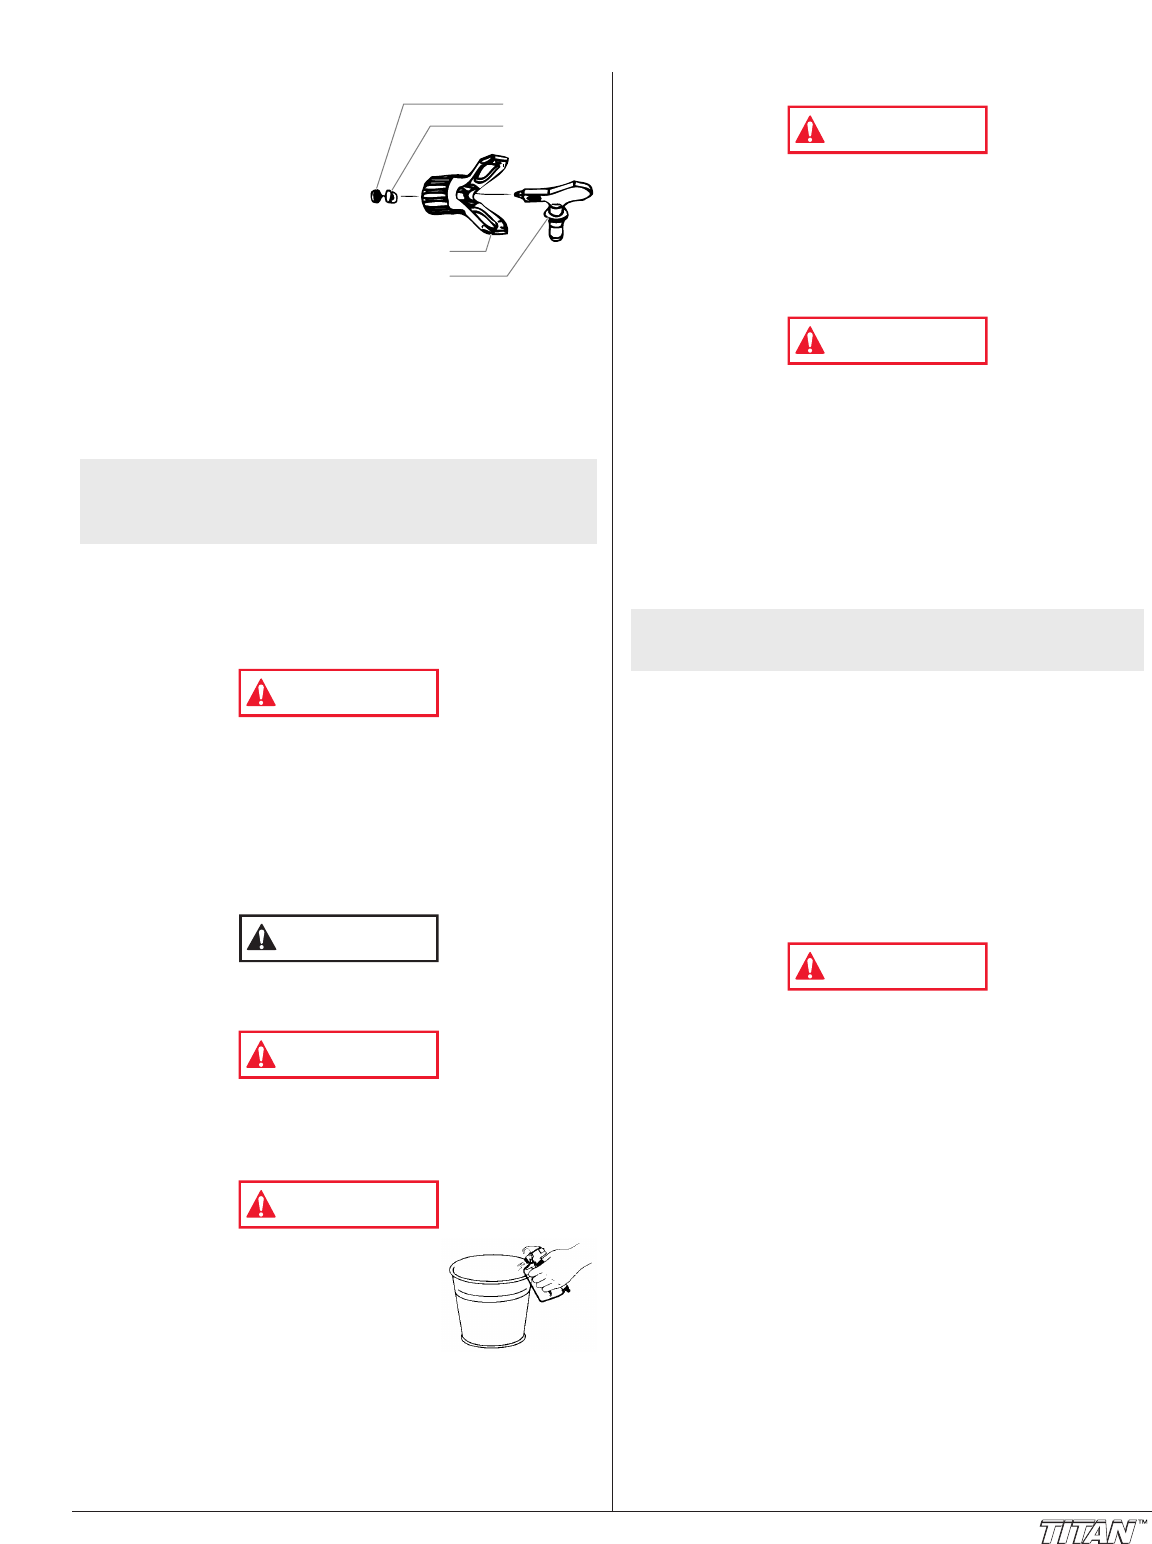
Removing the Gasket and Seal
1. Remove the tip from the tip
guard.
2. Insert the tip handle through
the front of the tip guard.
3. Push the gasket and seal out
through the back of the tip
guard.
Identifying Tip Sizes
To identify tip sizes, use the
following formula. A “517” tip size will be used in this example.
The first digit multiplied by two represents the size of the spray
pattern when spraying 12” away from the work surface:
5 x 2 = 10” spray pattern
The second two digits represent the diameter of the orifice on the
tip:
17 = .017” orifice
Cleanup
Maintaining a clean gun is important to ensure trouble-free
operation. Flush the gun after each use and store in a dry
location. Do not leave the gun or any of its parts in water or
solvents.
Special cleanup instructions for use with flammable
solvents:
• Always flush spray gun preferably outside and at least one
hose length from spray pump.
• If collecting flushed solvents in a one gallon metal container,
place it into an empty five gallon container, then flush
solvents.
• Area must be free of flammable vapors.
• Follow all cleanup instructions.
The pump, hose, and gun should be cleaned thoroughly
after daily use. Failure to do so permits material to cake,
seriously affecting the performance of the unit.
Always spray at minimum pressure with the gun nozzle tip
removed when using mineral spirits or any other solvent to
clean the pump, hose, or gun. Static electricity buildup may
result in a fire or explosion in the presence of flammable
vapors.
Always remove the tip/tip guard, adjust
the pressure to its lowest setting, and
hold the gun firmly against a metal
container while flushing.
NOTE: Worn spray tips will adversely affect the spray
pattern and result in reduced production, poor
finish, and wasted material. Replace worn tips
immediately.
Tip Seal
Tip Guard
Tip Gasket
Tip
Maintenance
Follow all safety precautions as described in the Safety
Precautions section of this manual before proceeding.
Replacing/Servicing the Seal Assembly
If your spray gun leaks or spits at the tip when you release the
trigger, the needle or seat is worn, damaged, or dirty and must
be replaced or cleaned. Refer to the Parts List section on the
back of this manual for part identification.
Never attempt to perform maintenance on the spray gun
without first performing the “Pressure Relief Procedure.”
1. Disconnect the spray hose from the gun.
2. Remove the tip and tip guard.
3. With the trigger depressed, remove the diffuser and the
copper washer from the front of the gun housing.
4. Remove the head screw, trigger pivot screw, and trigger.
5. Remove the plug from the rear of the gun housing.
6. Insert the repair tool into the passage at the rear of the gun
housing, and force the seal assembly out through the front of
the gun.
7. Lubricate the o-rings on the new seal assembly.
8. Install the new seal assembly into the front of the gun hous-
ing. Using the open end of the repair tool, force the seal
assembly completely into the gun housing. Push on the ball
at the front of the seal assembly to ensure complete inser-
tion.
9. Reattach the trigger, trigger pivot screw, and head screw.
10. WIth the trigger depressed, install the copper washer
followed by the diffuser into the front of the gun housing and
tighten securely with a wrench.
11.Perform the “Adjusting the Seal Assembly” procedure
described below.
Adjusting the Seal Assembly
Proper adjustment of the seal assembly is essential to
ensure positive shut-off when the trigger is released.
1. Pull the trigger and engage the trigger lock.
2. Insert a flat head screwdriver into the passage at the rear of
the gun housing up to the seal assembly.
3. Turn the seal assembly clockwise until the trigger lock can-
not be disengaged. Then, back off the seal assembly by
turning it 1-1/4 turns counterclockwise.
4. Thread the plug into the passage at the rear of the gun
housing and tighten securely.
NOTE: If a repair tool is not available, remove one of the
screws from the bottom of the gun handle and
use it to tap on the back of the seal assembly.
