


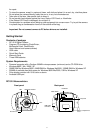
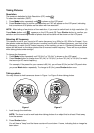
Top panel
Powering Up
Battery Installation
1. Slide the compartment cover at the bottom of your camera. See Figure 1.
2. Install 3-AAA alkaline batteries into the battery compartment. See Figure 2.
3. Make sure the battery polarities are oriented exactly as shown. See Figure 2.
4. Close battery compartment cover.
Figure 1 Figure 2
CAUTION - To avoid battery leakage
• Non-rechargeable batteries are not to be recharged
• Be sure to insert batteries in correct orientation
• Remove batteries from the camera before extended storage
• Always remove old or dead batteries from the camera
• Do not short-circuit the power supply terminals
• Check that the contact surfaces are clean and bright before installing batteries
Battery Power Levels
If at anytime the frame counter information begins to flash in the LCD panel, the battery level is
low. Download your photos to the computer and replace the batteries immediately.
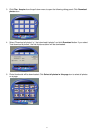
Turning camera on / off
Press Mode button to power on the camera. Two short beeps will sound.
(High Resolution) will
appear momentarily before
(frame counter) is shown on the LCD panel, indicating that a maximum
of 20 photos can be taken with high resolution.
To power off the camera, press Mode button repeatedly until "oF" displays on the LCD panel. Then
press Shutter button.
Auto Off
The camera will automatically turn off in 30 seconds if no operation has been performed.
Taking Pictures
Resolution
The camera is defaulted to High Resolution (CIF) mode
.
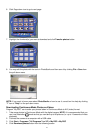
To select low resolution (QCIF):
1. Press Mode button repeatedly until
is shown on the LCD panel.
2. Press Shutter button to confirm your selection and "80" will appear on the LCD panel, indicating
that a maximum of 80 photos can be taken with low resolution.
NOTE: After taking a few photos of low resolution, if you want to switch back to high resolution: (1)
Press Mode button until
appears on the LCD panel (2) Press Shutter button to confirm your
selection and the remaining number of photos that can be taken will be shown on the LCD panel.
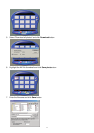
Selecting AC frequency
This camera is set to your country's AC mains frequency (e.g. 60Hz for US, 50Hz for Europe). If you
take photos under an electric light source in another country with a different frequency, you have to set
the frequency to match the AC mains frequency of the country you are in. Otherwise horizontal, black
stripes will be found on the taken photos due to incorrect mains frequency. There will be no problems
when taking photos under sunlight.
To change the frequency:
1. Press Mode button repeatedly until "60 (Hz)" or "50 (Hz)" is shown on the LCD panel.
2. Press Shutter button to change from "60 (Hz)" to "50 (Hz)" (or from "50 (Hz)" to "60 (Hz)" to match
that country's AC mains frequency.
For example, if the preset for your camera is 60 (Hz), you will see 50 (Hz) on the LCD panel when
you press Mode button repeatedly. To change to 50 (Hz), press Shutter button once.
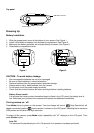
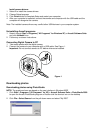
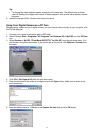
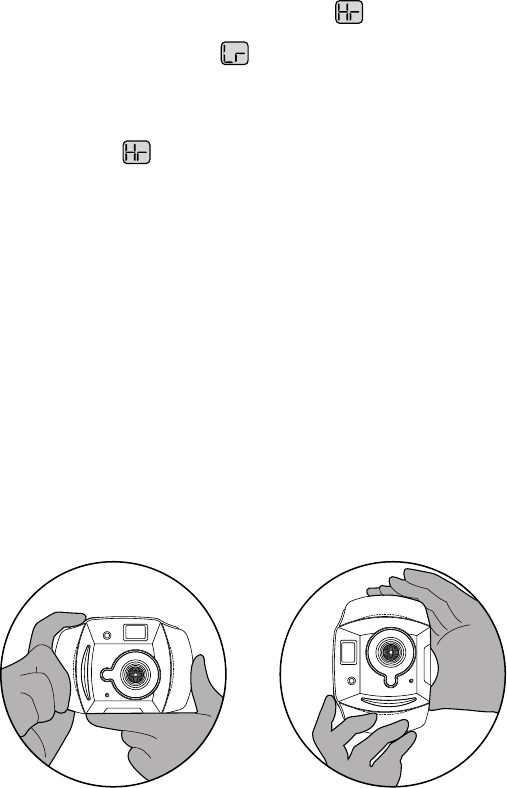
Taking a photo
You may choose to hold camera as shown in Figure 1 or Figure 2 when taking photos.
Figure 1 Figure 2
1. Look through the viewfinder.
NOTE: The focus is set to work best when taking photos of an object that is at least 2 feet away
from the camera.
2. Press Shutter button.
You will hear a "beep" and the frame counter will count down 1 frame, indicating that an image has
been taken.
5