


Page 10 AXIS M31-VE Network Camera Series Installation Guide
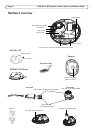
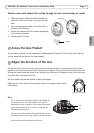
Adjust the focus
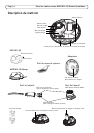
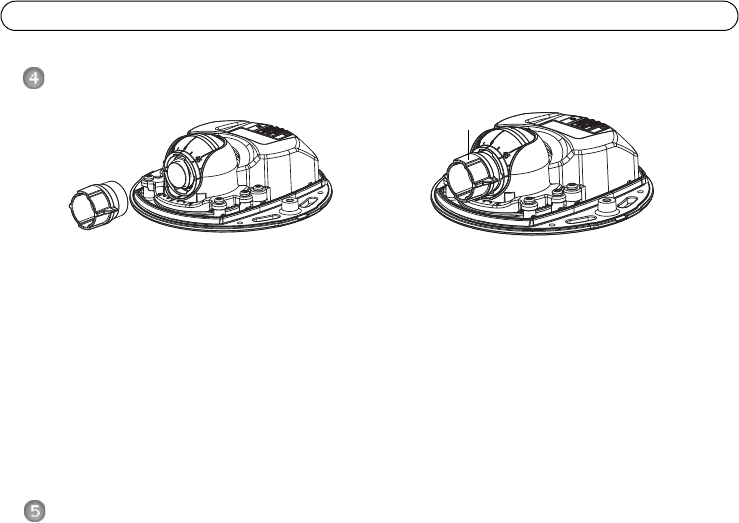
Pull the lens tool from the lens tool holder, turn it around and fit the black rubber side to the lens.
Adjust the focus. Check the image in the Live View page, and move the lens to the desired position
using the transparent side of the lens tool. See illustration under Hardware overview, on page 6.
After replacing the top cover, the image may appear slightly out of focus due to the optical effect
of the dome (especially in the case of tele/zoom lenses). To compensate, focus on an object slightly
closer than the intended area. If possible, position the top cover in front of the lens while adjusting
focus.
Complete the installation
To complete the installation, replace the top cover with care and tighten the captive screws. Ensure
that the rubber gasket in the top cover and the ridge it fits into in the bottom plate are dust-free.
Check the live view at this point to see if the weather shield on the top cover interferes with the
image. If it does, adjust the lens again as described above.
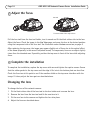
Changing the lens
To change the lens of the network camera:
1. Fit the black rubber side of the lens tool to the lens holder and unscrew the lens.
2. Remove the lens from the lens tool and fix the new lens to it.
3. Fit the new lens to the camera and tighten the lens into place.
4. Adjust the focus as described above.
Fit black rubber side to adjust focus
lens tool