


Camera Switching
Camera Switching is when you let ACE alternate between the camera feeds it displays. To do this
you need to add a SwitchCam object, which is done in the same way as for cameras, albums, etc.
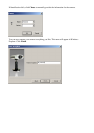
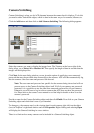
Click the Add button and then click on Add Camera Switching. The following dialog appears:
Select the cameras you want to display the images from. The 2 buttons at the lower right of the
dialog allow you to Select All or Deselect All. Then specify the length of time in seconds that the
images will be displayed for.
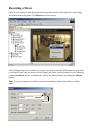
Click Next. In the next dialog window you are given the option of specifying a user name and
password that must be provided when connecting to the cameras. ACE will then automatically log
into the cameras. One user name and password can be used.
Note: The user name and password are specific for the cameras being viewed and will not
prevent access to the Camera Switching object itself. If all of your cameras are password
protected, it is a good idea to use the same user name and password for all your cameras.
Otherwise you will have to log in to those cameras that ACE does not have the password
for. Please refer to the camera’s user manual or on-line help for details on how to set the
camera’s password.
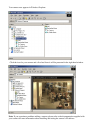
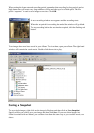
Provide a name for the Camera Switching object and then click Finish. Now click on your Camera
Switching object and check that it runs as you intended.
To change e.g. the cameras used, or the viewing time for each camera, right-click on the object
(icon) in Explorer’s right hand window and click Properties. Right-clicking and selecting Open
will display the Camera Switching in a new window.
There is no limit on how many cameras can be included in a Camera Switching object.