


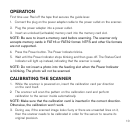

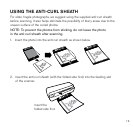
2. Insert the original into the feeding slot.
WARNING: Do not scan glossy photos in humid environments (humidity
higher than 70% RH). Otherwise, the surface of the photo will become sticky
and cause the scanner to jam.
3. The original will be fed into the slot and scanned automatically. The Power and
Status/Card Indicators blink while scanning.
4. When scanning is completed, the Power and Status/Card Indicators will keep
blinking for awhile, indicating that the scanner is processing the image and
storing the file onto the memory card.
5. Wait until the indicators stop blinking before inserting and scanning the
next original.
WARNING: Insert only one sheet at a time. Insert the next original only when
the previous one is done. Otherwise, the scanner will fail to function normally.
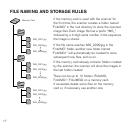
NOTE: Do not remove the memory card or disconnect the power supply
while the indicators are blinking. This scanner only supports output images
in JPEG (.jpg) format, and the date/time attribute will not be added. For
more information on how this scanner stores the scanned image files on the
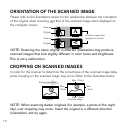
memory card, see “Orientation of the Scanned Image” on page 13. If the
Memory Card is near full (lower than 1MB), the Status/Card Indicator blinks
(see “LED Indicator Light Key” on page 9). Use another card or delete some
files on it if necessary.
6. To turn off the scanner after all originals are scanned, press and hold the
Power button for 1 second. The power indicator will blink and then go off.
7. Now it’s OK to disconnect the power and remove the memory card from the scanner.
12