4
Introduction
Preparing
a Sample
Basic
Windows
Pre-adjustments
Image
Characteristics
Saving
Preferences
Reference
Contents
Preparing Sample Images
PSE uses a sample image to perform the various adjustments and save
the adjusted results as an original Picture Style file. For this reason, a
sample image (p.2) to be used for this purpose needs to be prepared in
advance and saved on your computer.
The settings performed in PSE are saved as a Picture Style file (p.15)
which is separate from the sample image, and the sample image used
to perform the adjustments itself is not affected at all.
Starting up PSE
Double-click the [Picture Style Editor] icon on the
desktop.
¿The main window (Description on the right) appears when PSE
starts up.
You can also start up PSE from the camera software “EOS Utility”.
Refer to the “Function for Use with the Accessories” of “Reference”
in “EOS Utility Instruction Manual” (PDF electronic manual) for
details.
Opening a Sample Image
Open a sample image and perform various adjustments with that image
as a basis.
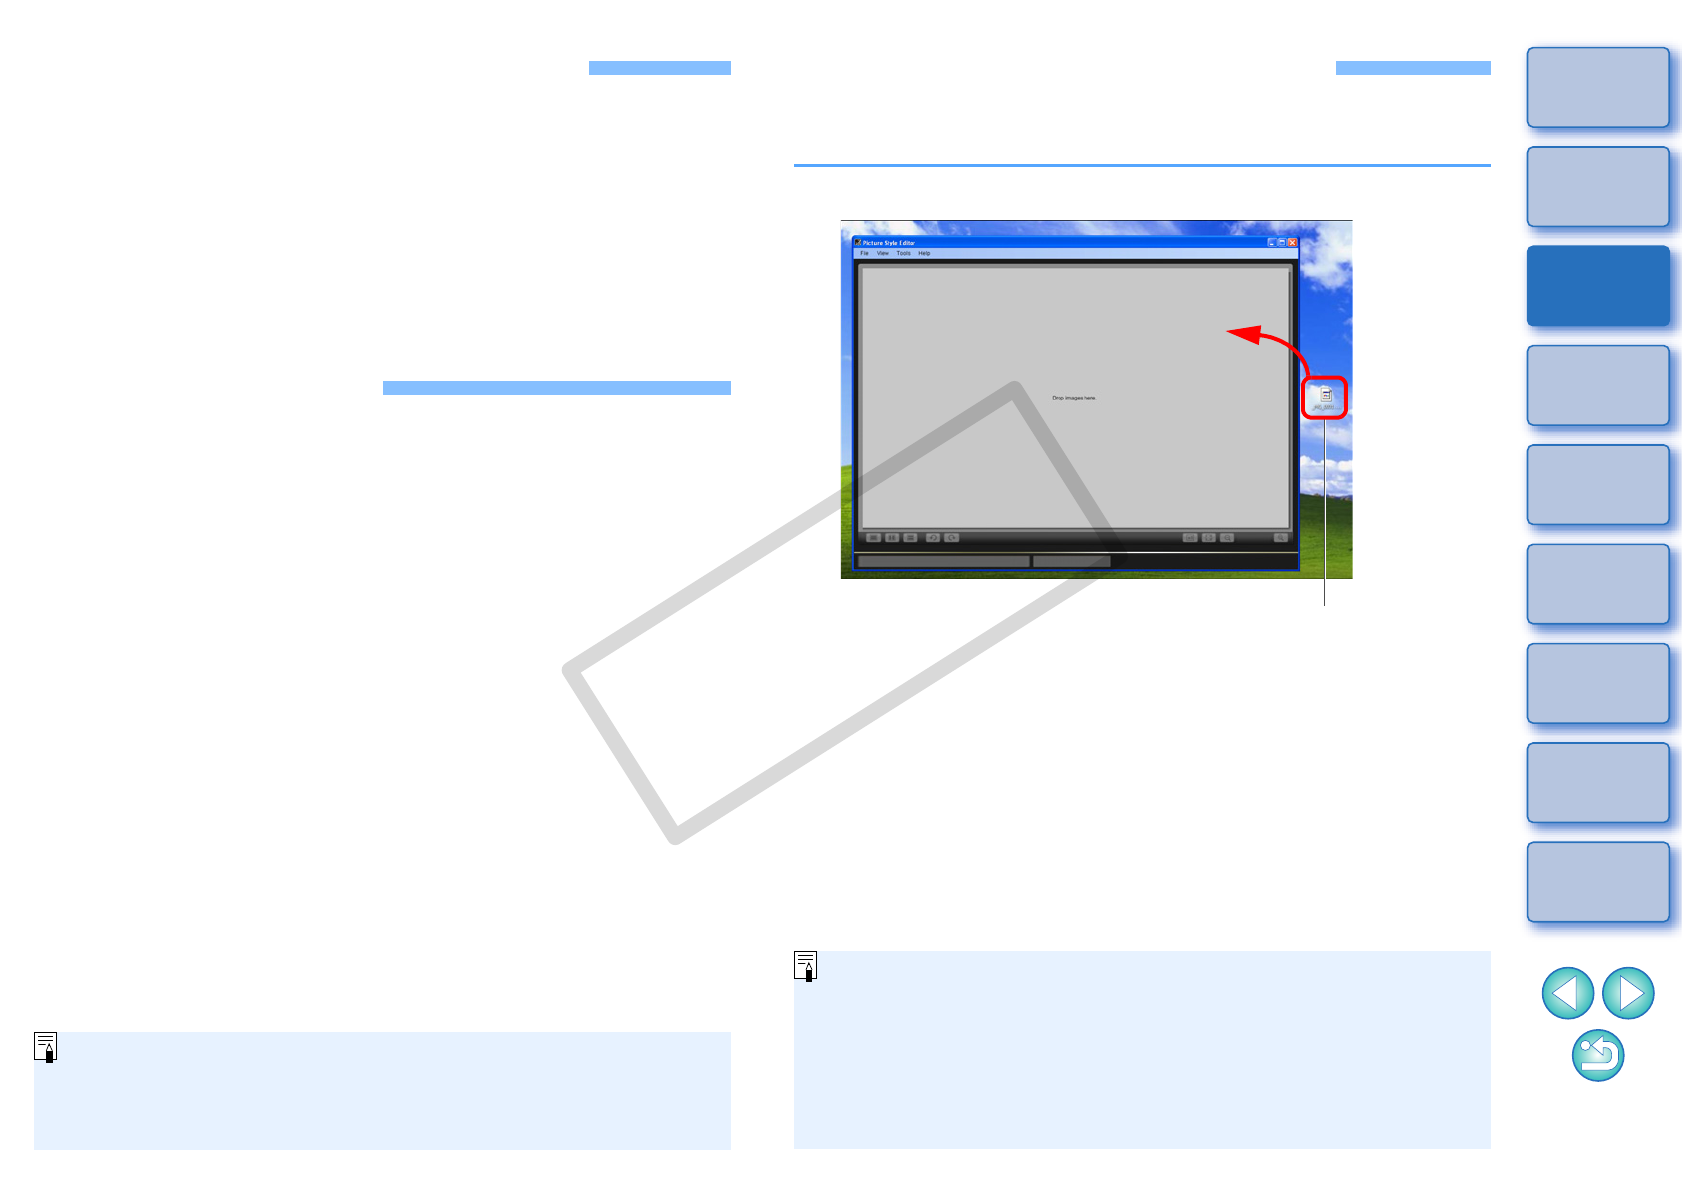
Drag and drop a sample image to the main window.
¿The sample image is displayed in the main window with the
camera settings at the time of shooting.
¿The [Tool palette] appears.
Drag and drop
O If you adjust a RAW image in Digital Photo Professional
(hereinafter, “DPP”) and then open it as a sample image with
PSE, the adjustments made in DPP will not appear in the image.
O If you open a RAW image, which has had the Auto Lighting
Optimizer settings set in the camera or DPP, as a sample image
with PSE, the Auto Lighting Optimizer settings set in the camera
or DPP will not appear in the image.
C OPY


