


67
E
Recording
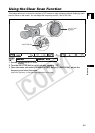
Using the Skin Detail Function
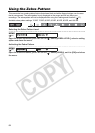
With the skin detail function, areas in the picture that have skin-tone characteristics will be detected, and
the details in these areas will be softened in order to conceal skin imperfections. On the screen, those
skin areas will be identified by a zebra pattern alternating with the normal picture (on a connected TV or
computer screen they will appear in white instead).
You can adjust the hue, chroma, area and Y level as required, to determine the areas that will be
detected as skin areas.
Activating the Skin Detail Function
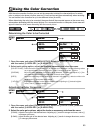
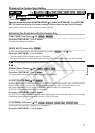
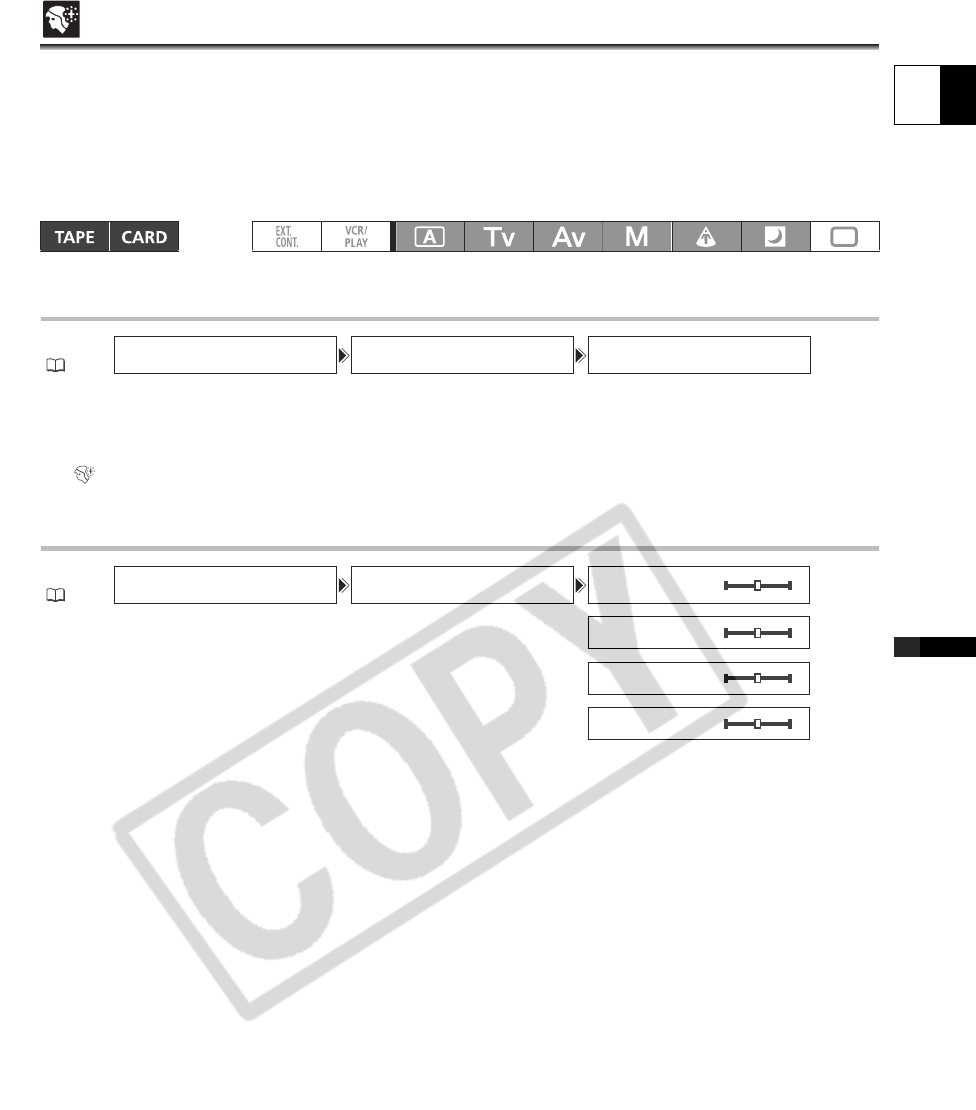
1. Open the menu and select [CAMERA SETUP]. Select the [SKIN DETAIL] submenu and
then select [EFFECT LEVEL].
2. Select a setting option and close the menu.
“ ” appears.
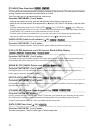
Determining the Skin Area
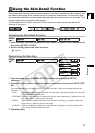
1. Open the menu, select [CAMERA SETUP] and then select the [SKIN DETAIL]
submenu.
2. Select each setting option, adjust the levels as necessary and press the SELECT/SET
dial.
After the adjustment you will return to the [SKIN DETAIL] submenu. Adjust other setting options in the
same way.
• [HUE]: Adjust the hue for detection of the skin area. Adjusting to [R] detects reddish skin color, and
to [G] detects greenish skin color.
• [CHROMA]: Adjust the color saturation for detection of the skin area. Adjusting to [+] detects more vivid
skin tones, and to [-] detects paler skin tones.
• [AREA]: Adjust the color range for detection of the skin area. Adjusting to [+] detects a wide color
range, and to [-] detects a narrow color range.
• [Y LEVEL]: Adjust the brightness for detection of the skin area. Adjusting to [+] detects brighter skin
color, and to [-] detects darker skin color.
3. Close the menu.
MENU
(25)
CAMERA SETUP SKIN DETAIL EFFECT LEVEL
••
OFF
MENU
(25)
CAMERA SETUP SKIN DETAIL HUE
•••••••••••••
G R
CHROMA
•••••••••••
- +
AREA
•••••••••••••
- +
Y LEVEL
••••••••••
- +