


110
Using the Camera with a Computer
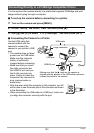
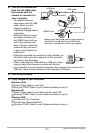
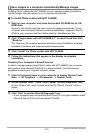
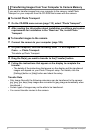
4. Turn off the camera and
then use the USB cable
that comes with the
camera to connect it to
your computer.
• The camera does not
draw power over the USB
cable. Make sure the
camera’s battery is
sufficiently charged before
connecting.
• Make sure that you insert
the cable connector into
the USB/AV port until you
feel it click securely into
place. Failure to insert the
connector fully can result
in poor communication or
malfunction.
• Note that even while the connector is fully inserted, you
still will be able to see the metal part of the connector
as shown in the illustration.
• When connecting the USB cable to a USB port, make
sure you align the connector correctly with the port.
• Your computer may not be able to recognize the camera if you connect via a
USB hub. Always connect directly to the computer’s USB port.
5. Turn on the camera.
6. Copy images to your computer.
Windows Vista
1
Select “Open folder to view files”.
2
Drag the “DCIM” folder to your Windows desktop to copy it.
Windows XP
1
Select “Open folder to view files” and then click “OK”.
2
Drag the “DCIM” folder to your Windows desktop to copy it.
Windows 2000
1
Double-click “My Computer”.
2
Double-click “Removable Disk”.
3
Drag the “DCIM” folder to your Windows desktop to copy it.
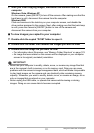
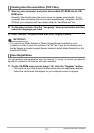
USB port
USB cable
Making sure that the 6 mark on the camera is
aligned with the 4 mark of the USB cable
connector, connect the cable to the camera.
USB/AV port
Large connector
Small connector