


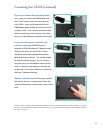


Connecting Your CEIVA(continued)
Once you have set up your connection,
press the Menu button on the remote control and
highlight Connect, then press the Select button�
Your first connection may take several minutes�
Once completed, your CEIVA is ready to receive
and display photos�
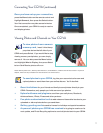
Viewing Photos and Channels on Your CEIVA
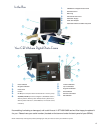
To view photos from a camera
memory card, insert it into the ap-
propriate slot on the left side of your
CEIVA and press Select� If you would like to stop
viewing memory card photos, you can simply
remove it� You can also press the Menu button
and highlight What to Display, then press Select
to turn Card Reader photos off or on�
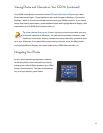
NOTE: Memory Stick Duo™, Memory Stick PRO Duo™, SmartMedia™, miniSD™ and xD-Picture Card™ require an
adapter, which can be purchased from most electronics or camera stores.
To send photos to your CEIVA, log into your account at ceiva�com and
upload photos or send them from your online albums� You’ll also find:
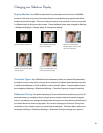
Guest invitations• for your friends and family to send photos directly to your
CEIVA� Remember, only people you invite can send you photos�
Upload software and plugins• to send from your cell phone, Facebook,
Adobe software, iPhoto, Picasa and other partners�
Fun photo customization tools• to add notes and decorative borders to your
uploaded or album photos before you send them�
Gallery greeting cards• to send to frames for holidays and special occasions�
A queue of photos your CEIVA has received• or is going to receive on its
next update, and Photo Recycling options to send old photos back to your CEIVA�
7