


• To avoid electrical shock, do not open the case of this product.
• Operate this product using only the supplied AC Power supply.
• Do not overload electrical outlets or extension cords; this can result in fire or electric
shock.
• Keep this product away from strong magnetic fields.
• Do not expose this product in direct sunlight or strong reflected rays.
• Refer servicing to qualified personnel only.
• Do not change or modify this product, the warranty will be voided.
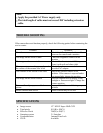
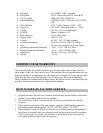
• Weatherproof (IP67)
• 1/3” Sony Super HAD CCD
• High Resolution 550 TV Lines (Color), 600 TV Lines (B/W)
• Rugged Steel Construction
• On Screen Display (OSD)
• True Day/Night (Built-in ICR: IR Cut Filter Removal)
• 3D DNR (Digital Noise Reduction) with 3D filter
• D-WDR (Digital Wide Dynamic Range)
• Total 42 Infrared LEDs with a CDS sensor
• Up to 130’ IR range (depends on scene reflection)
• DC Auto Iris Vari-focal Lens (2.8-12mm)
• Attached Universal Mounting Bracket and 100’ cable
• Dual Voltage(AC 24V/DC 12V)
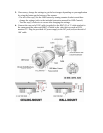
1. Attach the mounting bracket base① to the wall or ceiling, wherever you want to
install the camera. Locate a wall stud or ceiling joist and secure the bracket base①
using the supplied screws. Attach the mounting bracket② to the base① and secure
them using the supplied screws.
2. Lock the mounting bracket with the locking ring③.
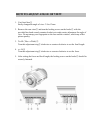
3. Turn the pivot locking screw④ with the provided hex-head wrench counter-
clockwise to set the desired angle of camera toward objects and turn it clockwise to
secure. It can be used for wall-mount or ceiling-mount application depending on
setting this pivot locking screw.
4. Loosen the locking screw⑤ with the provided hex-head wrench and turn the camera
clockwise or counter-clockwise to upright images on the screen and turn it clockwise
to secure.
PRECAUTIONS
FEATURES
INSTALLATION