8
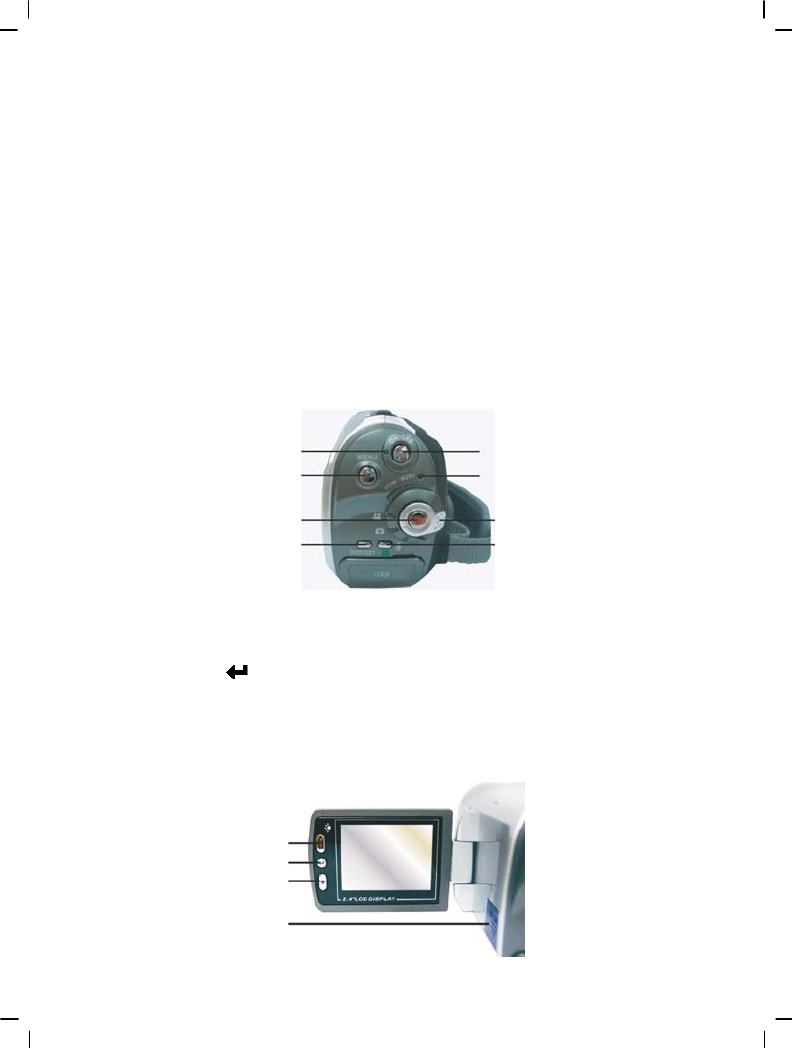
Back view
1. Power indicator light – When the digital video camera is on, the power indicator light is lit.
2. MENU button – Under different modes, pressing this button can access the function
menu of each mode.
3. REC button – Between the mode selection buttons, mainly for video/audio recording
functions.
4. DISP/SET button – Under different modes will access the camera setup screen, as well as
turn on/off the LCD.
5. Power switch – Pressing this button when digital video camera is turned off will turn on the
digital video camera, pressing this button when digital video camera is turned on will turn off
the digital video camera.
6. Busy indicator light – When camera is waiting for operation to finish, this light will flash.
7. Mode selection button – Selects modes.
8. Playback button – Under different modes pressing this button will switch to playback mode.
Under playback mode, pressing this button will enter different modes according to the mode
selection button location.
Left view
1. Up button (▲) – Under different MENU selections enables the up selection, plays the
previous song, photo, radio station etc. Under the photo mode, different flash modes can also
be selected.
2. Confirm button (
) – Mainly used to confirm an operation, to confirm a playback recorded
audio, video files, and music functions.
3. Down button (▼) –Under different MENU selections enables the down selection, plays the
next song, photo, radio station etc. Under the photo mode, can also be used to select macro
close-up mode.
4. SD card slot – Opens the SD card slot, to insert and remove the SD card.
1. Up button
2. Confirm button
3. Down button
4. SD card slot
2. MENU button
3. REC button
4. DISP/ SET button
6. Busy/DC-in indicator
5. Power switch
7. Mode selection dia
8. Playback/station delete button
1. Power indicator light


