


Instructional Manual Continuous Ink System for use in Epson Photo C120 printer
Before using this product, please read and follow the instructions. After opening your package, make sure to check that all the
accessories shown in figures 1-1 through 1-3 below are included.
Conduct Parts Check:
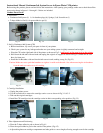
1. Accessories
a. Continuous Ink System (1) b. Air breather plugs (6), Syringe (1) & Screwdriver (1)
c. T shape Adhesive Pad (1) & square adhesive pad (1)
Fig. 1-1 Fig. 1-2 Fig.1-3
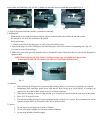
2. Set-Up Continuous Ink System (CIS)
a. Before installation, lay out all your parts in front of your printer.
b. Check your system for any leakage and make sure your tubing system is tightly connected and straight.
c. Place the CIS on the right hand side of the printer as shown on Fig.2-1 and keep it at the same level as the printer.
d. Hold down the ink tank with one hand and unplug the original air stoppers as shown on Fig.2-2, make sure to save
these for future use.
e. Install the Air Breather wider end into the ink reservoir tank, making a snug fit. (Fig.2-3)
Caution: Make sure not to push the breathers too tight as it could crack the tank. Also when removing the air breathers
from the tank use caution to avoid cracking.
Fig.2-1 Fig.2-2 Fig.2-3
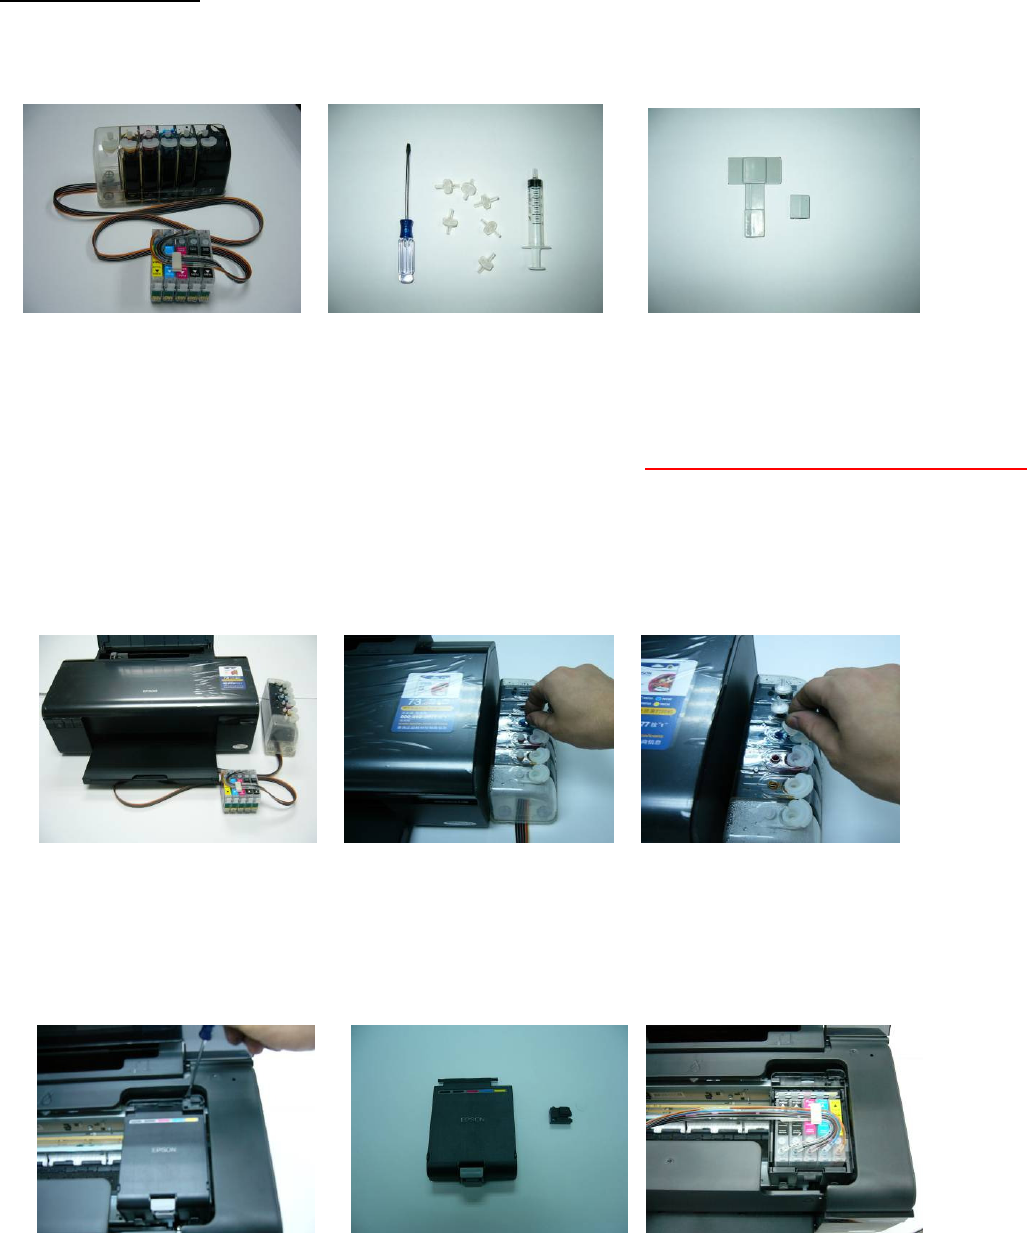
3. Cartridge Installation
a. Unplug the printer power.
b. Use the screwdriver to remove the cartridge carrier cover as shown in Fig 3-1 & 3-2.
c. Take out the original cartridges.
d. Install the CIS cartridges into the cartridge carrier in their corresponding color position. (Fig 3-3)
Fig.3-1 Fig.3-2 Fig.3-3
4. Tube Adjustment and Positioning
a. Place the T shape adhesive pad as shown in Fig 4-1.
b. Place the square adhesive pad on the outside of the printer. (Fig.4-2)
c. Adjust tubing between cartridge compartment and tube guide to correct length; allowing enough room for the cartridge