3
Setting Up Your
P-520 Camera
GENERAL PRECAUTIONS
Use only the power supply provided with the system.
Unplug the power supply when the system is not in use for extended periods.
Do not place any of the equipment near a radiator, vent, or other place where it
might be exposed to heat, moisture, dust, vibrations, or strong magnetic fields.
Do not attempt to repair the camera. Contact a qualified technician or the dealer for
service. Any change or modification may damage the equipment and invalidate the
warranty.
When installing the camera, follow manufacturer’s advice when using power tools,
steps, ladders, etc. and wear suitable protective equipment (e.g., safety goggles)
when drilling holes. Before drilling holes through a ceiling, check for hidden
electricity cables and water pipes.
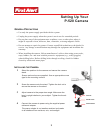
INSTALLING THE CAMERA
1
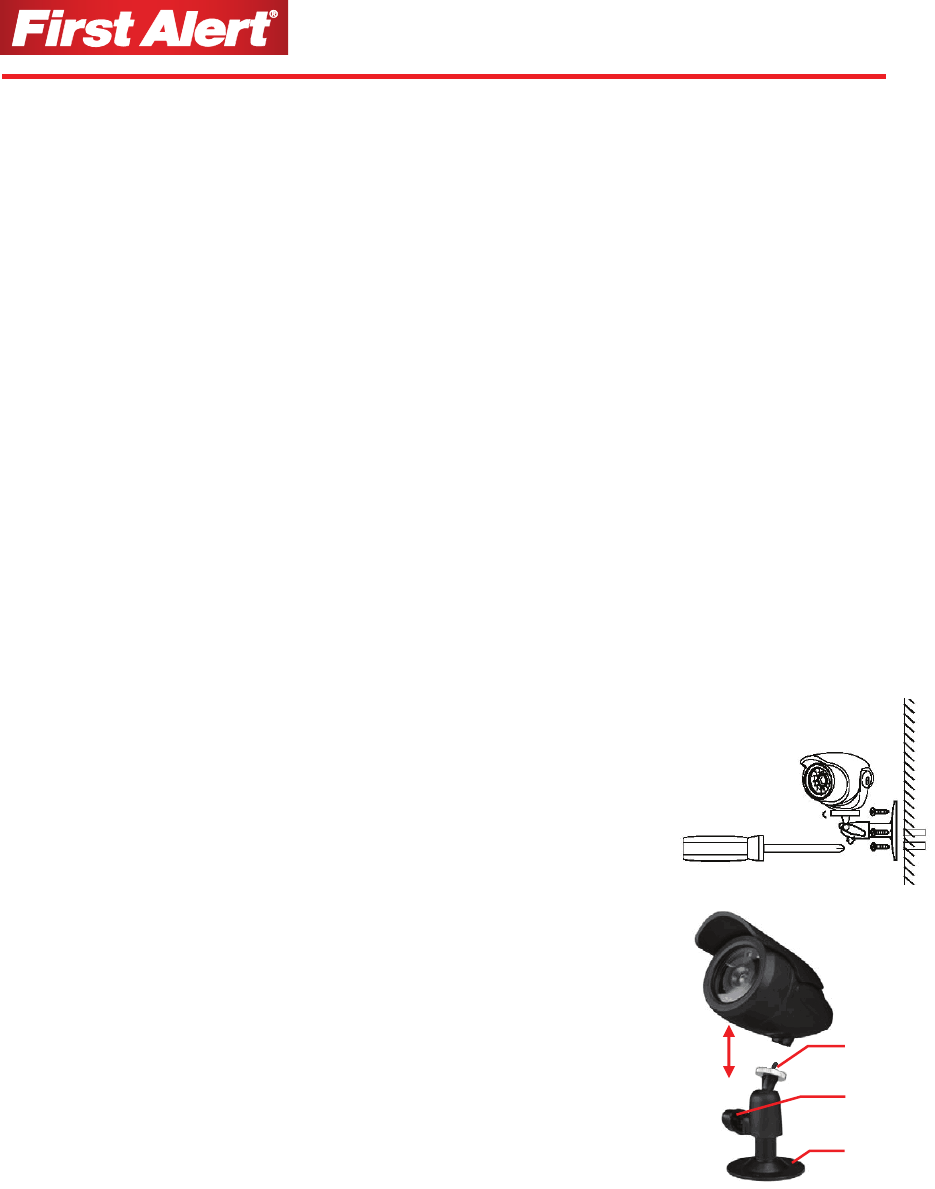
Select the position for the camera and secure the camera
stand.
Screws and anchors are supplied. Use an appropriate screw
type for the mounting surface.
2 Screw the camera onto the stand. Tighten the lock nut to
secure the camera on the stand.
3 Adjust camera to the proper view angle. Make sure the
lens is upright relative to your subject. Tighten the thumb
screw.
4 Connect the camera to power using the supplied power
cable and adapter.
The power adapter is not weather resistant and needs
to be sheltered from moisture, rain, and sunlight.
camera stand
thumb screw
lock nut


