53
4
1
➀
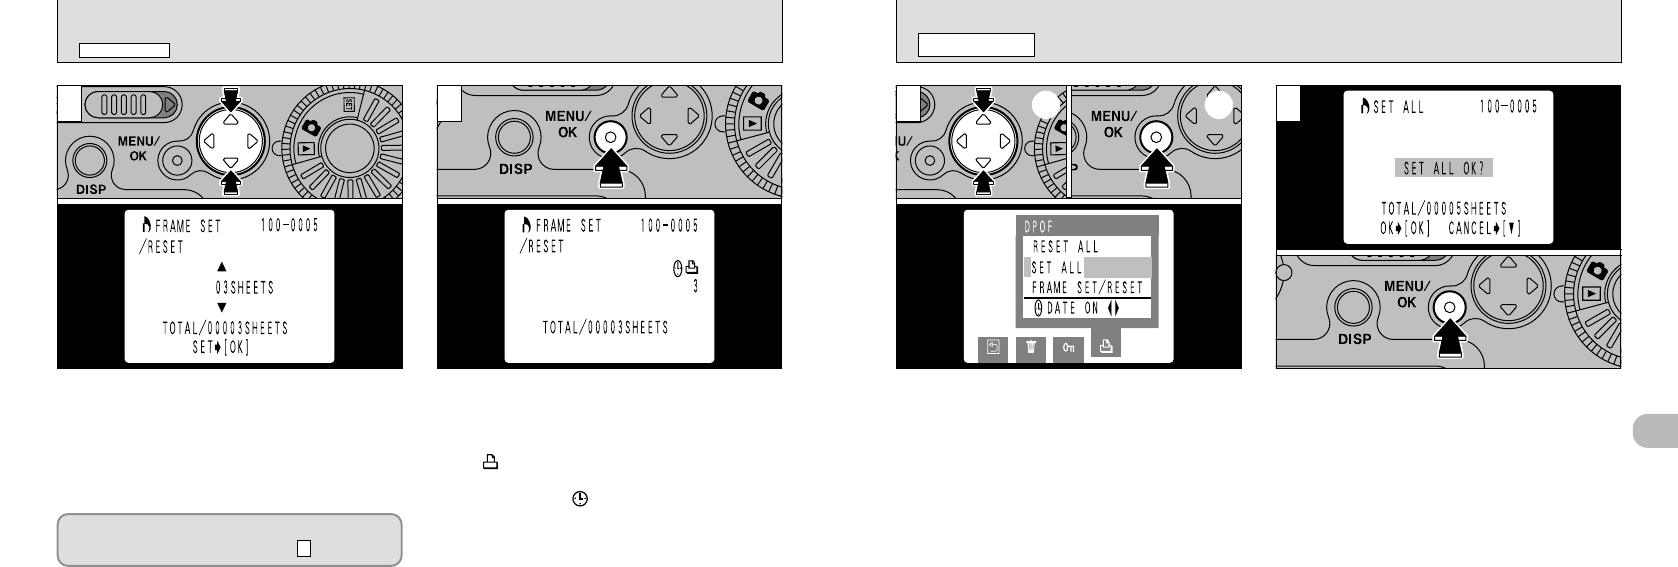
Use “a” or “b” to select “SET ALL” or “RESET
ALL”.
➁
Press the “MENU/OK” button.
2
When you press the “MENU/OK” button, a
confirmation screen appears. To proceed with the
set or reset operation, press “MENU/OK”. The
total number of prints is displayed on the LCD
monitor and you are returned to the menu.
●
!
To exit the menu, use the “d” or “c” button to select
“[BACK” and then press the “MENU/OK” button.
●
!
If you reset all the frames, the “TOTAL” display
reverts to “00000”.
●
!
“SET ALL” specifies 1 print for all the images.
●
!
The settings specified for individual frames are
cancelled.
●
!
Prints can be specified for up to 999 frames on the
same SmartMedia. If you specify more than 1000
frames, the “
8
” warning appears.
➀ ➁
S
DPOF SET ALL
/
RESET ALL
PLAYBACK MENU
52
4
When you have completed the settings, always
press the “MENU/OK” button to confirm the
settings. The total number of prints is displayed on
the LCD monitor and you are returned to the menu.
The “” icon and the number of prints is
displayed for confirmed frames and, if the date
has been set, the “” icon is also displayed.
3
Use “a” or “b” to specify the number of prints.
S
DPOF FRAME SET
/
RESET
PLAYBACK MENU
●
!
If you do not press the “MENU/OK” button, after 10
seconds the menu screen reappears. The settings
for the last selected frame are discarded.
●
!
The setting is not saved until you press the “d” or
“
c” button to move to another frame or press the
"MENU/OK" button.
●
!
If you do not want a print of the frame, set (reset) the
number of prints to “00 SHEETS”.
To specify DPOF settings for another frame,
repeat the procedure from step .
2


