24
Shooting Mode
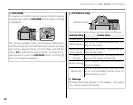
Advanced Anti Blur
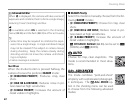
When n is displayed, the camera will take a series of
exposures and combine them to form a single image,
reducing “noise” (mottling) and blur.
a
n is available when ON is selected in the shooting
menu (P 88) and the flash (P 39) is off or set to auto.
c
• Some time may be required to combine the expo-
sures into a single image. A single combined image
may not be created if the subject or camera moves
during shooting. Keep the camera steady during
shooting and do not move the camera until shoot-
ing is complete.
• Frame coverage is reduced.
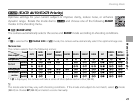
The EXR Icon
When the shutter button is pressed halfway, the
camera chooses the preferred E mode:
• S (RESOLUTION PRIORITY): Produces crisp, clear
shots.
• T (HIGH ISO & LOW NOISE): Reduces noise in pic-
tures taken at high sensitivities.
• U (D-RANGE PRIORITY): Increases the amount of
detail visible in highlights.
■
■
E
E
Priority
Priority
Select this mode to manually choose from the fol-
lowing E modes:
• S (RESOLUTION PRIORITY): Choose for crisp, clear
shots.
• T (HIGH ISO & LOW NOISE): Reduce noise in pic-
tures taken at high sensitivities.
• U (D-RANGE PRIORITY): Increase the amount of
detail visible in highlights.
U DYNAMIC RANGE (P 86) can be set to M
(1600%) and D (800%).
B
B
AUTO
AUTO
Choose for crisp, clear snapshots. This
mode is recommended in most situa-
tions.
Adv.
Adv.
ADVANCED
ADVANCED
This mode combines “point-and-shoot”
simplicity with sophisticated photograph-
ic techniques. The
A
Adv. MODE op-
tion in the shooting menu can be used
to choose from the following advanced
modes:


