


3089242
Pressure Relief Procedure
WARNING
PRESSURIZED EQUIPMENT HAZARD
The equipment stays pressurized until pressure is
manually relieved. To reduce the risk of a serious
injury from pressurized fluid, accidental spray from
the gun, or splashing fluid, follow the Pressure
Relief Procedure whenever you
D Are instructed to relieve the pressure
D Stop spraying
D Check or service any of the system equipment
D Install or clean the fluid nozzles
1. Turn off air supply to gun, and turn off turbine
sprayer.
WARNING
The turbine hose outlet may be hot. Carefully check
the hose end before you remove the hose.
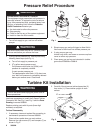
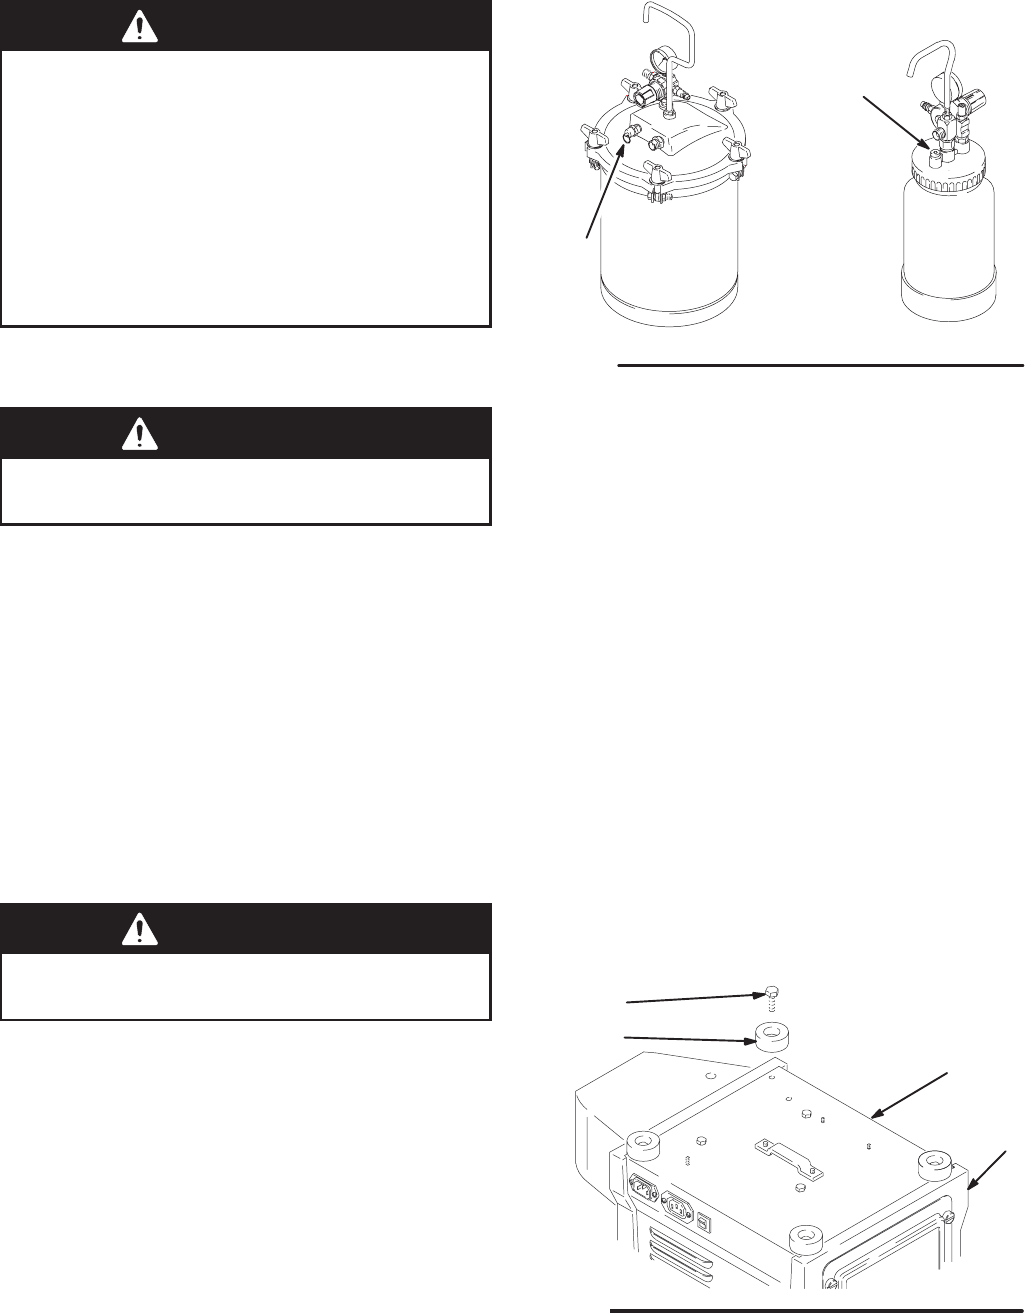
2. If using remote pressure pot, relieve pressure by
following these steps (see Fig. 1):
a. Turn off air supply to pressure pot.
b. 2
1
/
2
-gallon remote pressure pot:
Pull pressure relief valve ring (206c) until
pressure is completely relieved.
2-quart remote pressure pot:
Turn out pressure relief knob (113) about one
turn. Wait until pressure is completely relieved
before you remove cover. Close knob.
Fig. 1
8069A
206c
113
2 quart
02882A
2
1
/
2
gallon
3. Elevate spray gun and pull trigger to allow fluid in
fluid hose to drain back into remote pressure pot.
4. If using a spray gun cup:
Unlatch cup cover, and loosen or remove cup from
cover to relieve cup pressure.
5. Clean spray gun and cup as instructed in turbine
gun manual 308336 or 308810.
Turbine Kit Installation
WARNING
Turn off the turbine and unplug the power cord for
these procedures.
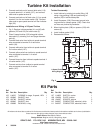
Use these procedures to install the 2-Speed Turbine
Conversion Kit. See Fig. 2 and Fig. 3 and the Parts
Drawing in manual 308808.
Replace existing parts with kit parts (three-digit
numbers) as required.
Turbine Disassembly
1. If necessary, clean and replace filter according to
maintenance procedure in manual 308808.
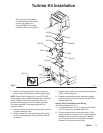
2. Place turbine upside down on work surface.
Remove four cap screws (27) and bumpers (7) as
shown in Fig. 2.
3. Carefully lift and remove turbine base plate (2)
from cover (1). Place turbine upright on work
surface.
7949A
Fig. 2
27
7
1
2