English
126
[When using Macintosh]
USING PIXE VRF BROWSER EX AND IMAGEMIXER VCD/DVD2
Pixe VRF Browser EX allows you to import the images on DVD-RAM/DVD-RW/DVD-R recorded
on the DVD video camera/recorder into PC as an MPEG file. ImageMixer VCD/DVD2 allows you to
use the images imported by Pixe VRF Browser EX to create a DVD-Video (DVD-RW/DVD-R).
The following shows the basic operations of Pixe VRF Browser EX and ImageMixer VCD/DVD2.
Refer to the electronic instruction manuals that can be read on PC for detailed instructions of Pixe
VRF Browser EX and ImageMixer VCD/DVD2. See the electronic instruction manuals for the
detailed use method of each software program.
For Pixe VRF Browser EX, click “Help” - “Pixe VRF Browser EX Help” while it is being started up.
For ImageMixer VCD/DVD2, click the question ? mark at the top right of the folder select screen.
To start Pixe VRF Browser EX and ImageMixer VCD/DVD2, double-click the “Pixe VRF Browser EX
for DVDCAM” icon and “ImageMixerVCD/DVD2” icon in Macintosh HD (startup disk) -
“Applications” - “ImageMixer for DVDCAM”.
Note:
• The provided software cannot be used to burn a DVD-VR (DVD-RAM/DVD-RW): It is also incompatible with a
+RW.
IMPORTING IMAGES RECORDED ON DVD-RAM/DVD-RW/DVD-R INTO PC
TO CREATE A DVD-VIDEO (DVD-RW/DVD-R)
You can use the images recorded on the DVD video camera/recorder to create a disc that can be
viewed on DVD recorders/players.
* Any DVD-RW/DVD-R/+RW recorded on this DVD video camera/recorder must be finalized.
1 Connect the DVD video camera/recorder
with no disc loaded to a USB port of
Macintosh.
* If you connect the DVD video camera/
recorder while a disc is loaded, you will
have to remove the disc later.
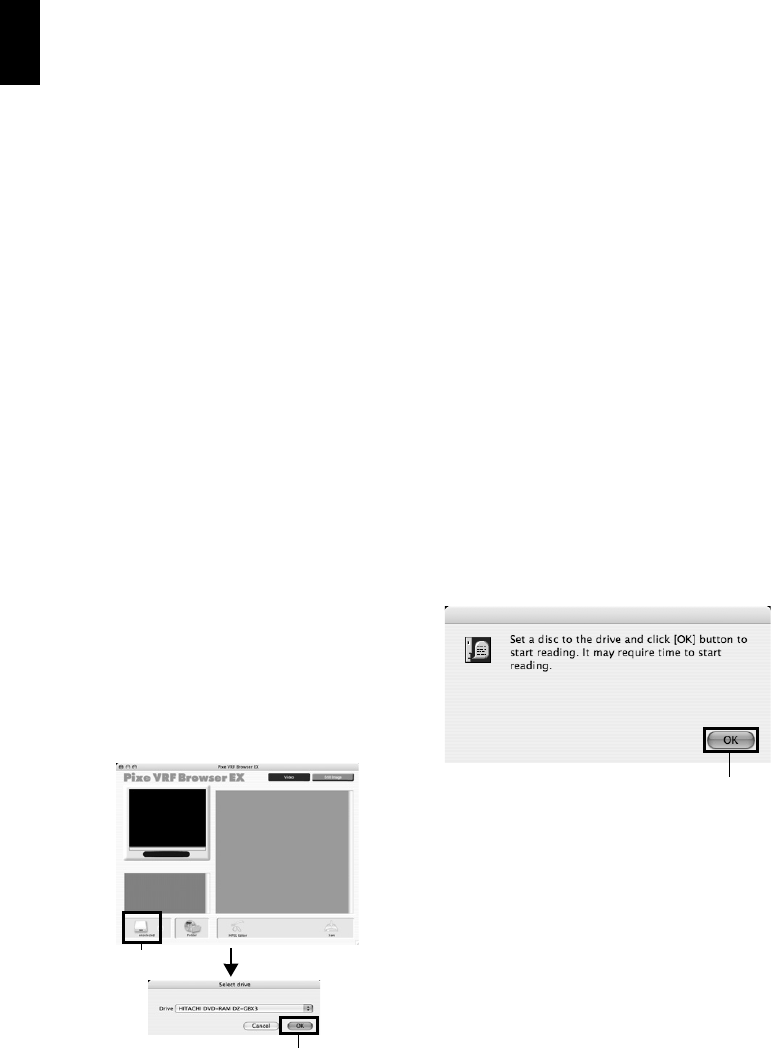
2 Start Pixe VRF Browser EX and choose the
drive.
Clicking the “Drive” icon will display the
drive select screen. Choose “HITACHI DVD-
RAM DZ-GBX3”, and then click “OK”. The
cover of disc insertion block on DVD video
camera/recorder will automatically open.
3 Set a disc.
Set a disc whose recorded video file you wish
to import in the DVD video camera/recorder,
close the cover of disc insertion block, and
then click “OK”.
Click
Click
Click
