


MHD56012 - Edition 8 9
Load Chain
• Failure to maintain clean and well lubricated load chain may
result in chain failure causing injury, death or substantial
property damage.
1. Lubricate each link of chain weekly. Apply new lubricant
over existing layer.
2. In severe applications or corrosive environments, lubricate
more frequently than normal.
3. Lubricate hook and hook latch pivot points with same
lubricant used on load chain.
4. To remove rust or abrasive dust build-up, clean chain with an
acid free solvent. After cleaning lubricate chain.
5. Use Ingersoll-Rand LUBRI-LINK-GREEN® or a SAE 50
to 90 EP oil.
MAINTENANCE
• Never perform maintenance on hoist while it is supporting a
load.
• Before performing maintenance, tag hoist:
WARNING - DO NOT OPERATE -
EQUIPMENT BEING REPAIRED.
• Only allow personnel trained in operating and servicing this
product to perform maintenance.
• After performing maintenance on the hoist, test to 125% of
its rated capacity before returning to service. Testing to more
than 125% of rated capacity might be required to comply with
standards and regulations set forth in areas outside of the
USA.
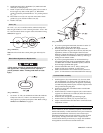
Installing New Load Chain
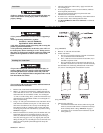
• To prevent a falling load which can cause death, injury or
property damage, hook (42) must be on left fall of load chain
(47) and right fall must be attached to hoist body with end
anchor (21 and 22). Right and left are designated when viewed
from hand chain side of hoist.
• Do not remove old load chain from hoist. Old load chain can
be used to install new load chain.
1. Remove end of load chain from end anchor (21 and 22).
2. Make a “C” link in new load chain by grinding through one
side of end link. On 1/2 to 2, 8, 15 and 20 ton hoists the load
chain must have an even number of links, not counting the
“C” link, to avoid twisting. On 3, 5 and 10 ton hoists the load
chain must have an odd number of links, not counting the “C”
link, to avoid twisting.
3. Using a “C” link, join old load chain to new load chain. If old
load chain was installed correctly, the “C” link assures end
link of new load chain will be correctly reeved through the
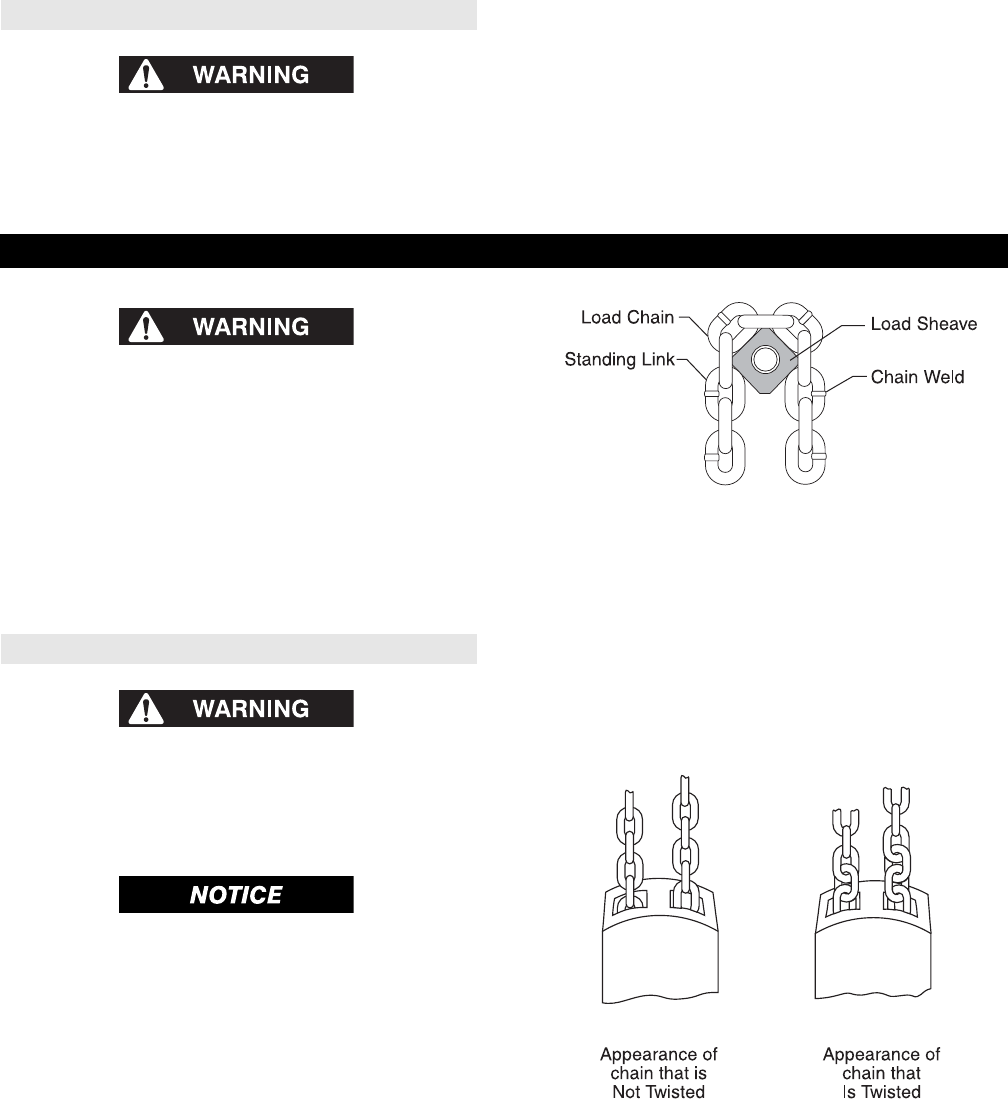
hoist. Be sure welds of “standing” links on new load chain
are facing away from hoist load sheave(s) (6). Refer to Dwg.
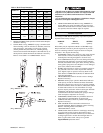
MHP0042 on page 9.
4. Run new load chain to its anchor point. On smaller units, use
hand chain (46) to move load chain. On larger units, load
chain (47) installation can be speeded up by unscrewing U-
nuts (40), removing gear cover (17), support plate (16) and
taking out 2nd gear set (14). With gear set (14) removed, load
chain (47) can be pulled by hand through hoist body and
hook blocks.
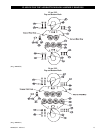
(Dwg. MHP0042)
5. Remove “C” link and old load chain.
6. Anchor load chain:
a. On 1/2 to 2 ton and 8 ton hoists, load end of load chain
(47) is attached to bottom hook block.
b. On 3, 5 and 10 ton hoists load end of load chain (47) is
attached to top hook frame.
c. On 15 and 20 ton hoists, load end of load chain (47) to
attached to end anchor (21 and 22) of second hoist body.
For information on connecting unloaded end of load chain
(47) refer to “Attaching End of Load Chain” section.
(Dwg. MHP0020)
7. Check for the following:
a. Load chain did not become twisted, when reeving load
chain (47) between idler sheaves on the bottom and top
hook assembly. Refer to Dwg. MHP0020 on page 9.
b. Load chain (47) is reeved between load sheave (6) and
chain guides (7).