


13
EN
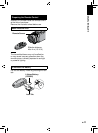
Remote Control
Q Infrared Beam Transmitting Window
R START/STOP Button
S ZOOM (T) Button (Zoom in)
T Left Button
U ZOOM (W) Button (Zoom Out)
V INFO Button
W SNAPSHOT Button
X PLAY/PAUSE/SET Button
Y Right Button
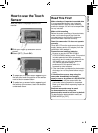
Z INDEX Button*
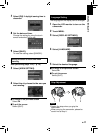
* Each time you press INDEX, the screen
switches as shown below:
! mode only:
Index Screen « Group Index Screen
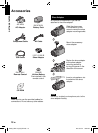
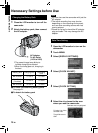
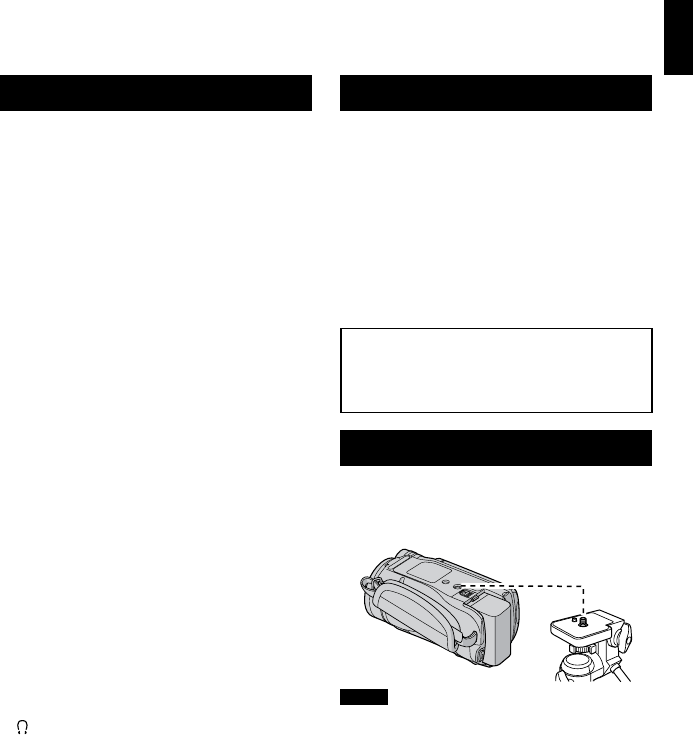
Tripod Mounting
Align the camcorder stud hole with the tripod
stud, and the mounting socket with the screw,
and then rotate the camcorder clockwise to
mount it to the tripod.
NOTE
Do not use a tripod on unsteady or unlevel
surfaces. It could tip over, causing serious
damage to the camcorder.
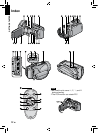
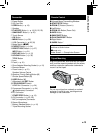
Camcorder
! Power Button
# SD Card Slot
$ OPEN knob (Z
p.
18)
% Speaker
& PLA
Y/REC Button (Z p.
19, 20, 22, 23)
( SNAPSHOT Button (Z p.
20)
) Touch Sensor
* OK
Button
+ MENU Button (Z
p.
36)
, USB Connector (Z p.
26, 30)
- Mode Switch [
!, #]
. EXPORT Button (Z p.
34)
/ DIRECT DISC Button (Z p.
27)
INFO Button (Z p.
21)
0 DISPLAY Button (Z p.
15)
1 UPLOAD Button (Z p.
35)
TITLE Button
2 Lens
3 Flash (Z
p. 21)
4 Shoe Adapter Mounting Socket (
Z p. 10)
5 Remote Sensor
6 Zoom Le
ver (
Z p. 21)
Speaker Volume Control
7 Aper
ture Priority Setting Button [A]
8 Shutter Speed Button [
S]
9 USER Button [U]
: Adjustment dial/SET Button
; FOCUS/BRIGHT Switch
< HDMI Mini Connector (Z
p.
24)
= Component Connector (Z p.
24)
>
(headphones) Connector
? DC Connector
@ START/STOP Button (Z
p.
19)
A AV Connector (Z p.
25, 28)
B MIC (microphone) Connector
C Stereo Microphone
D Batter
y Release Button (Z p. 16)
E Tripod Mounting Socket
GETTING STARTED